A Visual Guide to GraphiQL and GraphQL Voyager

 Leonardo Losoviz
The development experience offered by GraphQL shines. It is one of its greatest qualities, one that makes GraphQL stand out over other API formats. This is achieved, in no small part, thanks to the availability of several open source clients, which enable you to interact with the GraphQL service in a visual manner.
Among those clients, there are two prominent ones: GraphiQL, and the GraphQL Voyager. In this article, let's do a tour of how to use these two clients, step by step, via screenshots.
Intro to GraphiQL
GraphiQL is the first killer app delivered with GraphQL. It was originally developed by the Facebook team who created the GraphQL spec, and released alongside it, back in 2015.
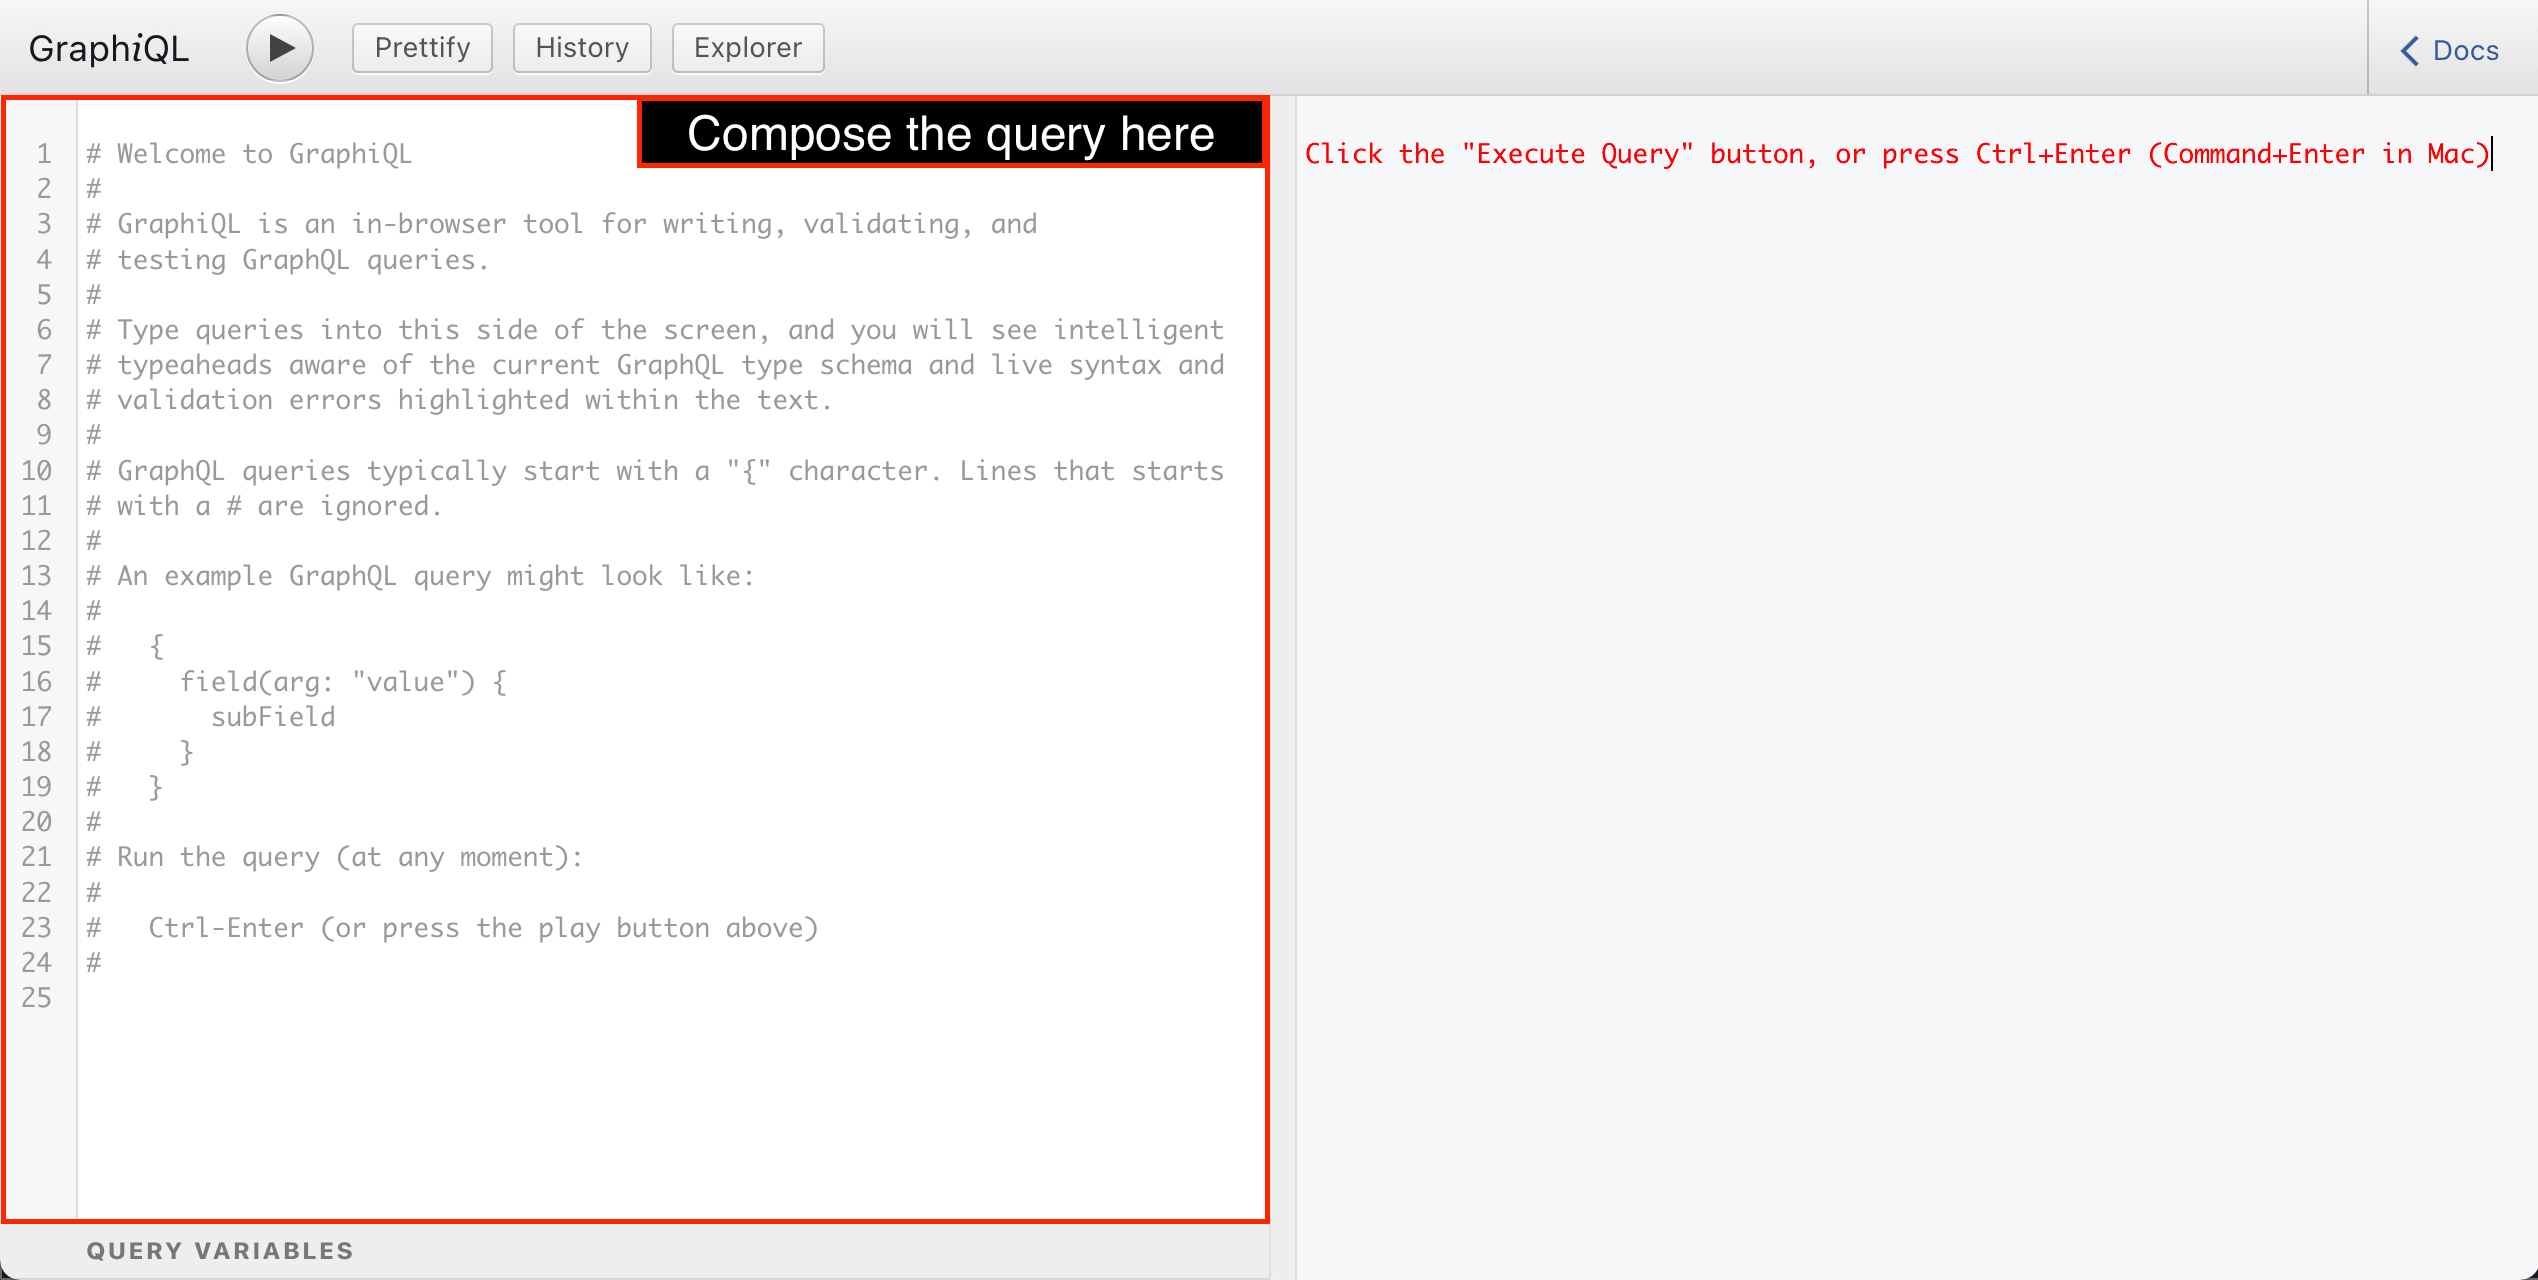
GraphiQL is an IDE for composing GraphQL queries, executing them against the endpoint, and visualizing the response:
Let's see how to use it, step by step.
StepZen actually includes a customized version of GraphiQL within its CLI that launches for local testing when using
stepzen start --dashboard=local.
GraphiQL via screenshots
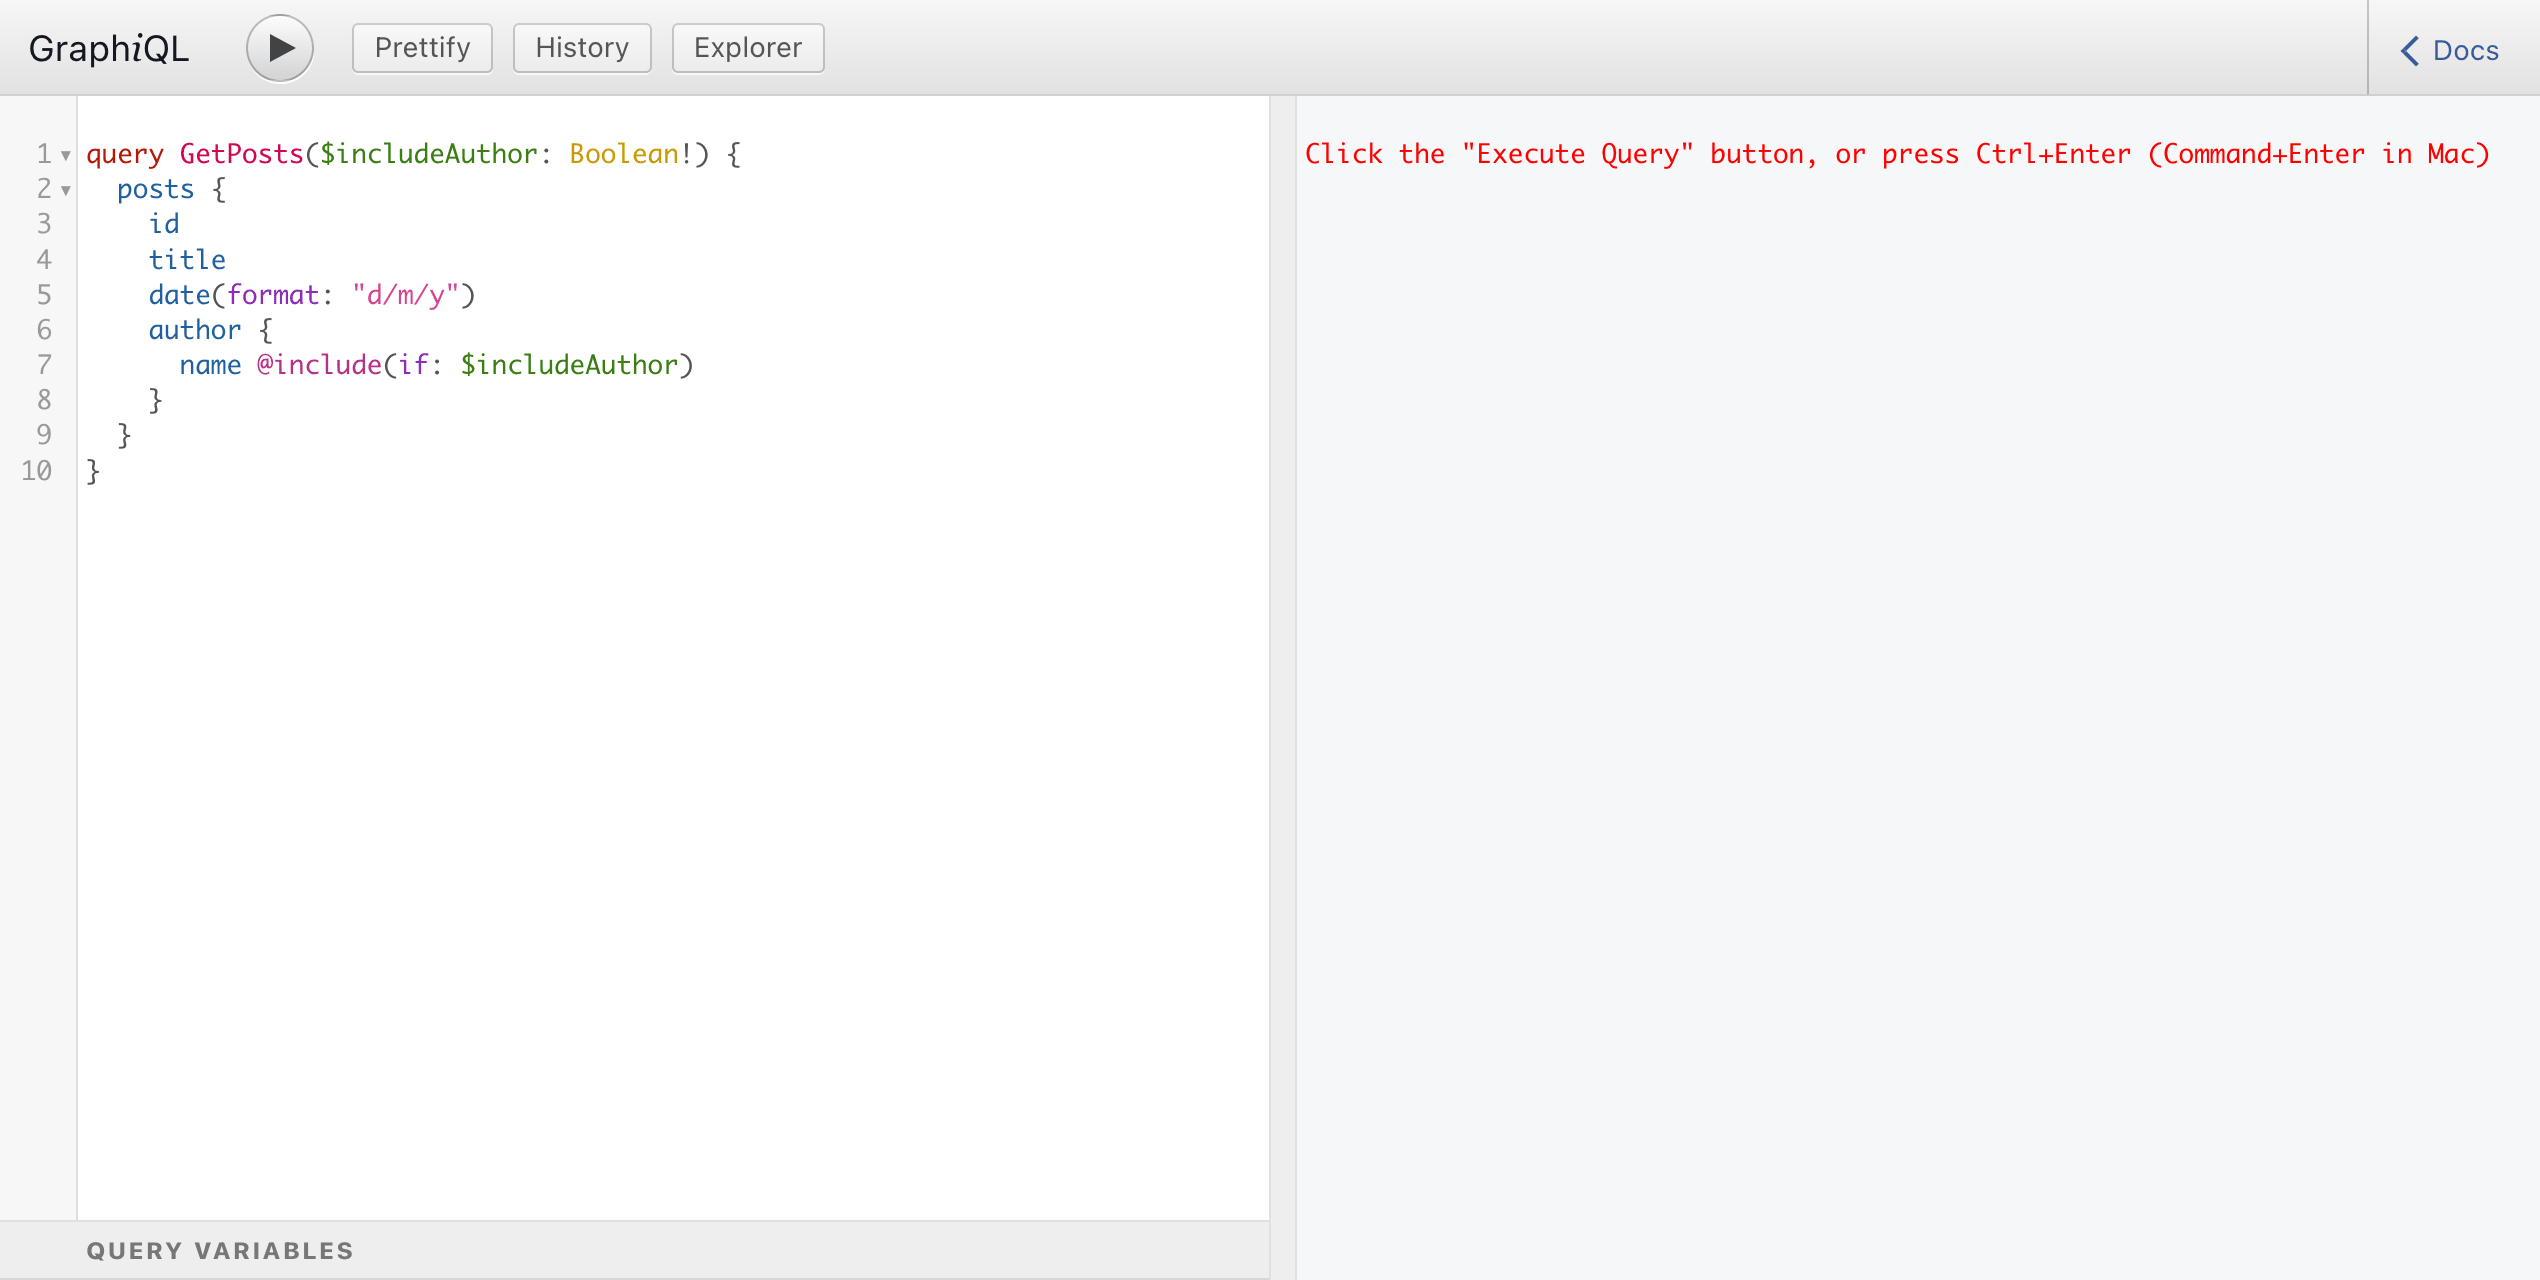
We compose the GraphQL query on the panel on the left-side:
GraphiQL has a syntax highlighter for the GraphQL syntax. As we start composing the query, we can appreciate how the operation name, the opening and closing brackets, fields, arguments, directives and comments all have a distinct color, helping us to make sense of the query:
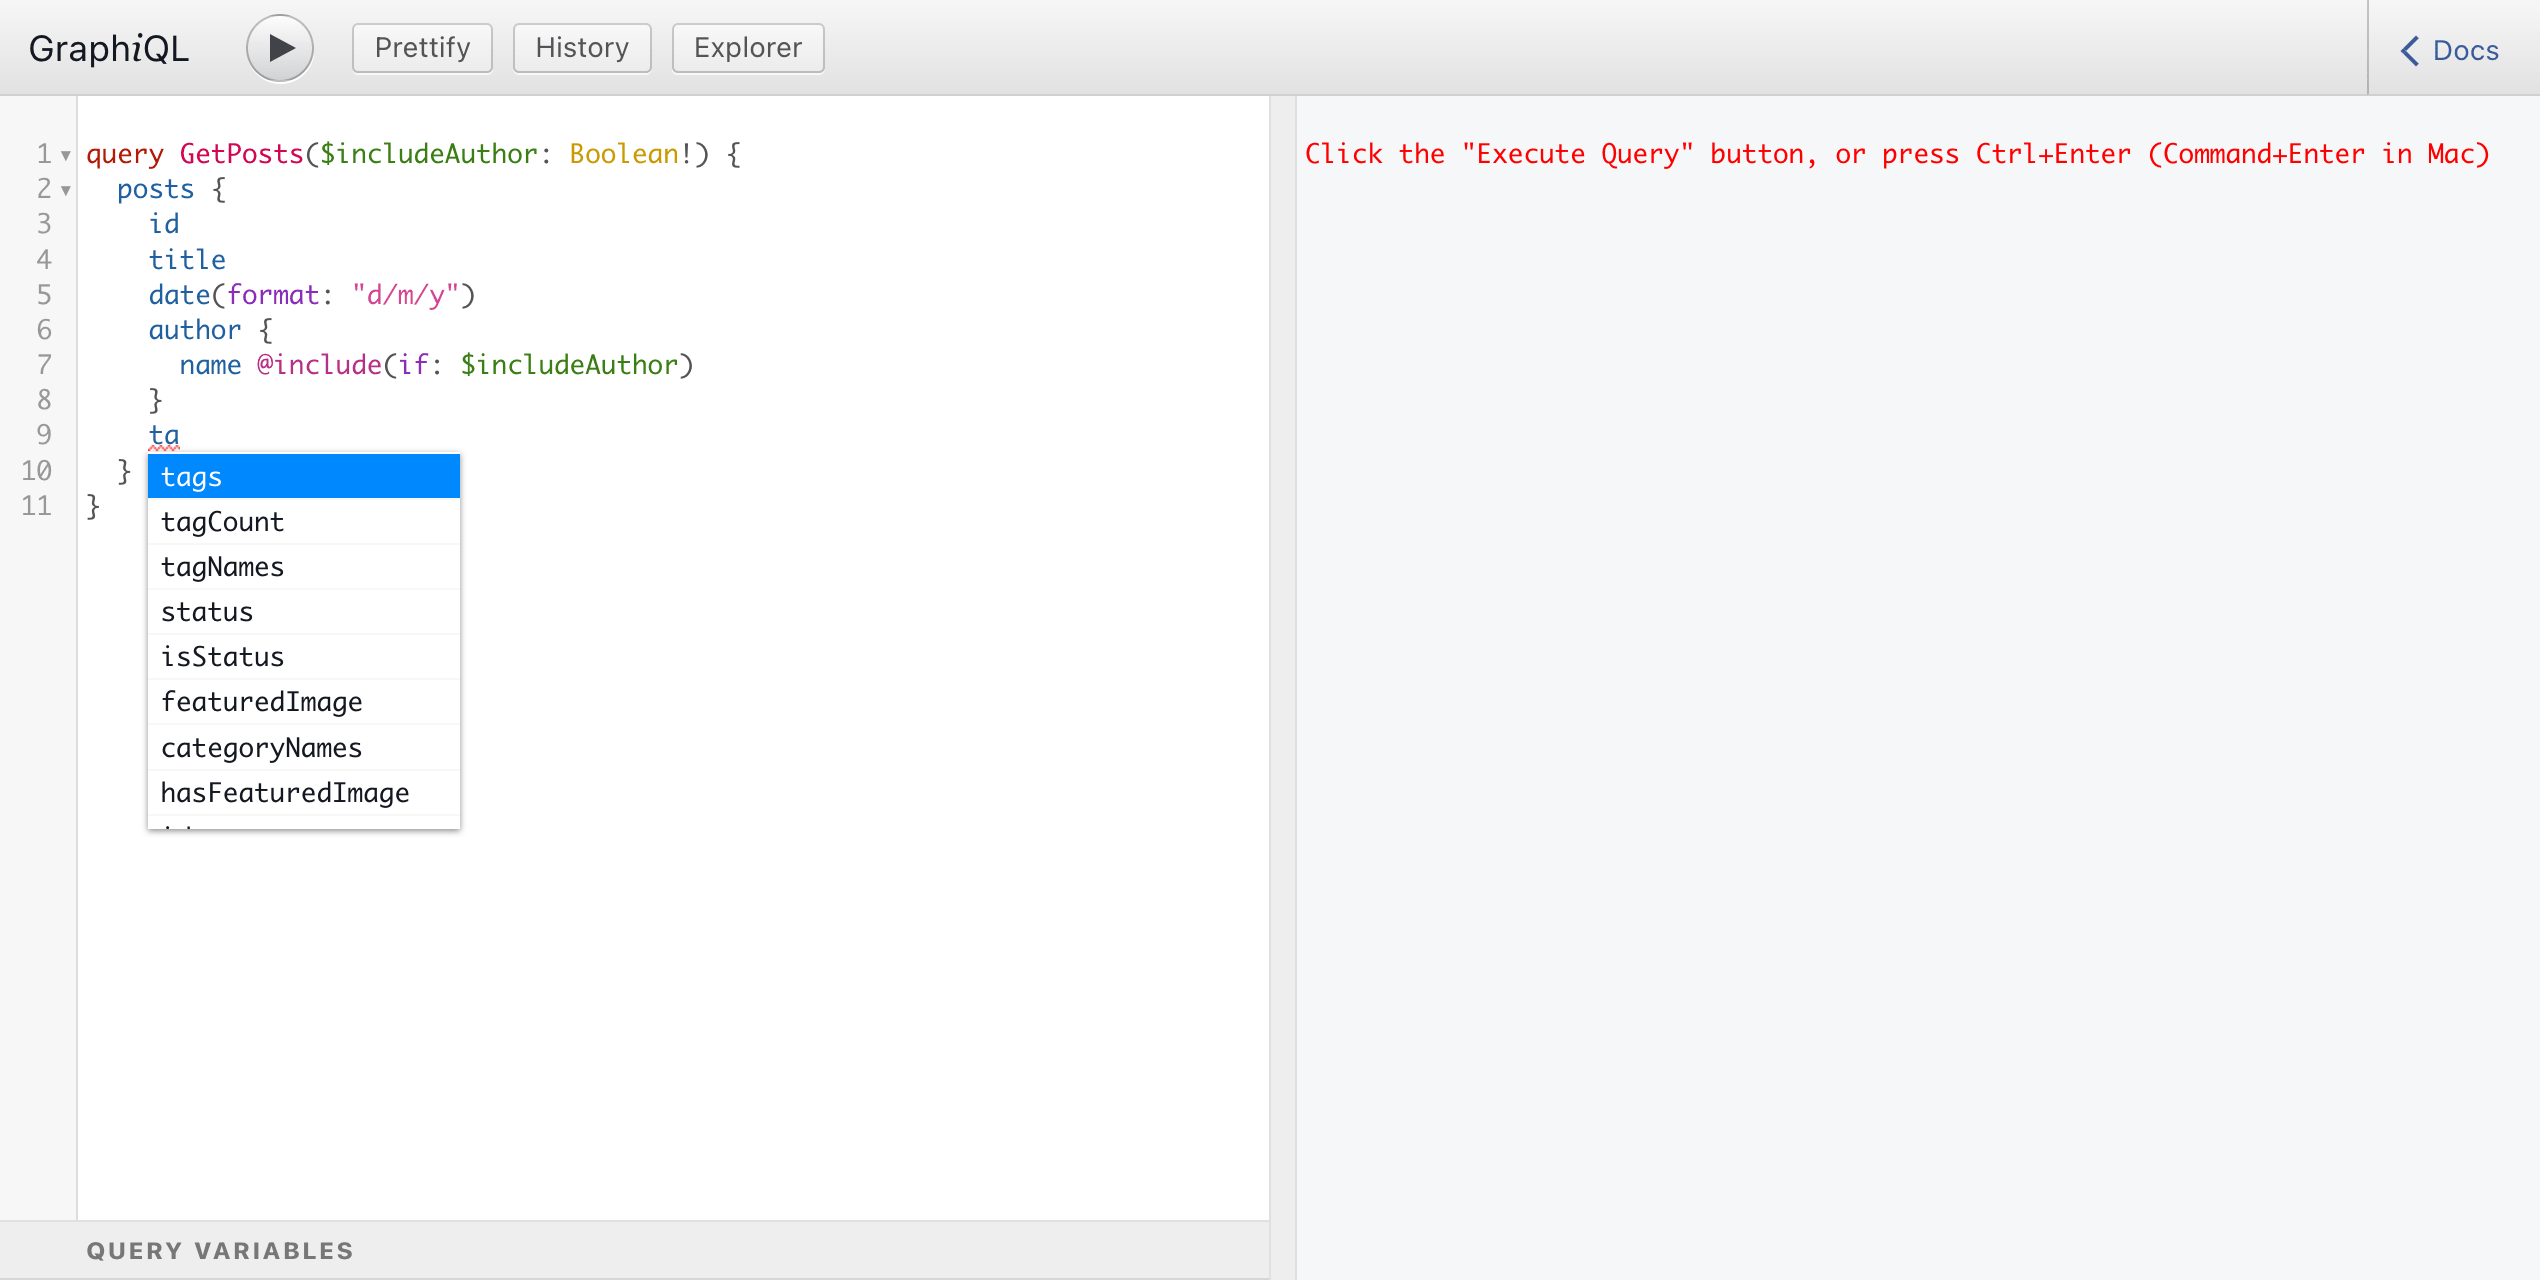
When first loading, GraphiQL will retrieve the GraphQL schema's metadata, via introspection. Thanks to the schema metadata, at every moment while composing the query, GraphiQL will suggest autocomplete options:
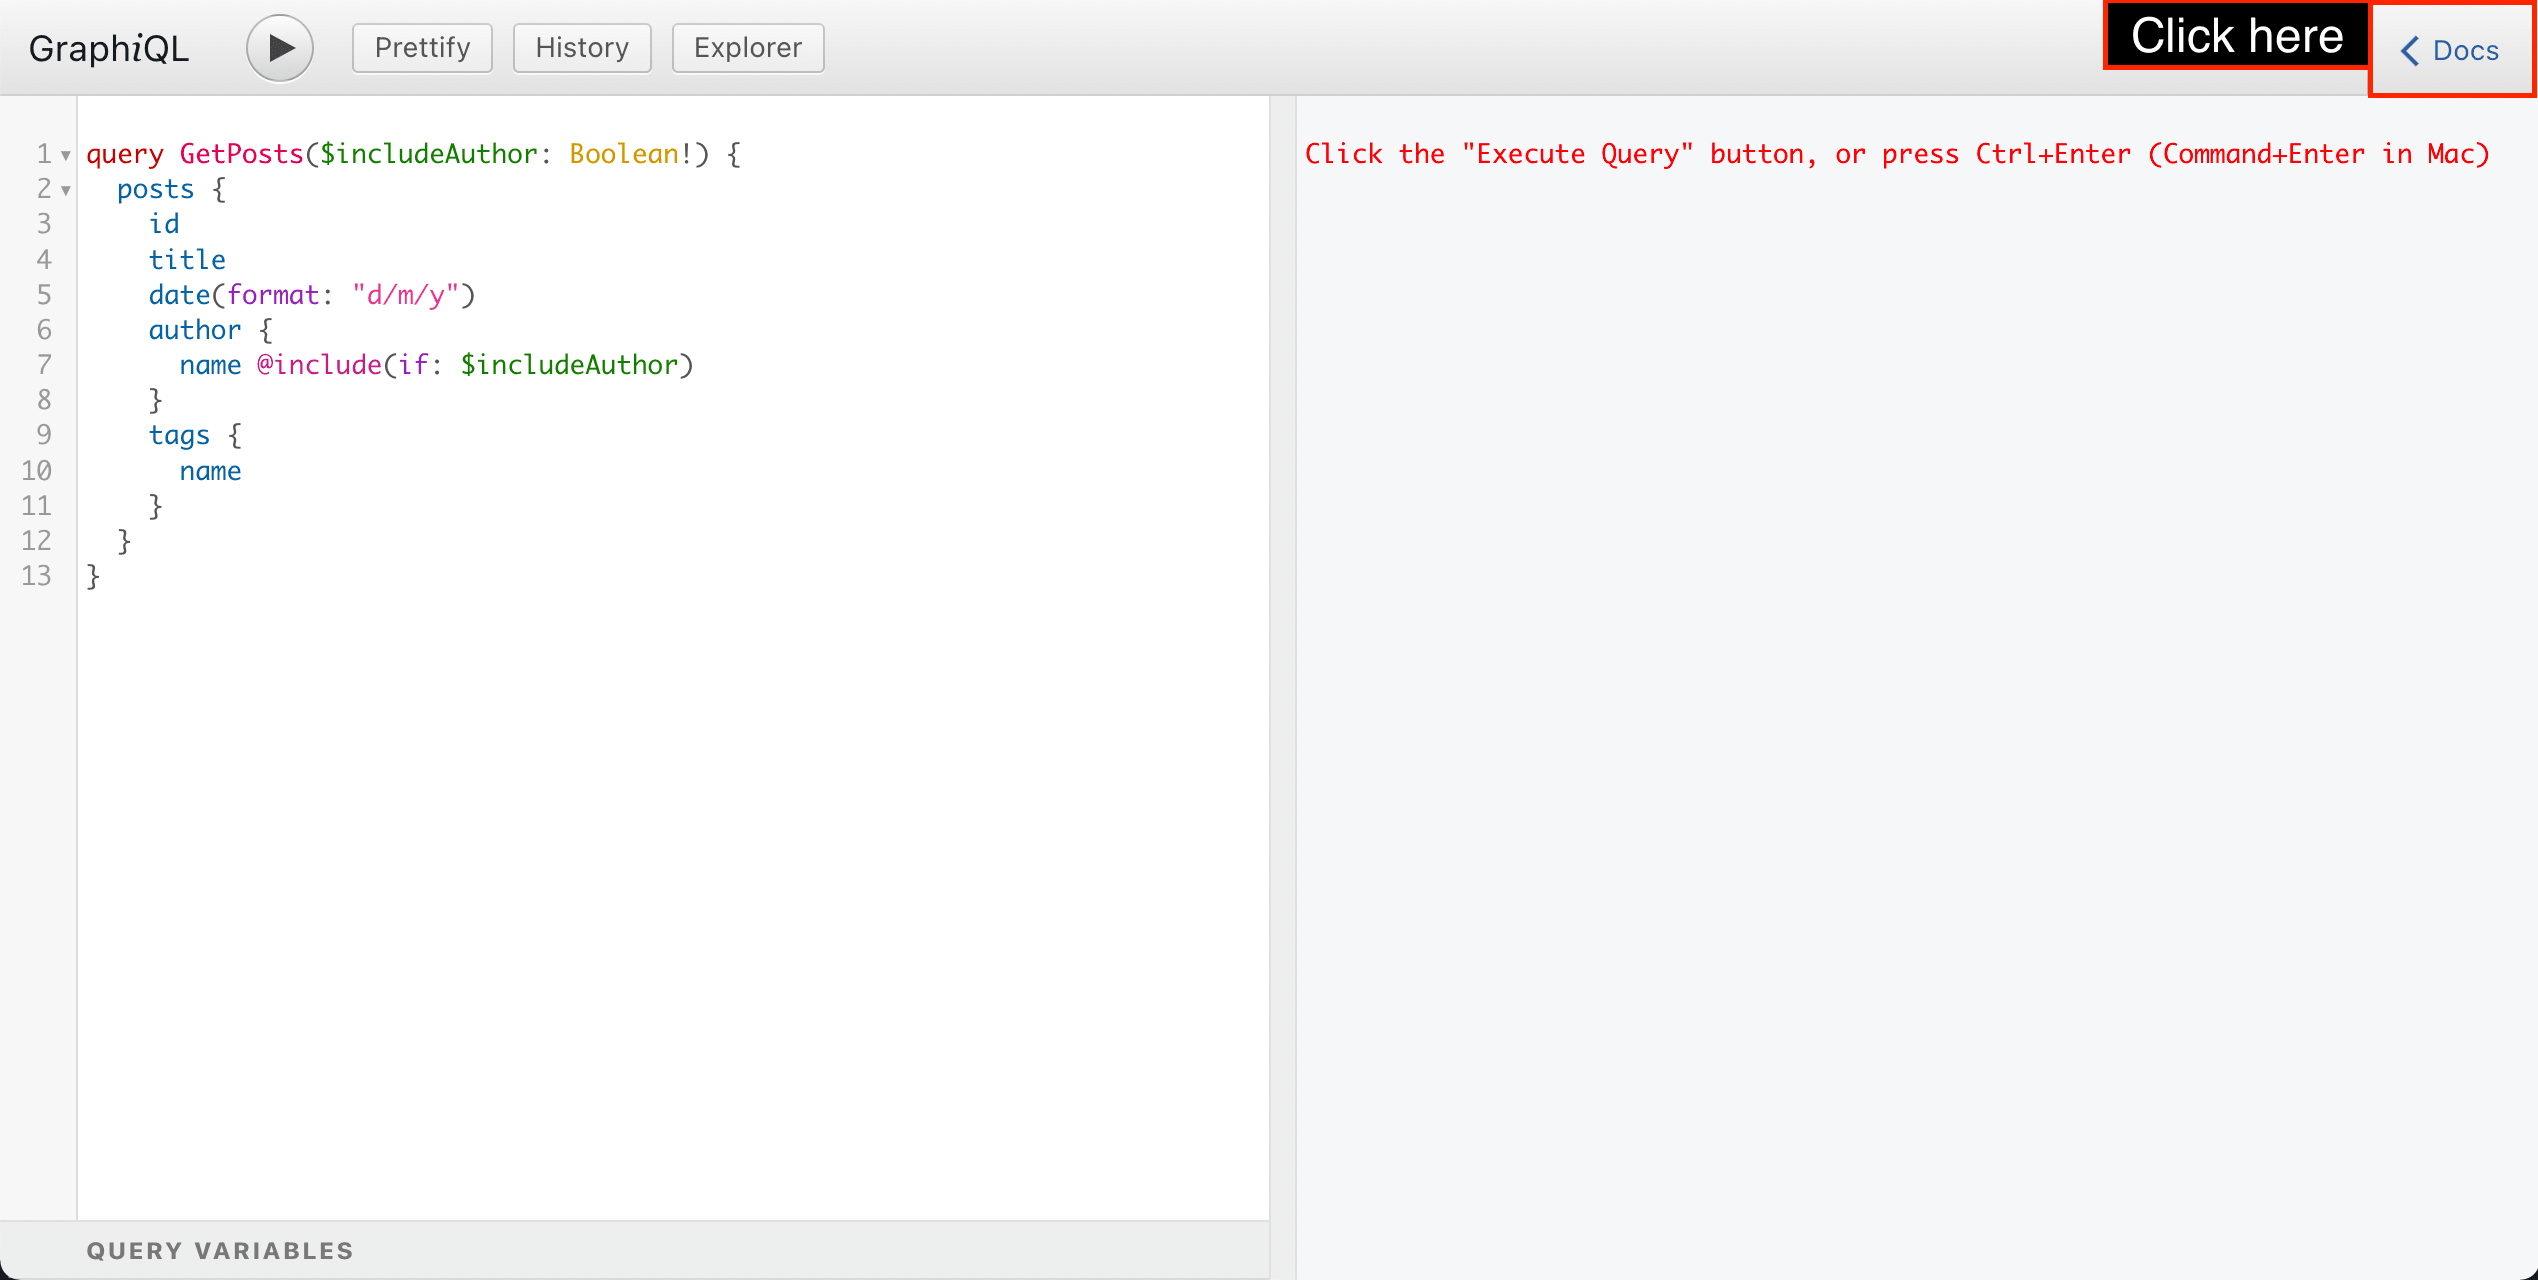
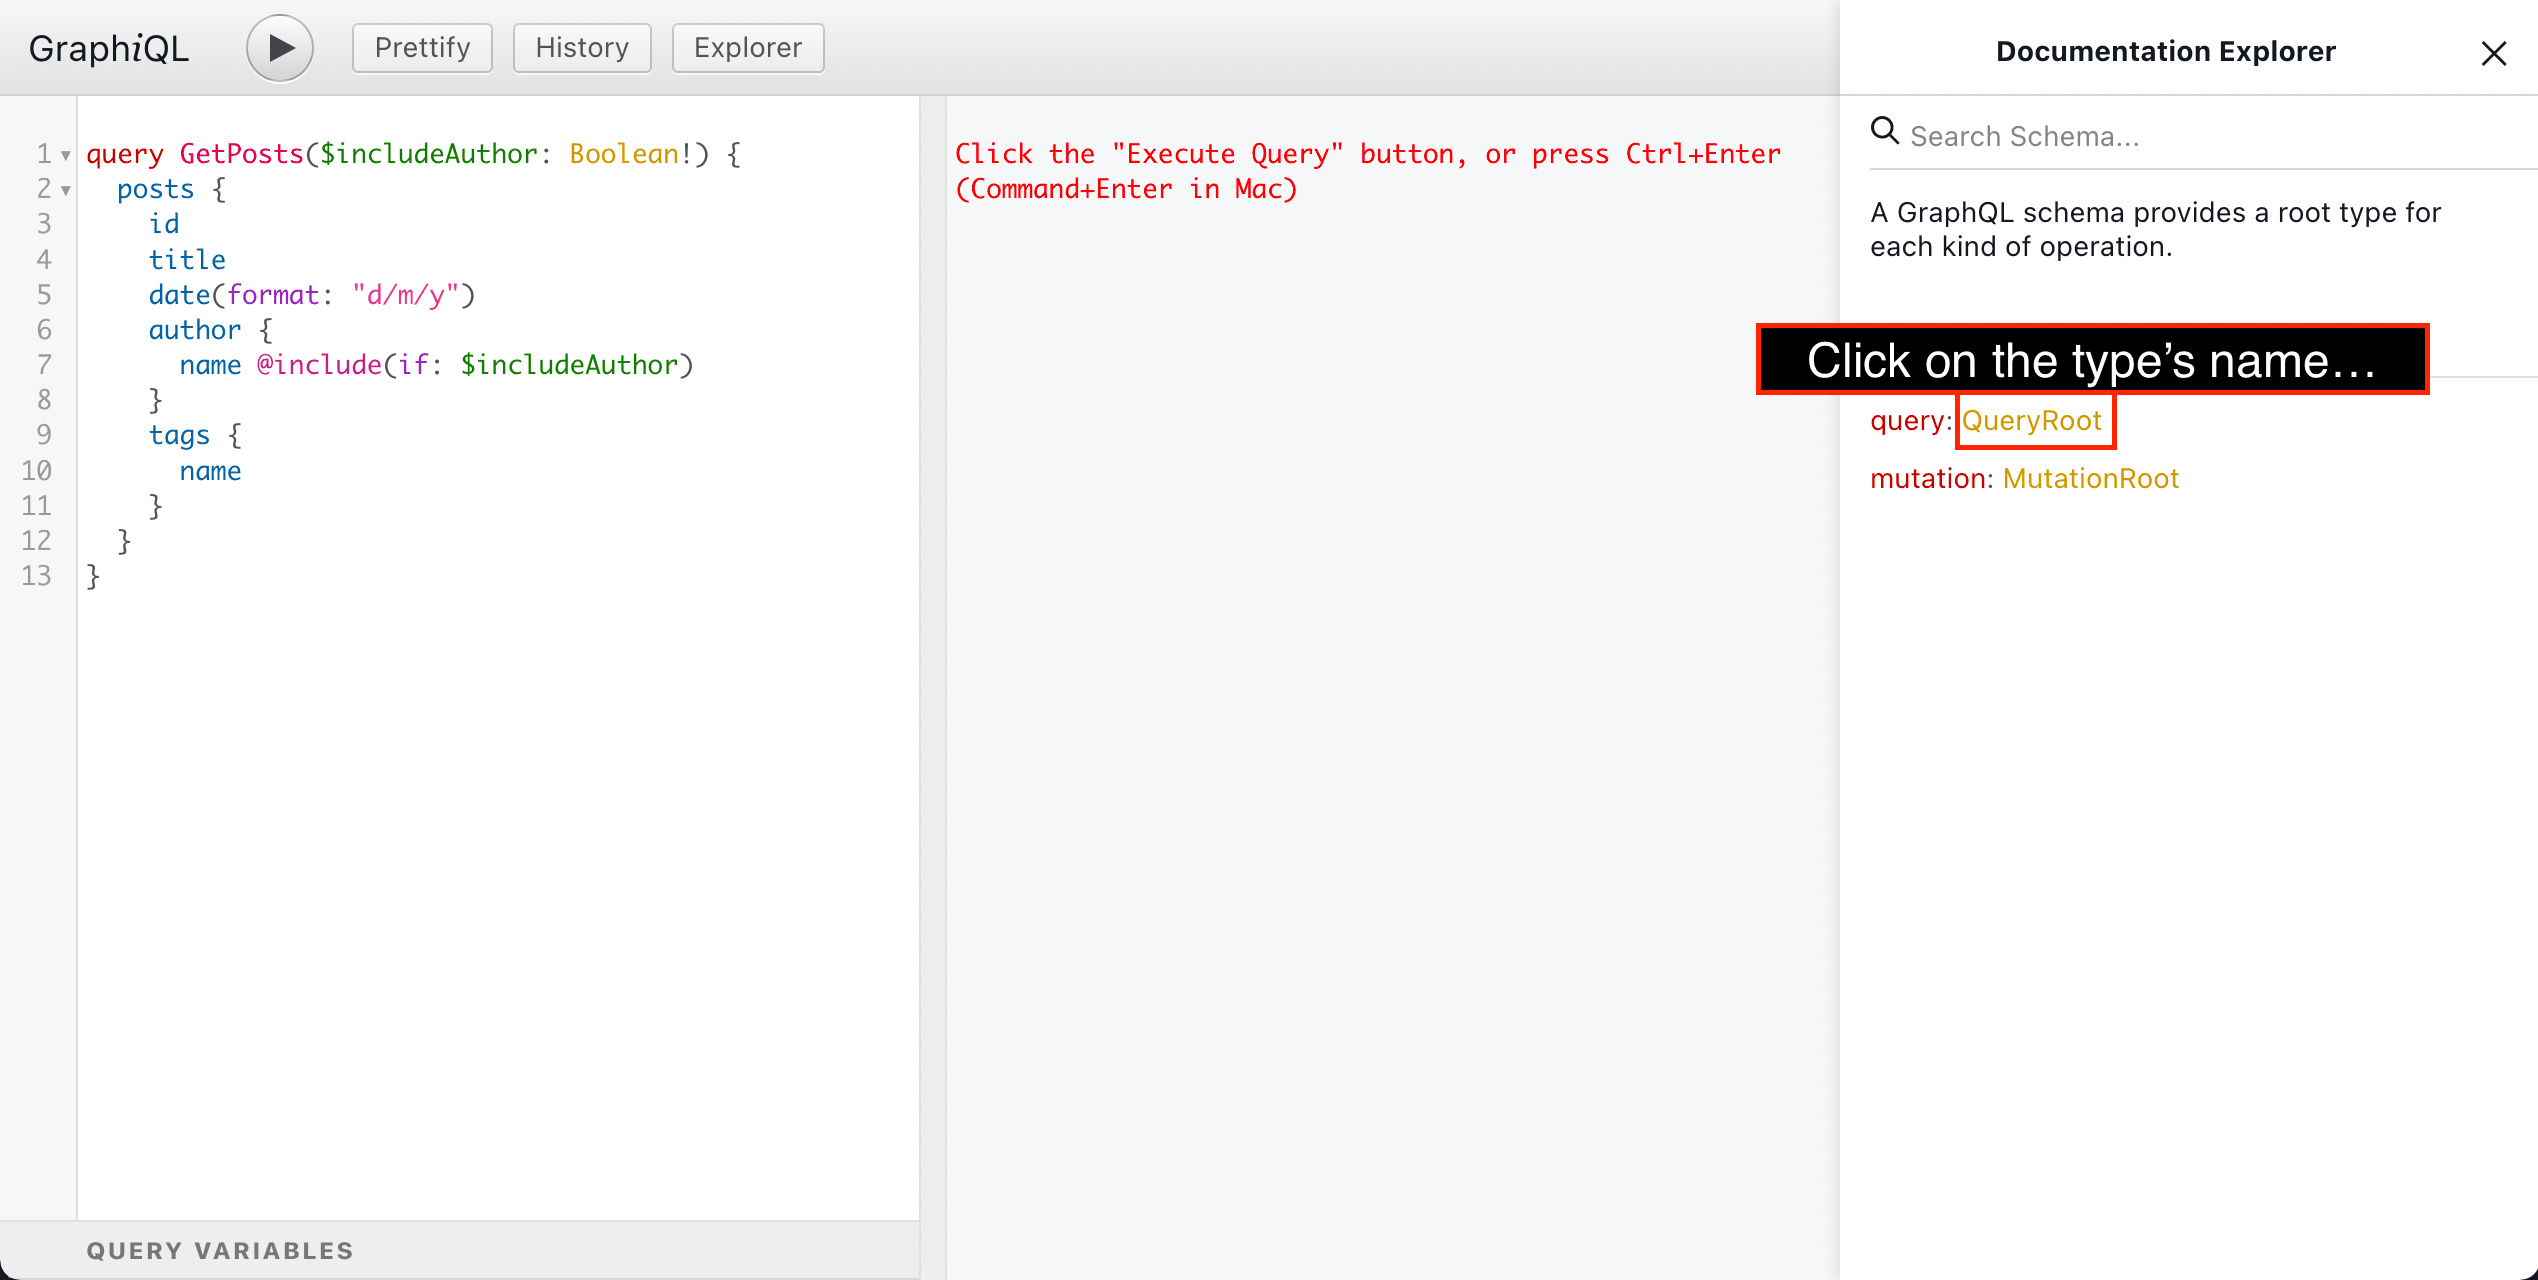
We can also browse the schema metadata via the Documentation Explorer. To open it, we must click on the "Docs" button:
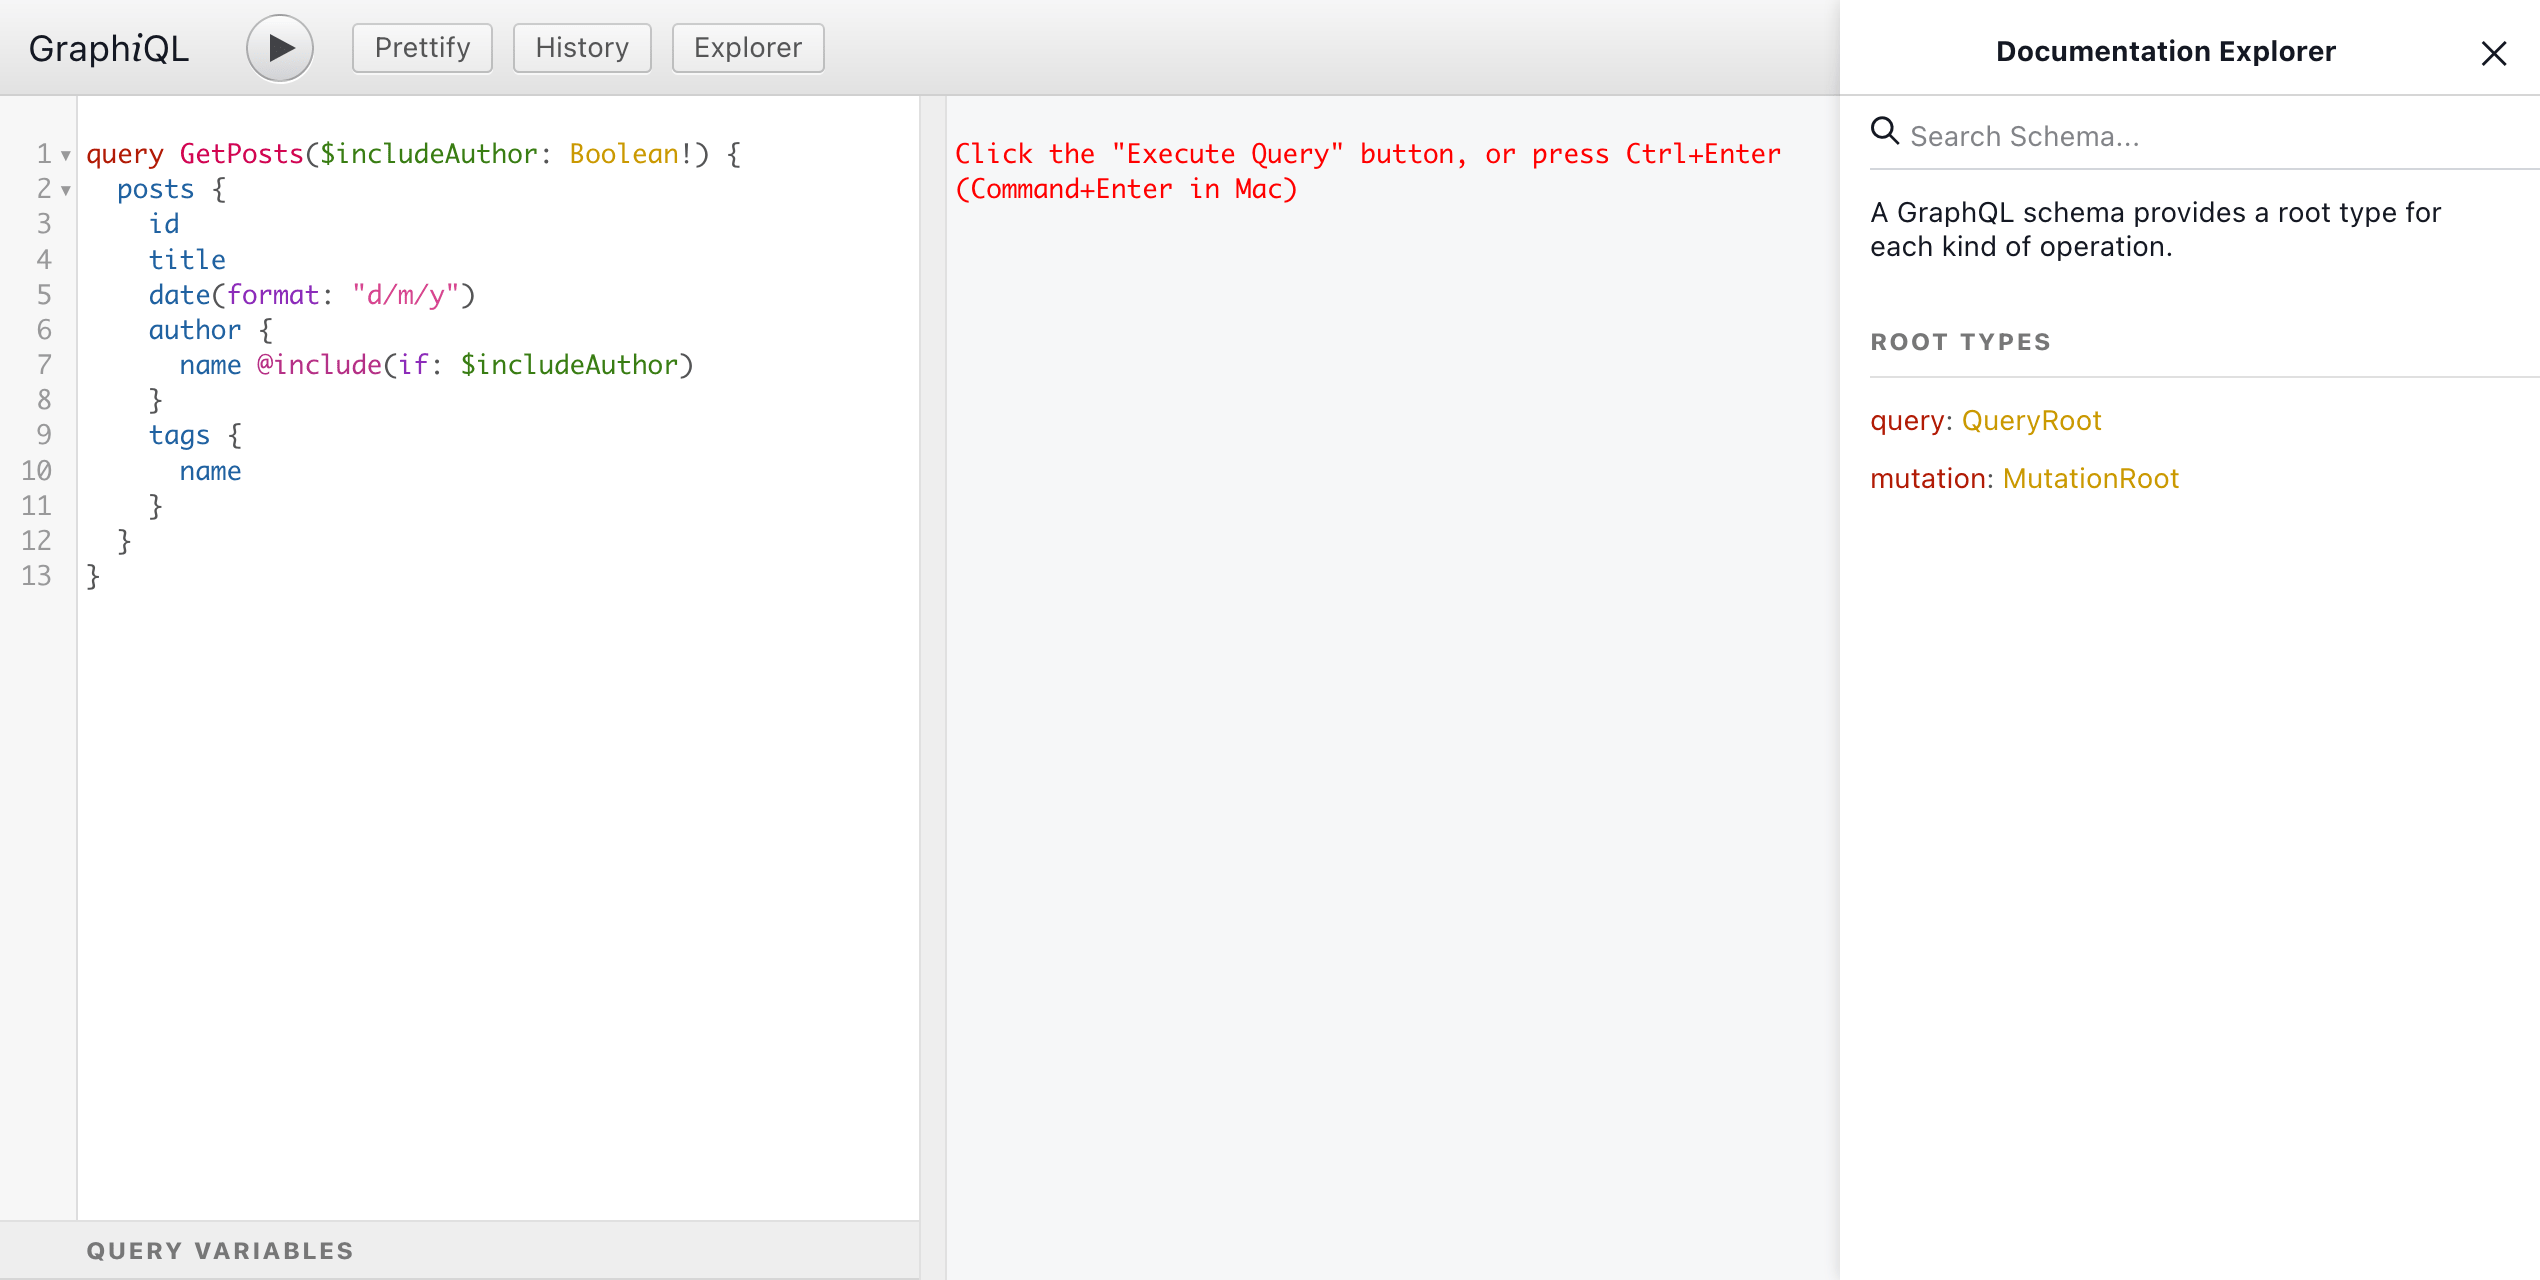
The Documentation Explorer will appear on the right-hand side:
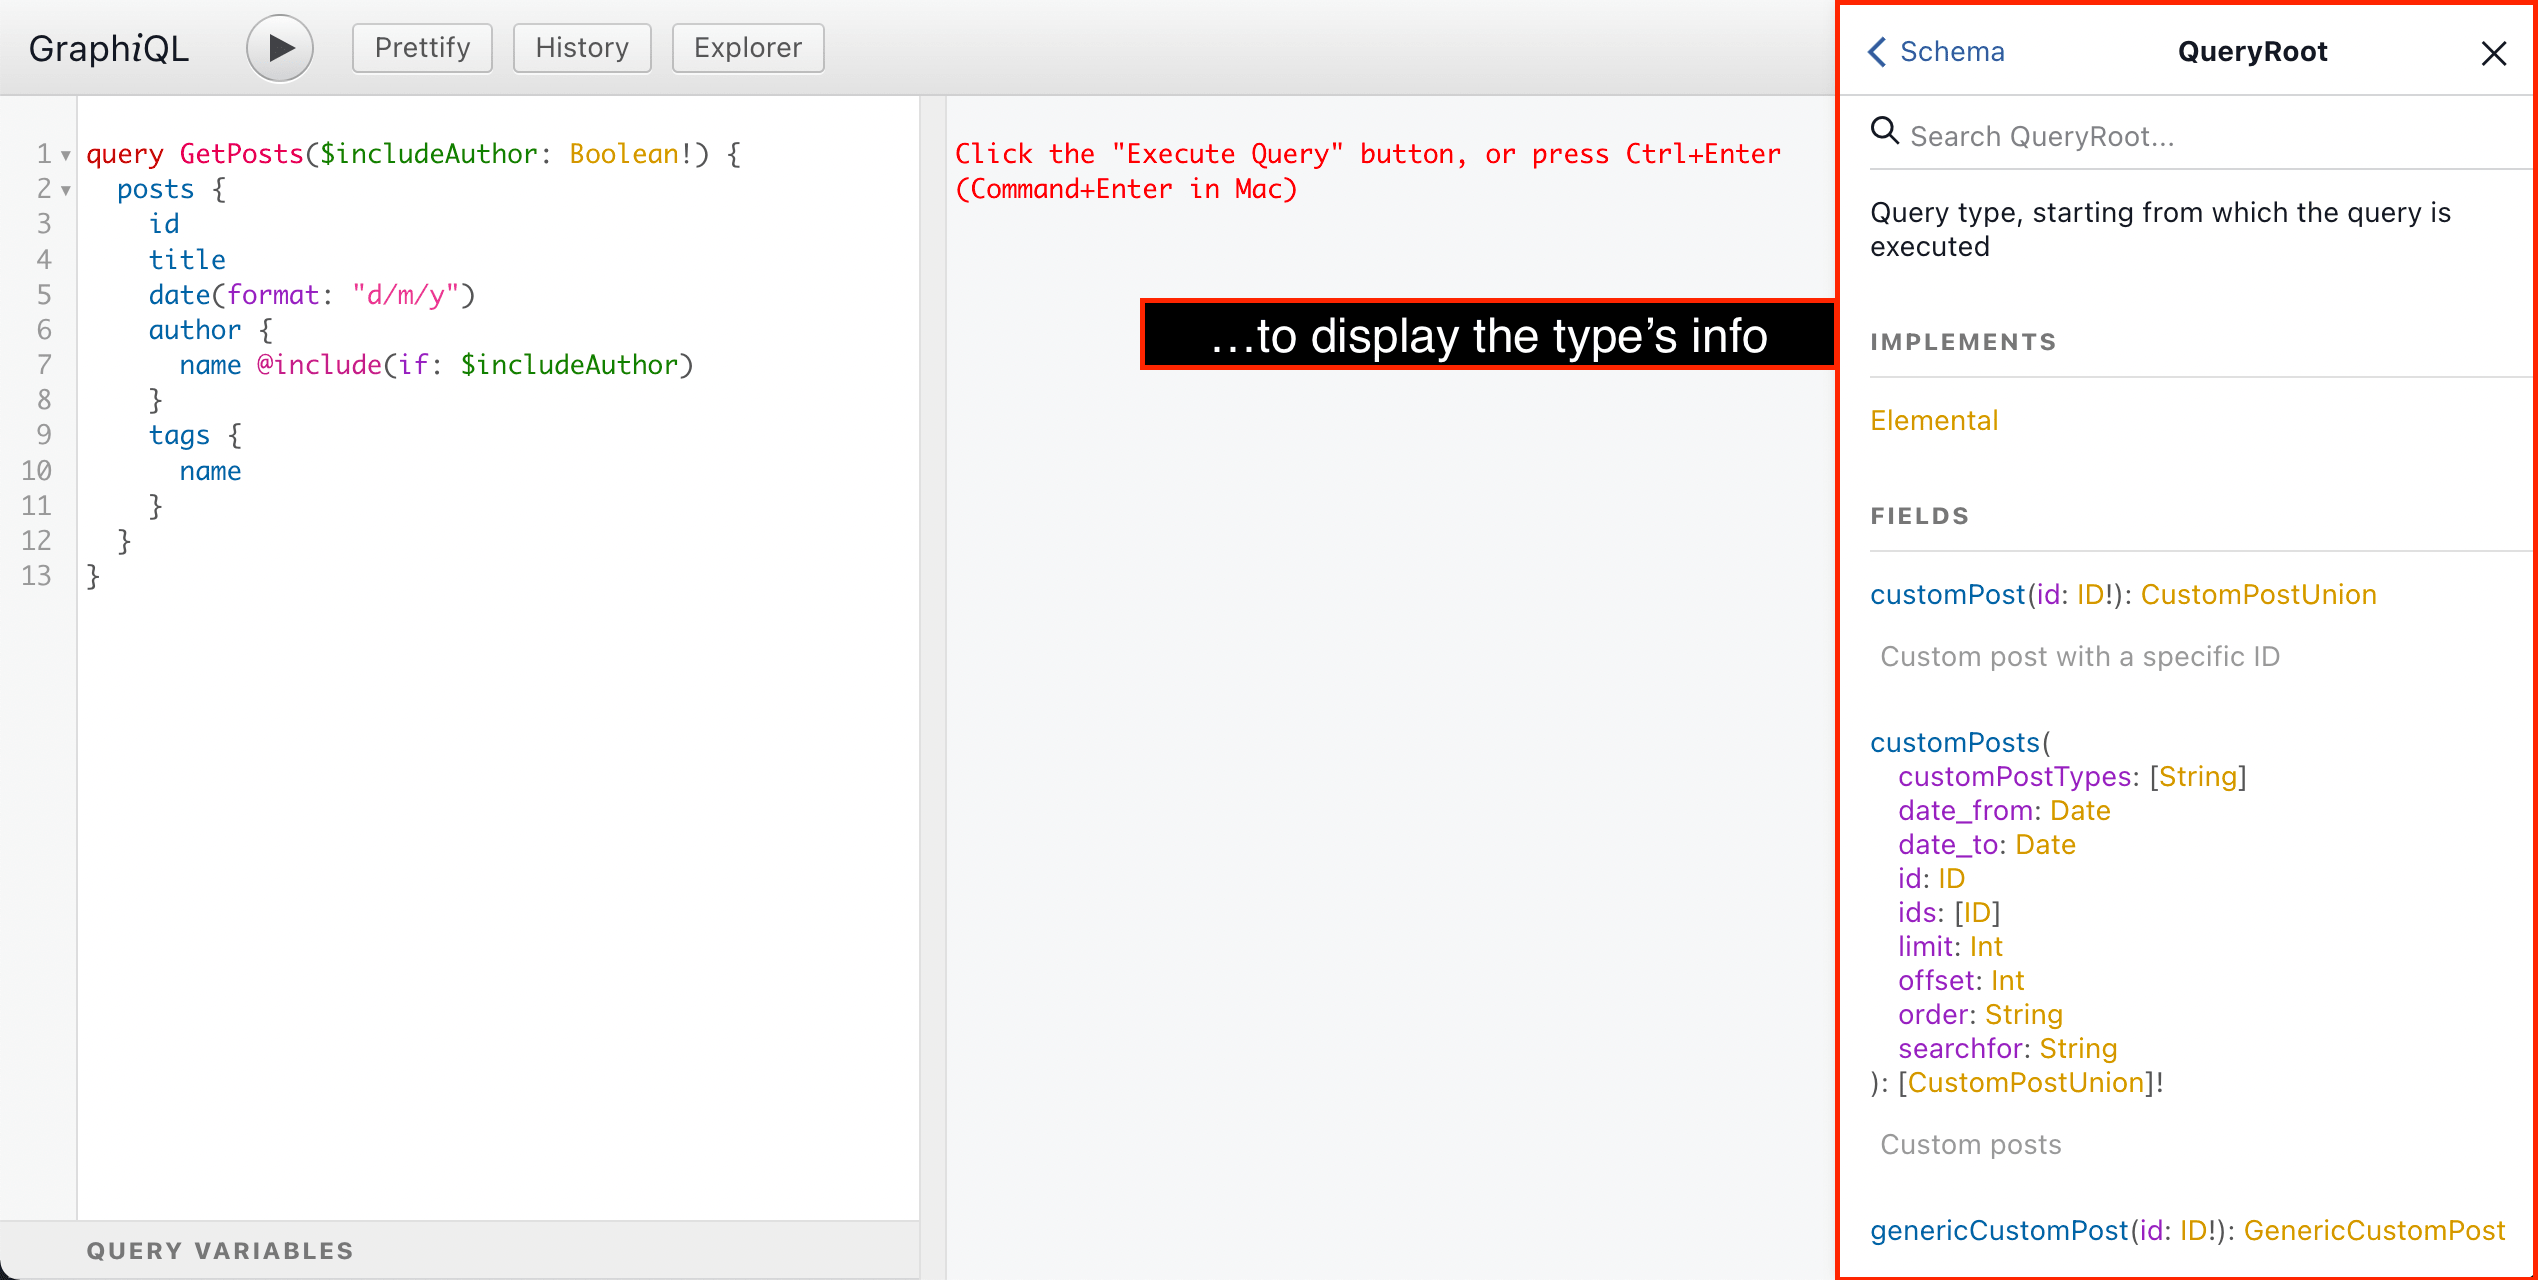
By clicking on the GraphQL type's name, the Documentation Explorer will display its information:
- Its description
- What interfaces it implements
- The list of all its fields, including:
- What arguments they receive
- Their return type (on which we can also click)
- Their description
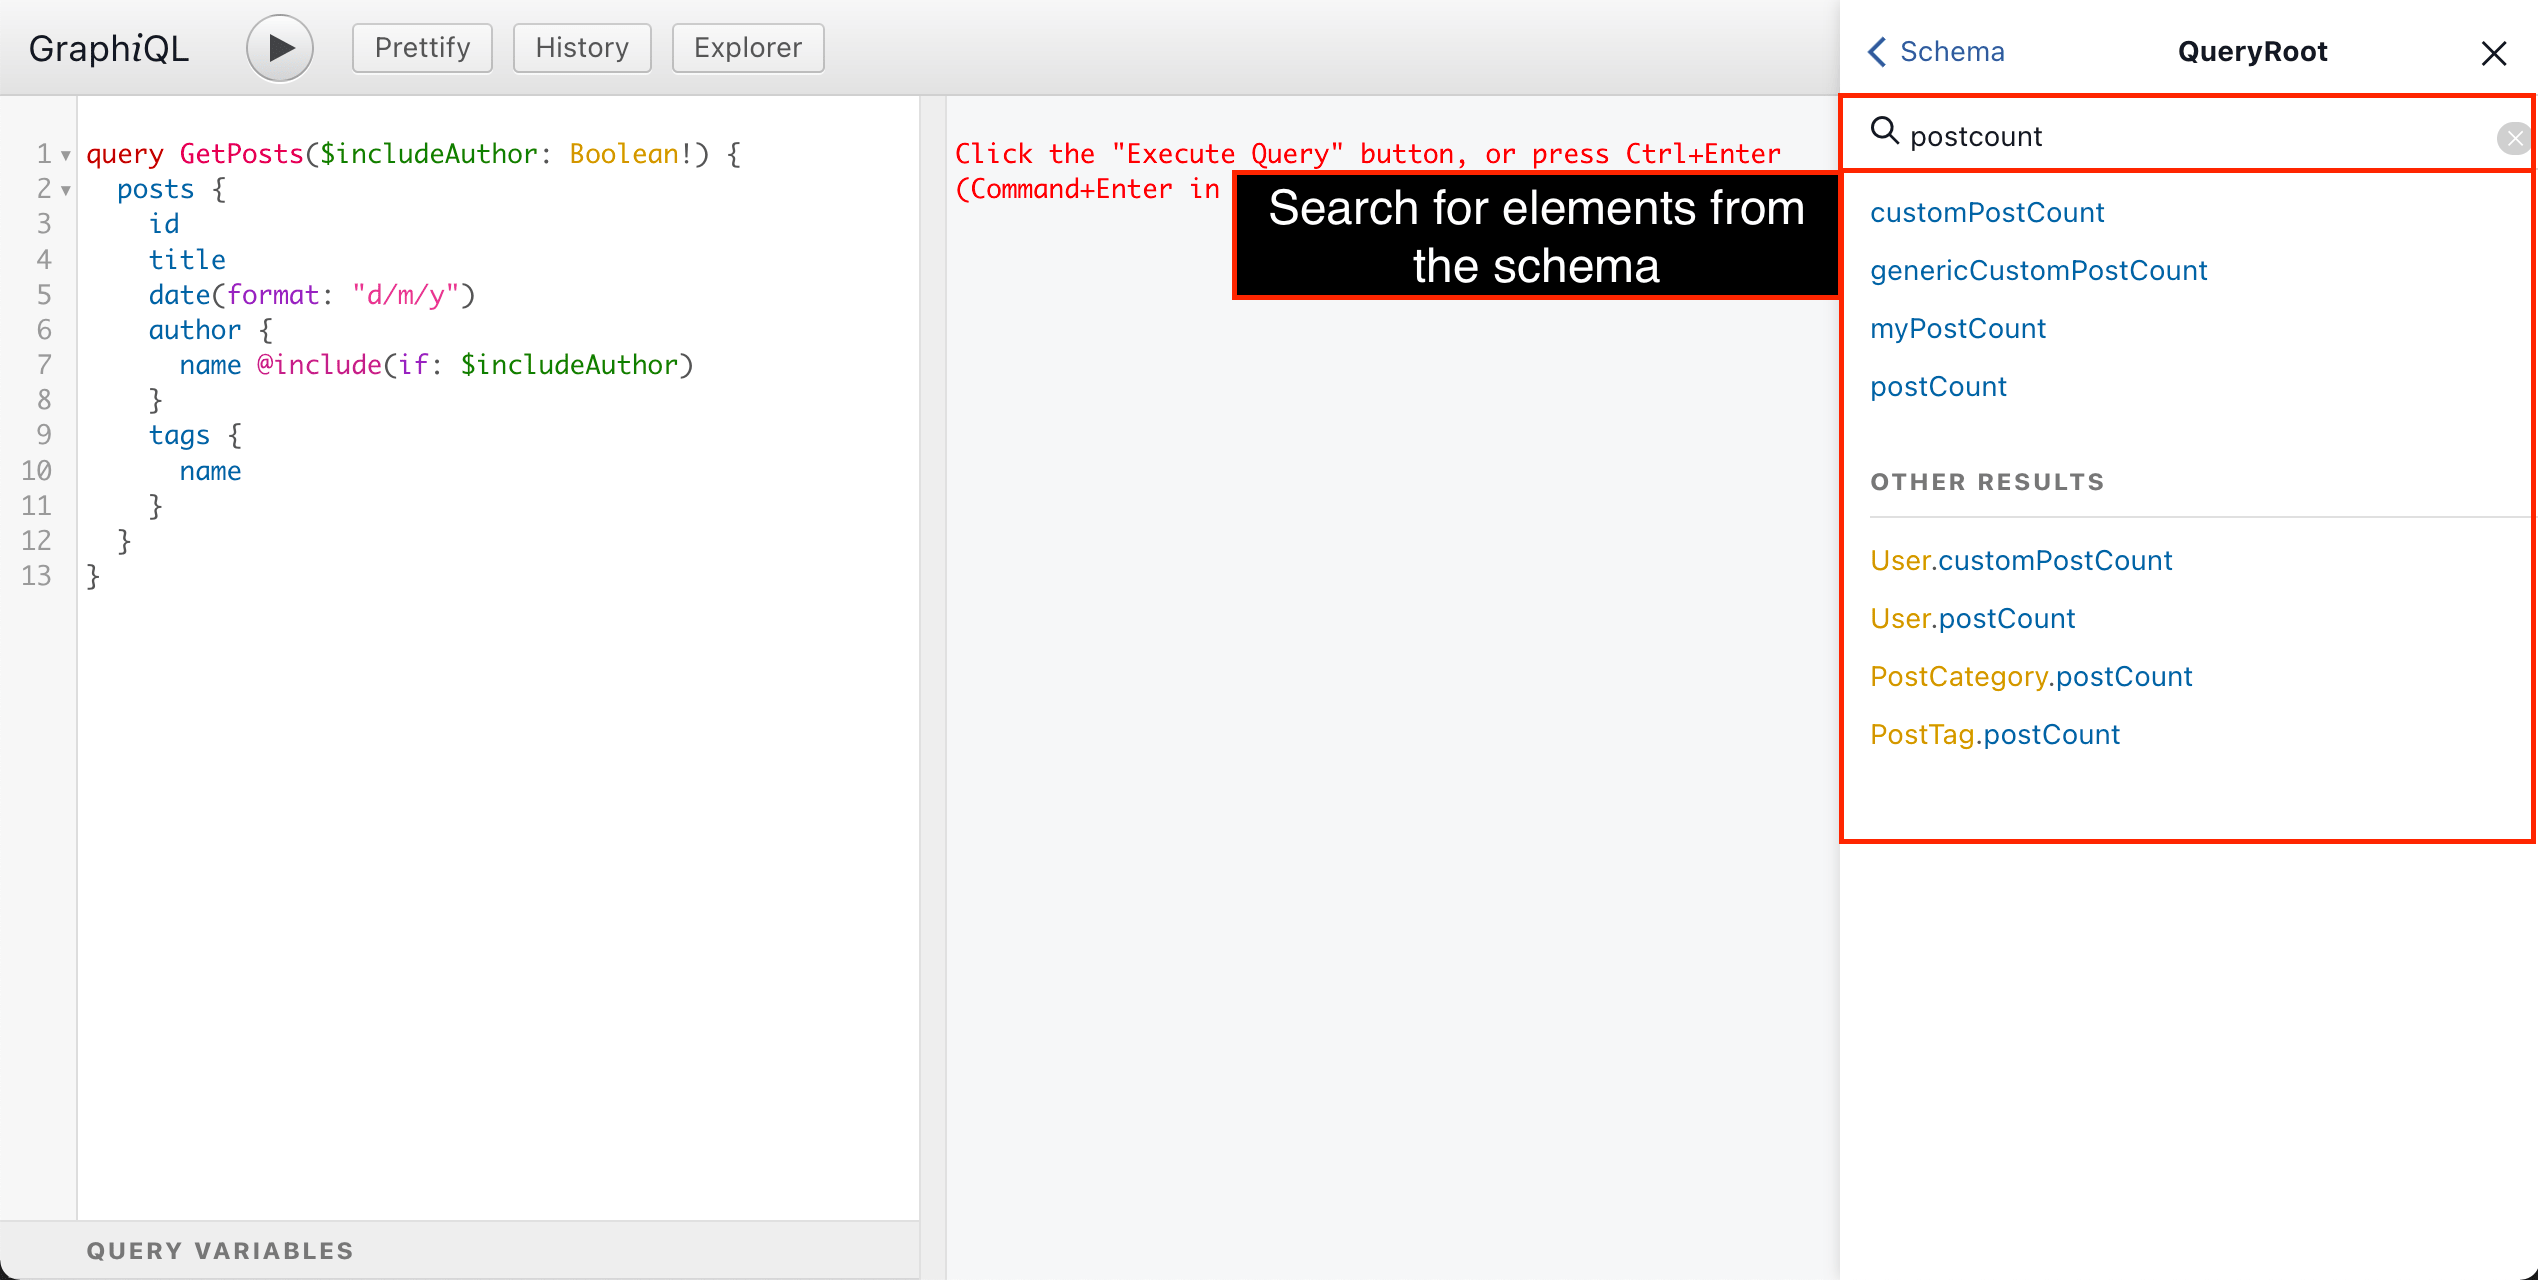
At any moment, we can also search for, and retrieve info for, any element from the schema:
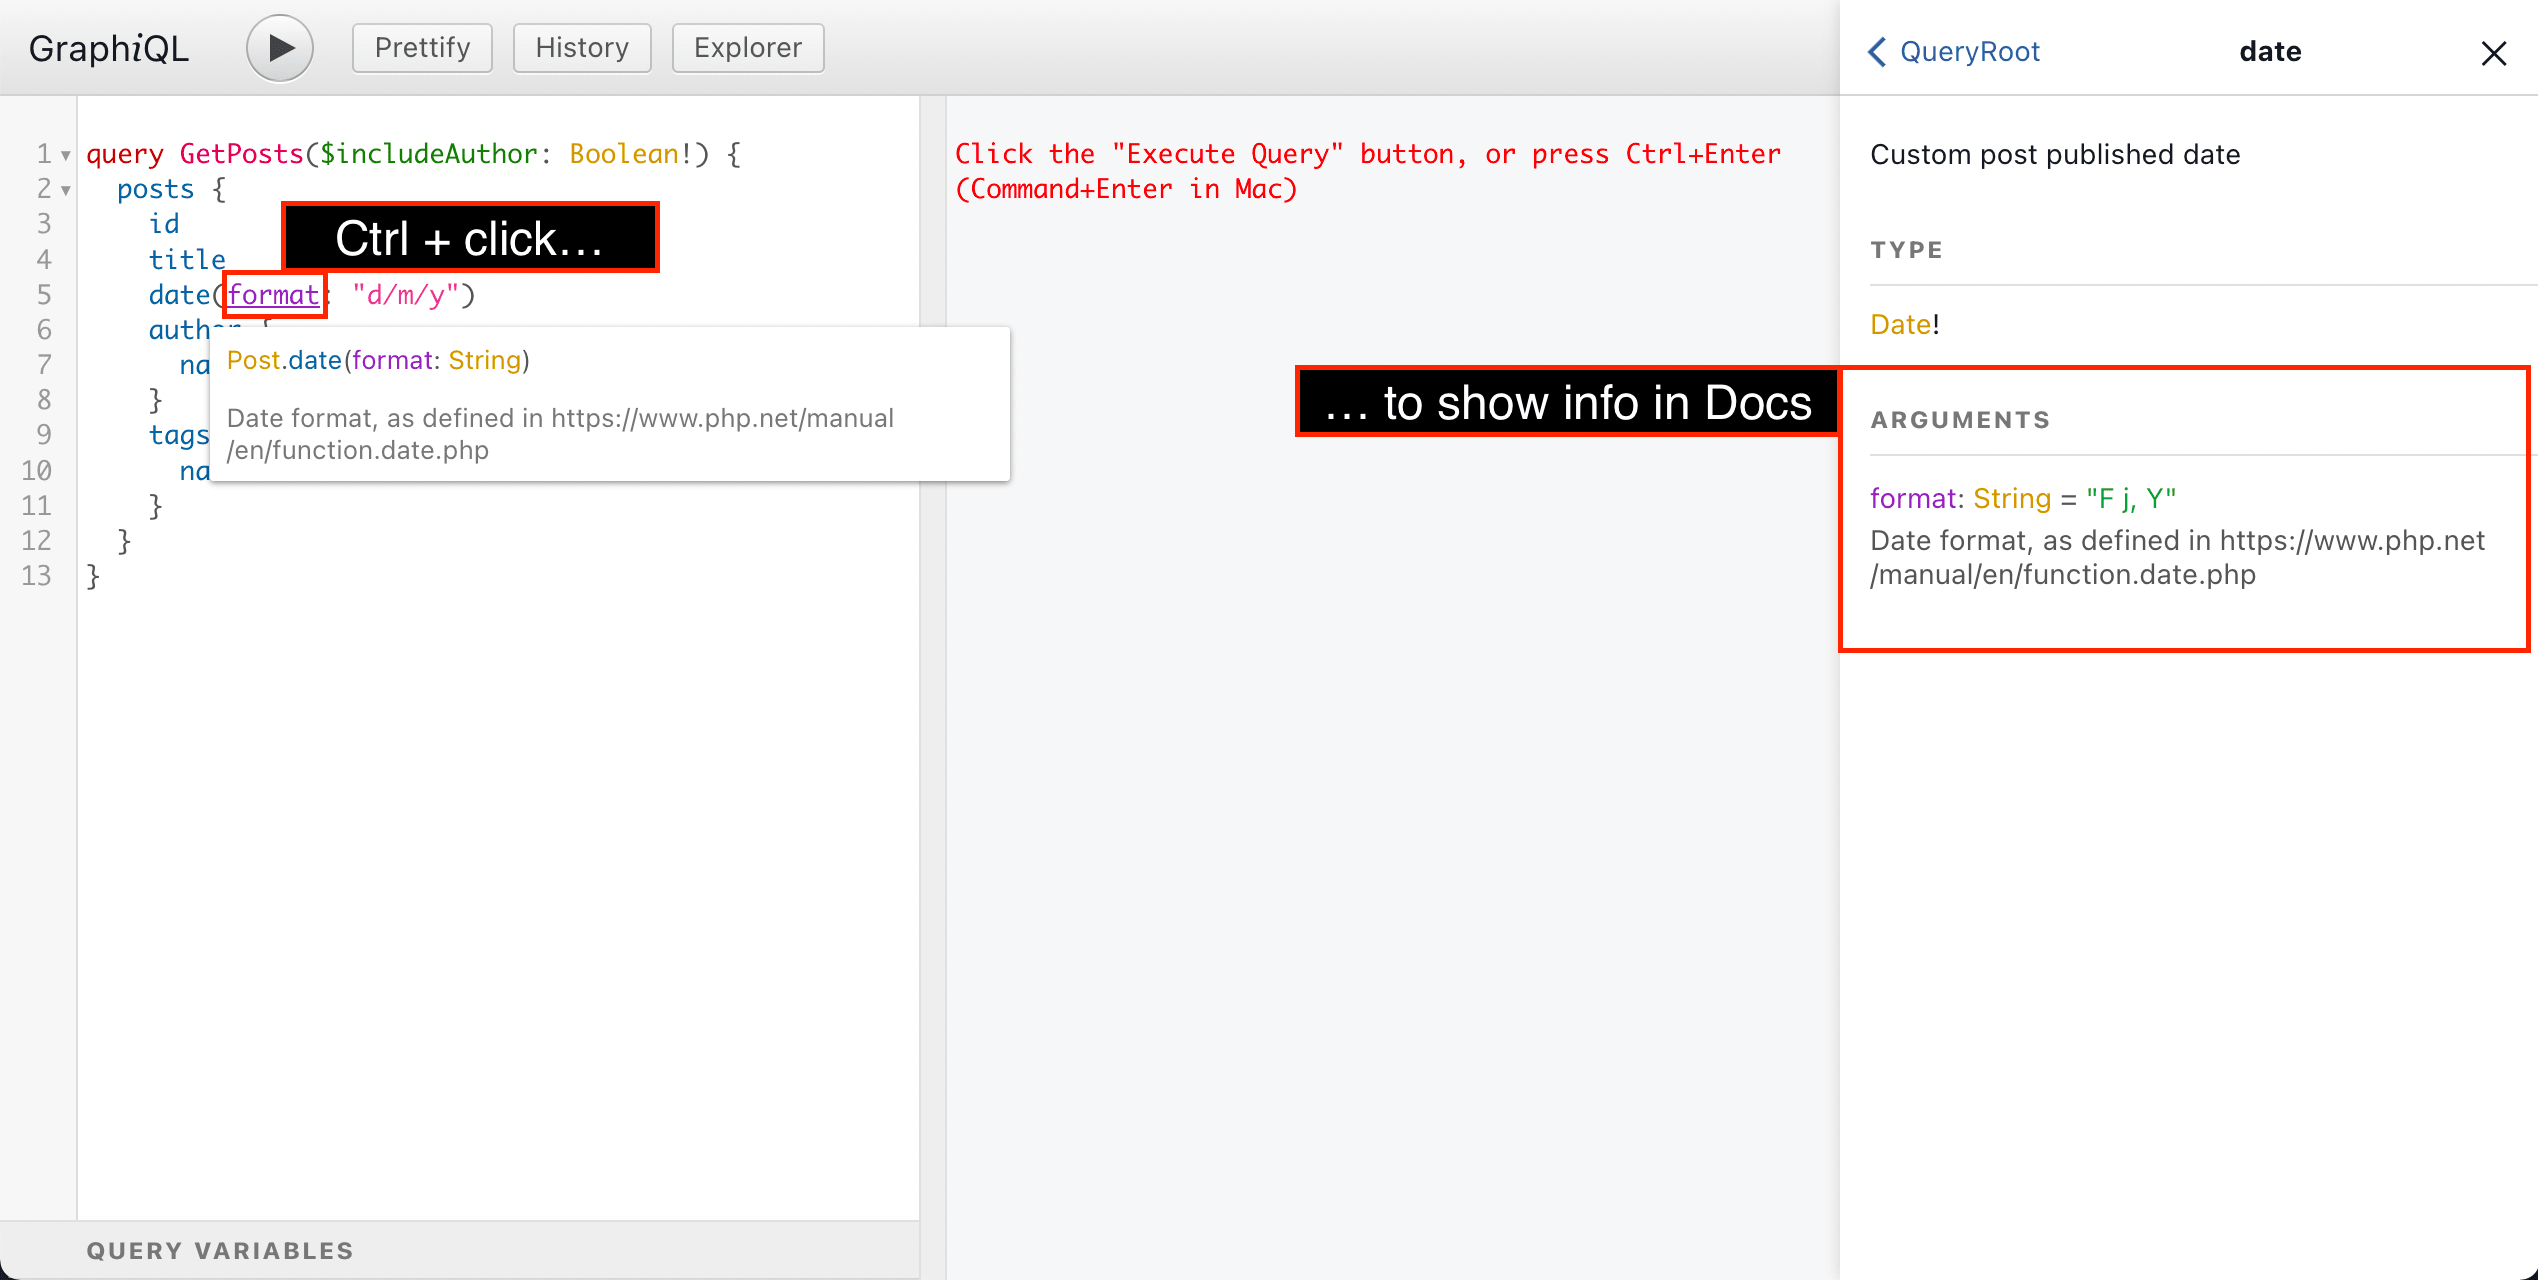
Hovering on any element from the query will display its information, and ctrl (or cmd) + clicking on it will display it in the Documentation Explorer:
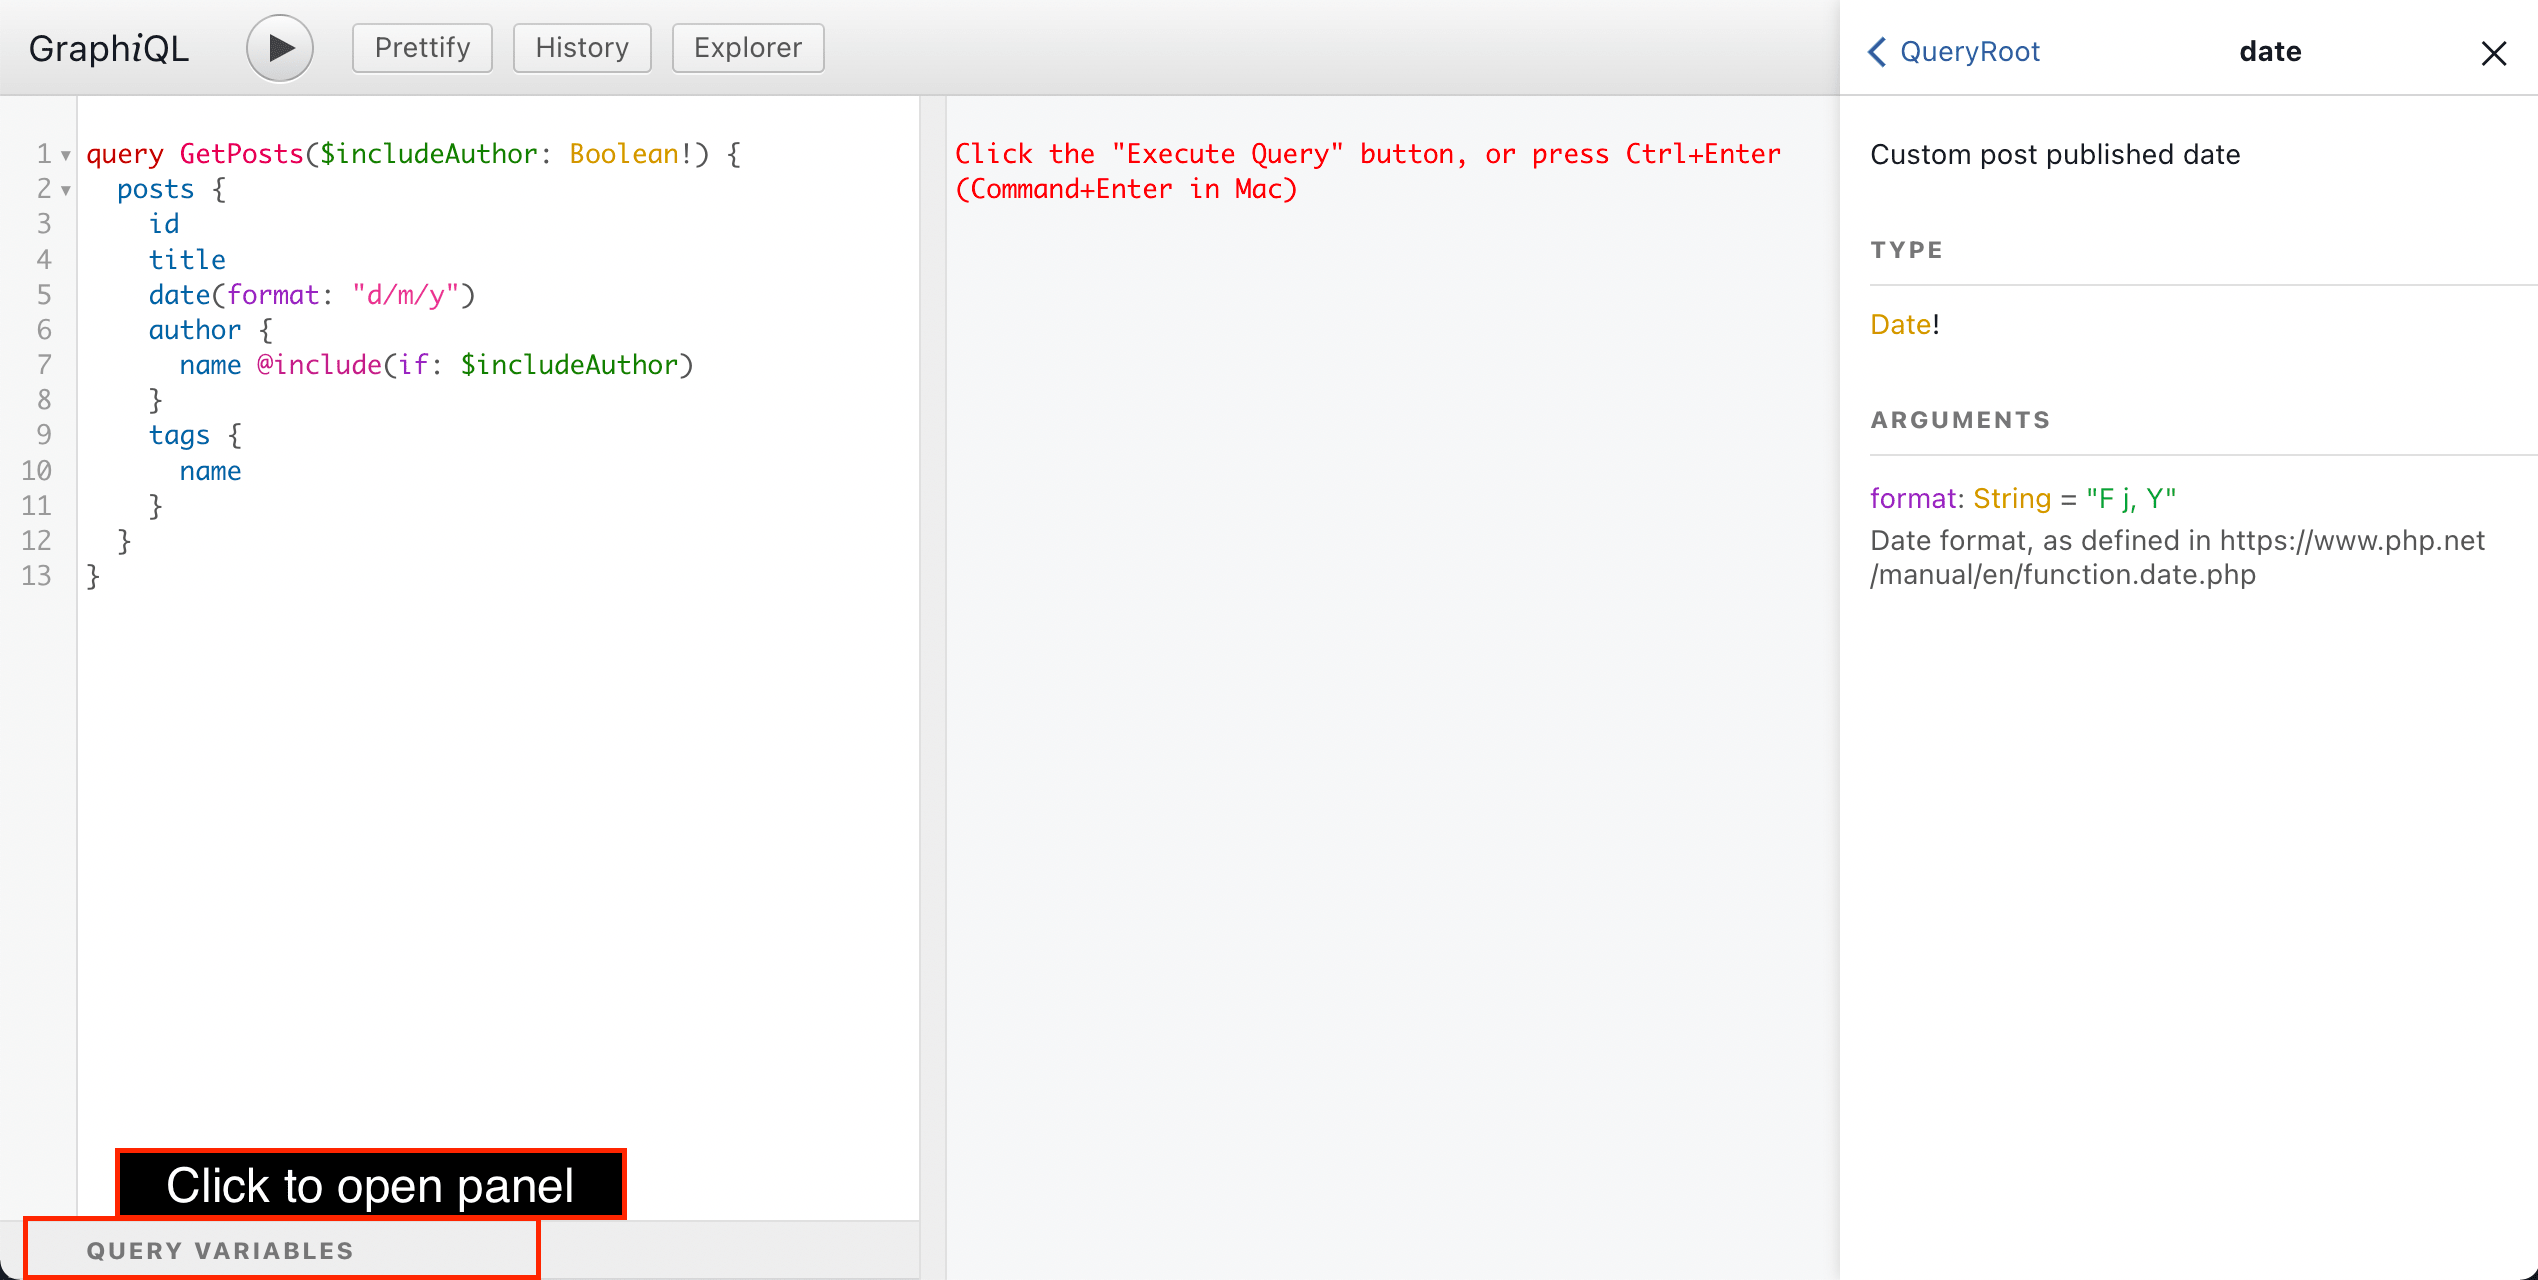
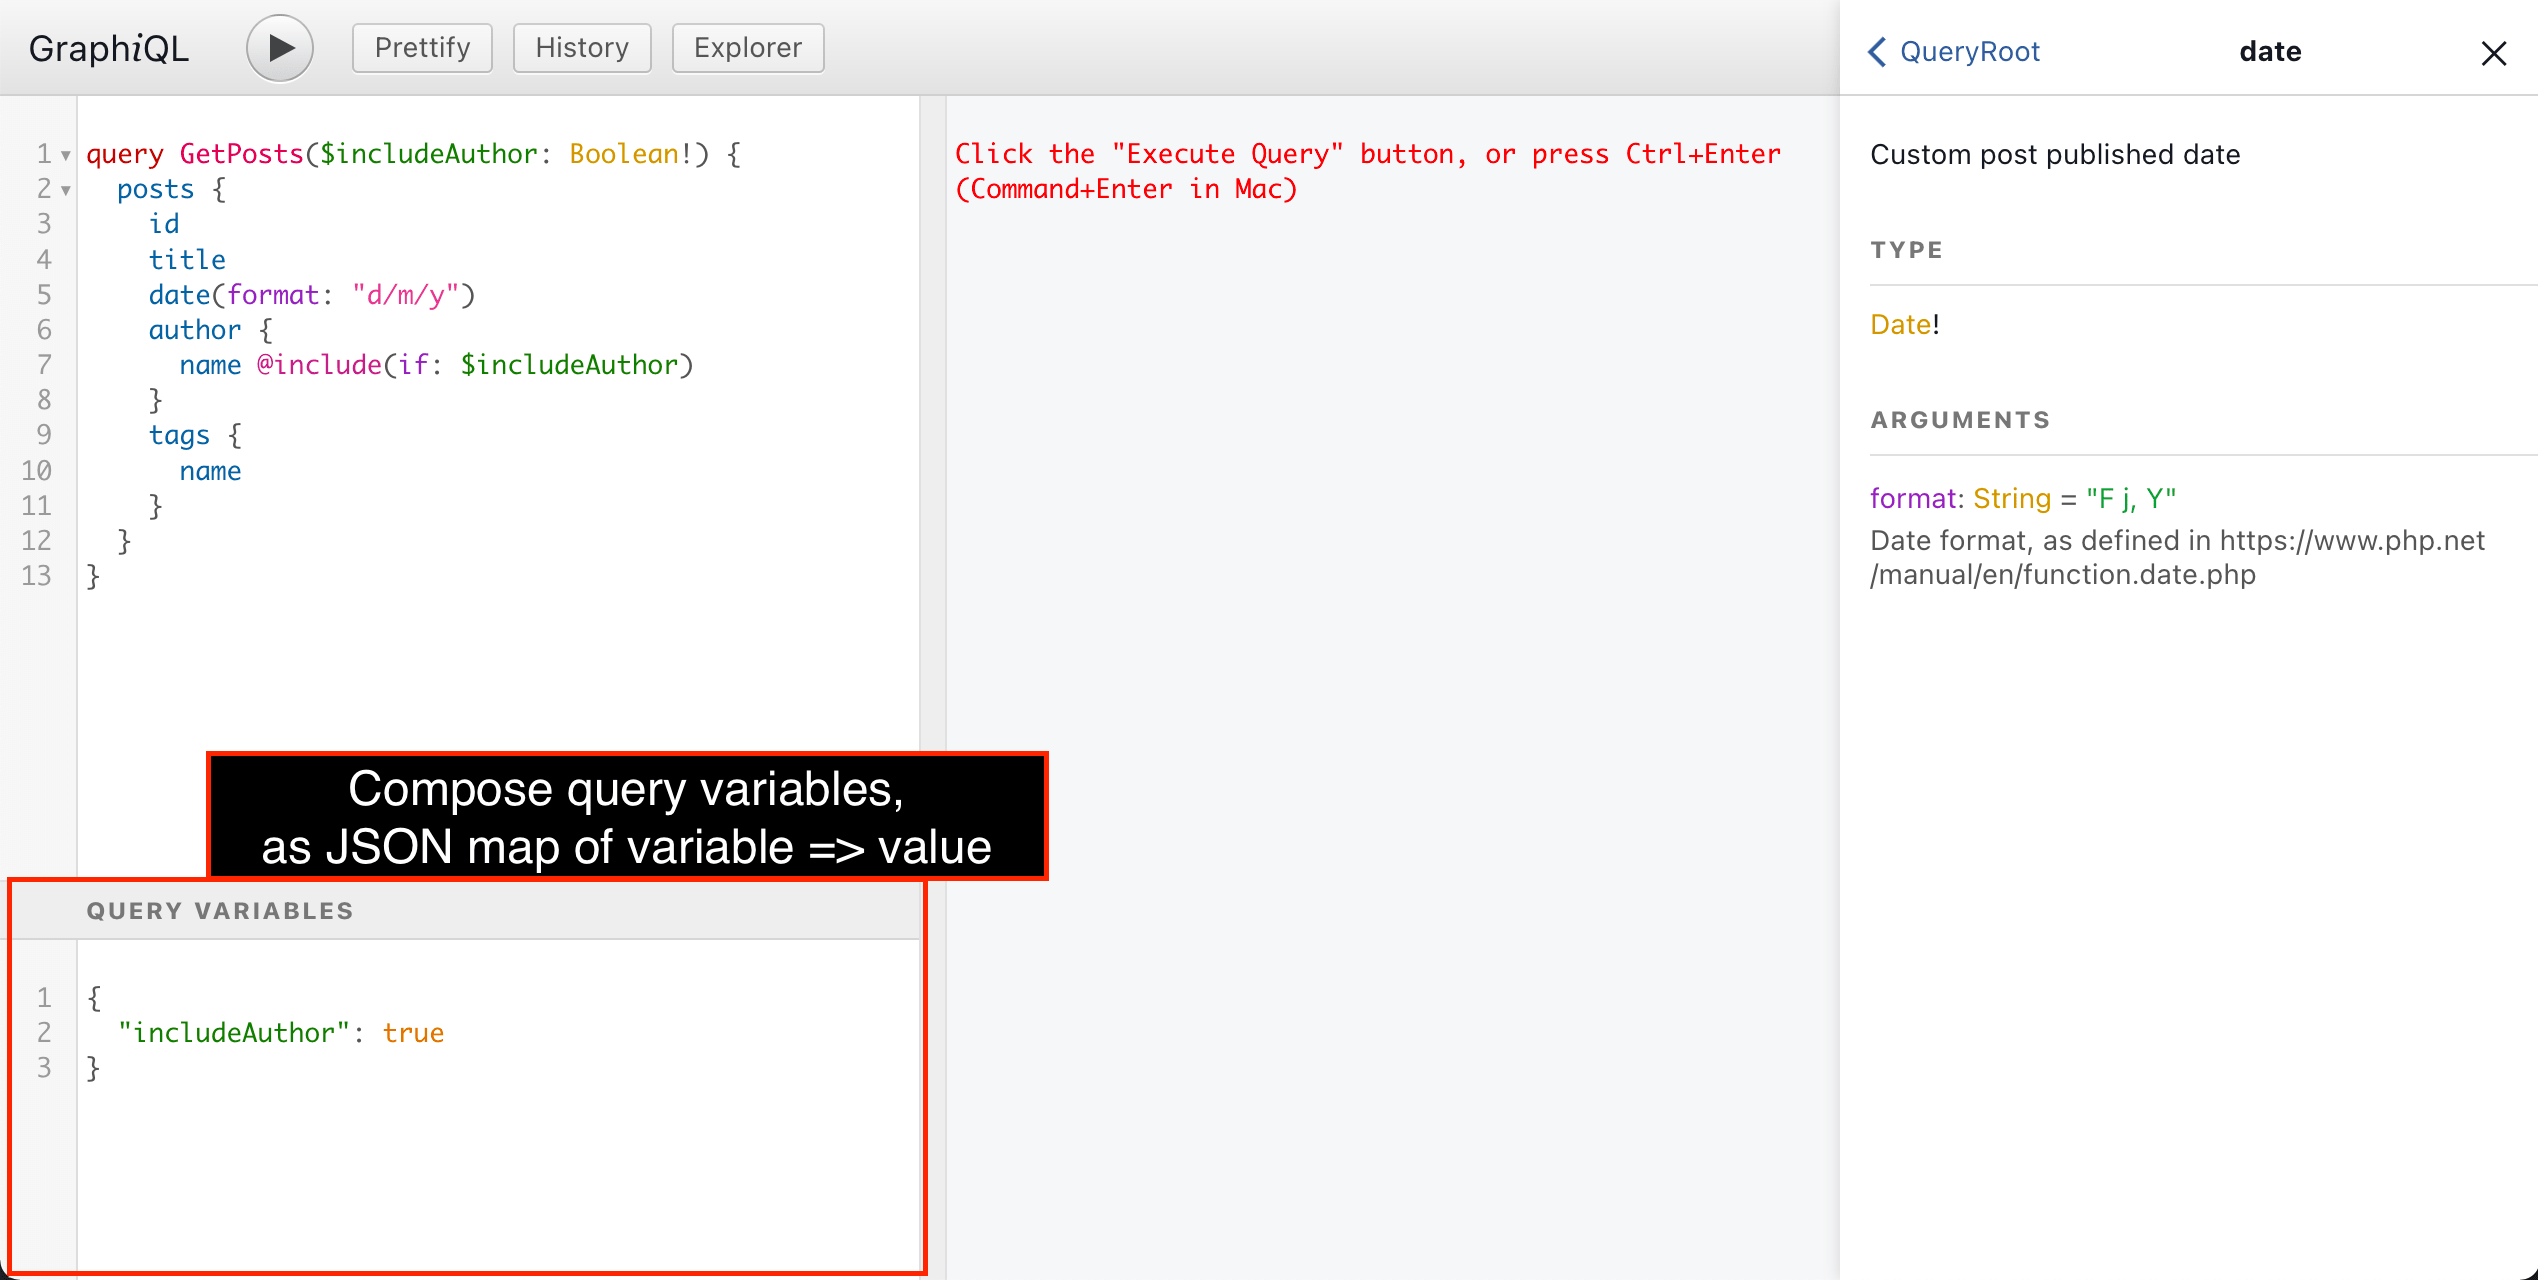
Clicking on the "Query variables" panel at the bottom, we can compose variables to pass to the query, as a JSON map of variable => value:
To execute the GraphQL query, we press on the "Run" button, or press ctrl (or cmd) + enter:
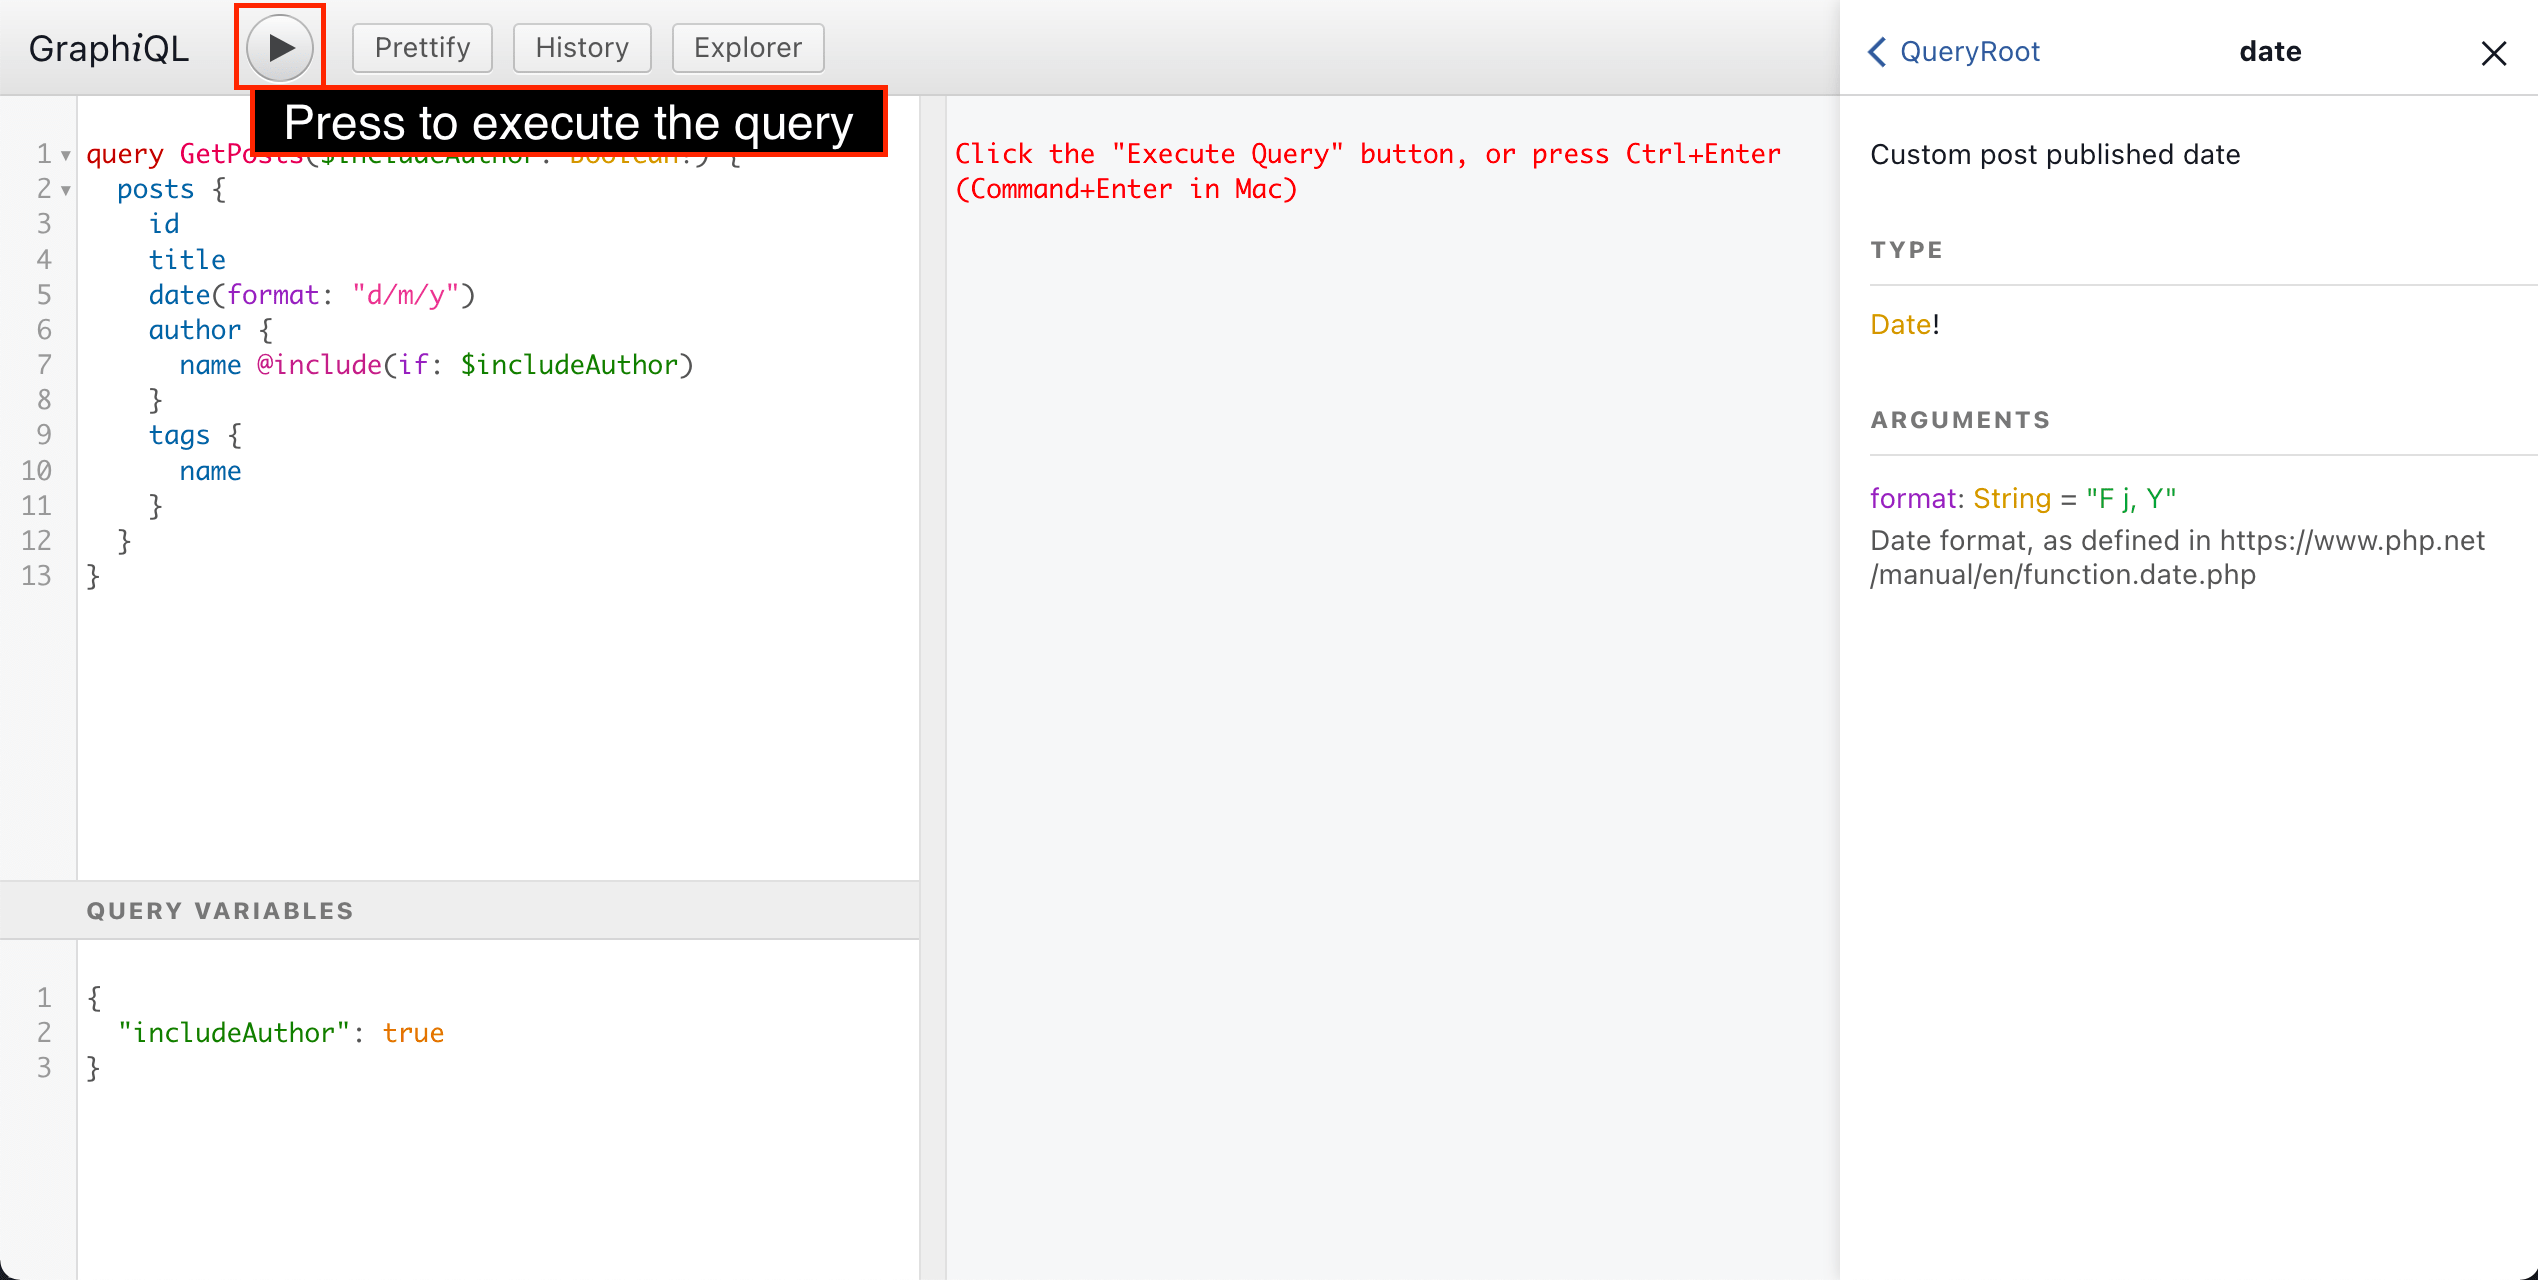
The GraphQL response will be displayed on the central panel:

On the top panel, there are different addons for GraphiQL:
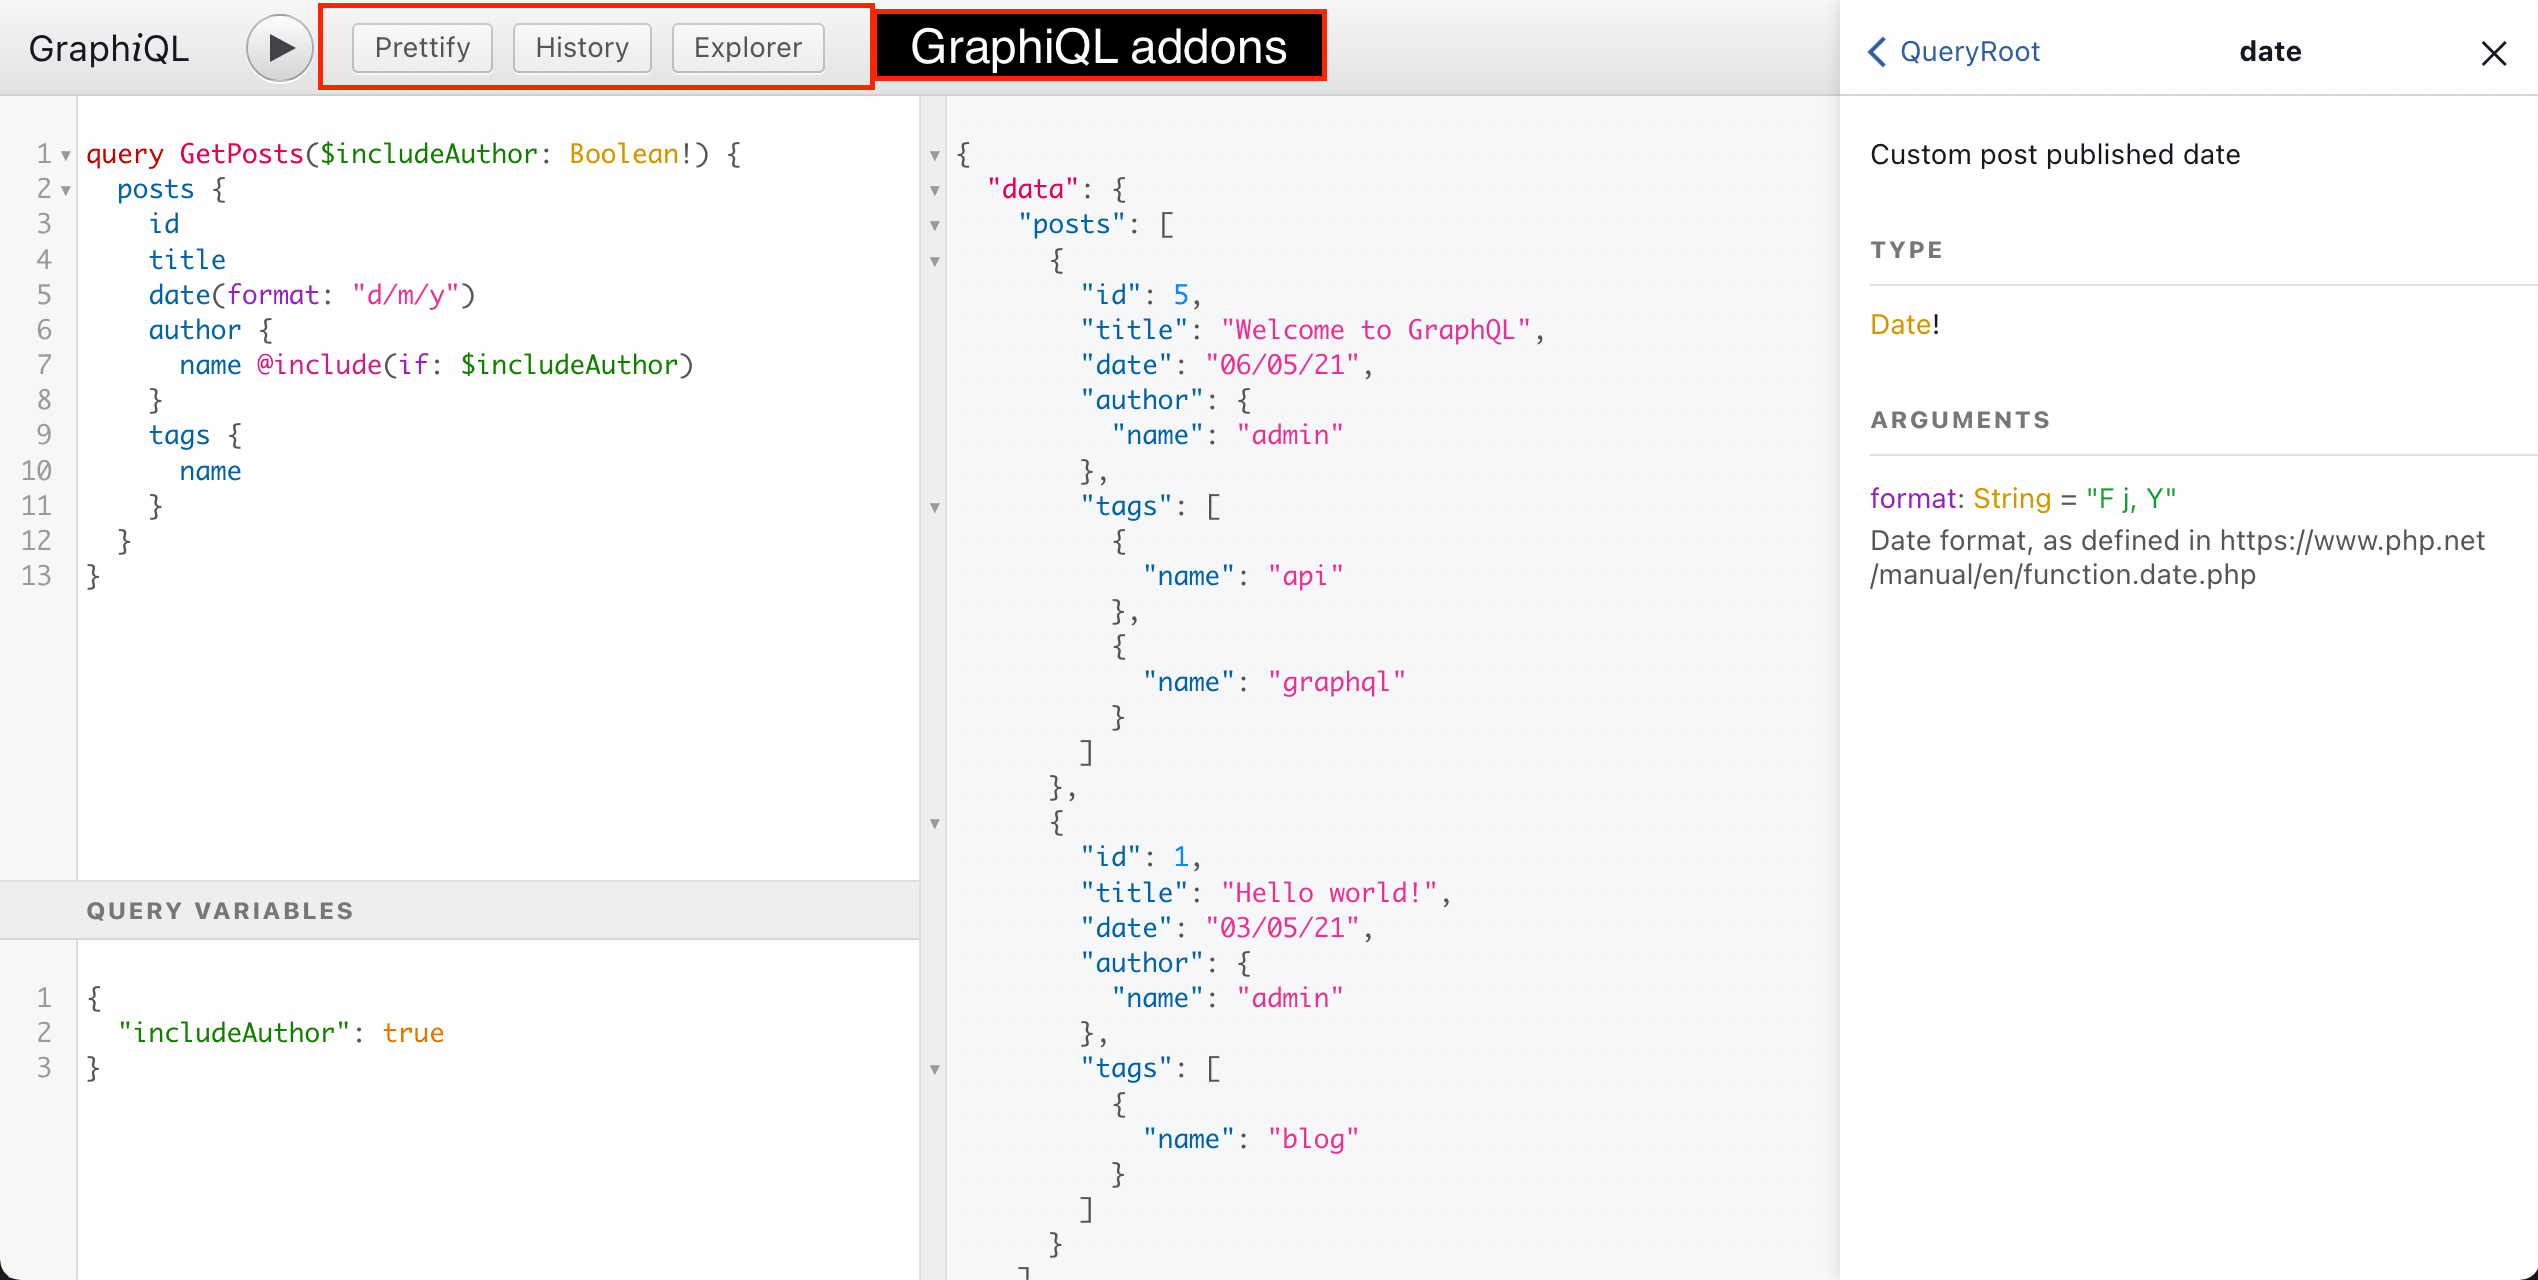
Clicking on each addon button, will perform a certain action:
- "Prettify" formats the GraphQL query
- "History" displays the list of most-recent previous queries, and clicking on any of them will input it into the query editor
- "Explorer" opens the GraphiQL Explorer panel
The GraphiQL Explorer is a great addon. It displays the list of all the fields, and clicking on them adds them to the query in the editor, enabling to compose the GraphQL query in a visual manner:
Intro to GraphQL Voyager
GraphQL Voyager is a tool to visualize the GraphQL schema, which excels and displaying how every element relates to each other:
Let's see how to use it, step by step.
GraphQL Voyager via screenshots
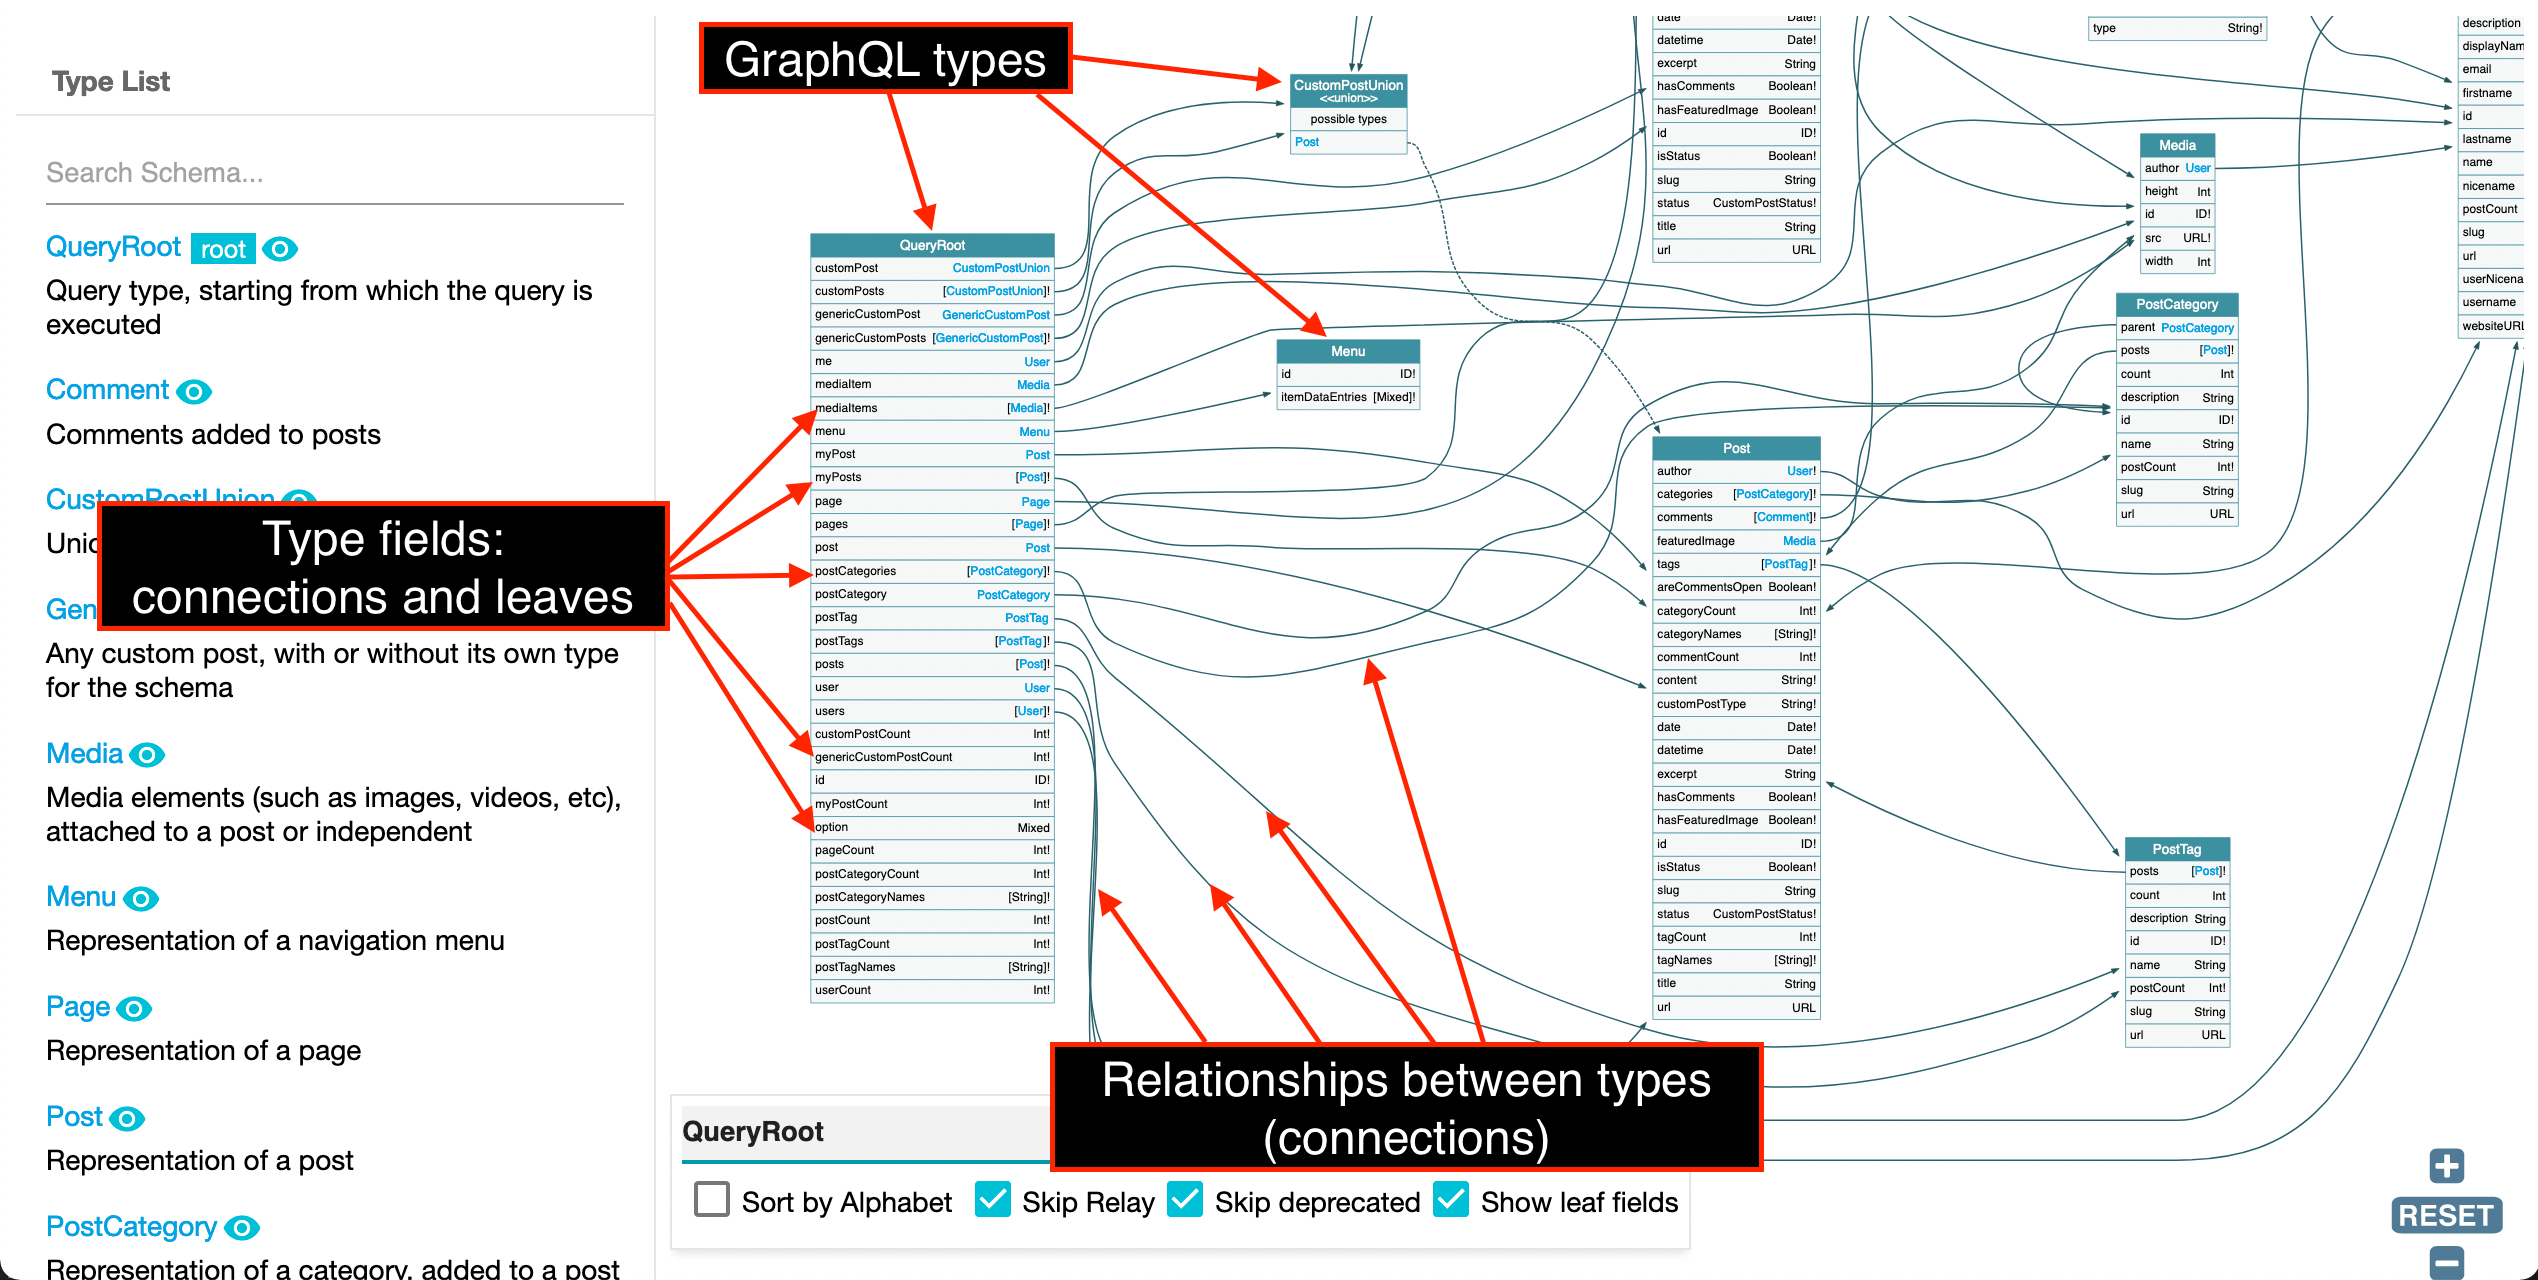
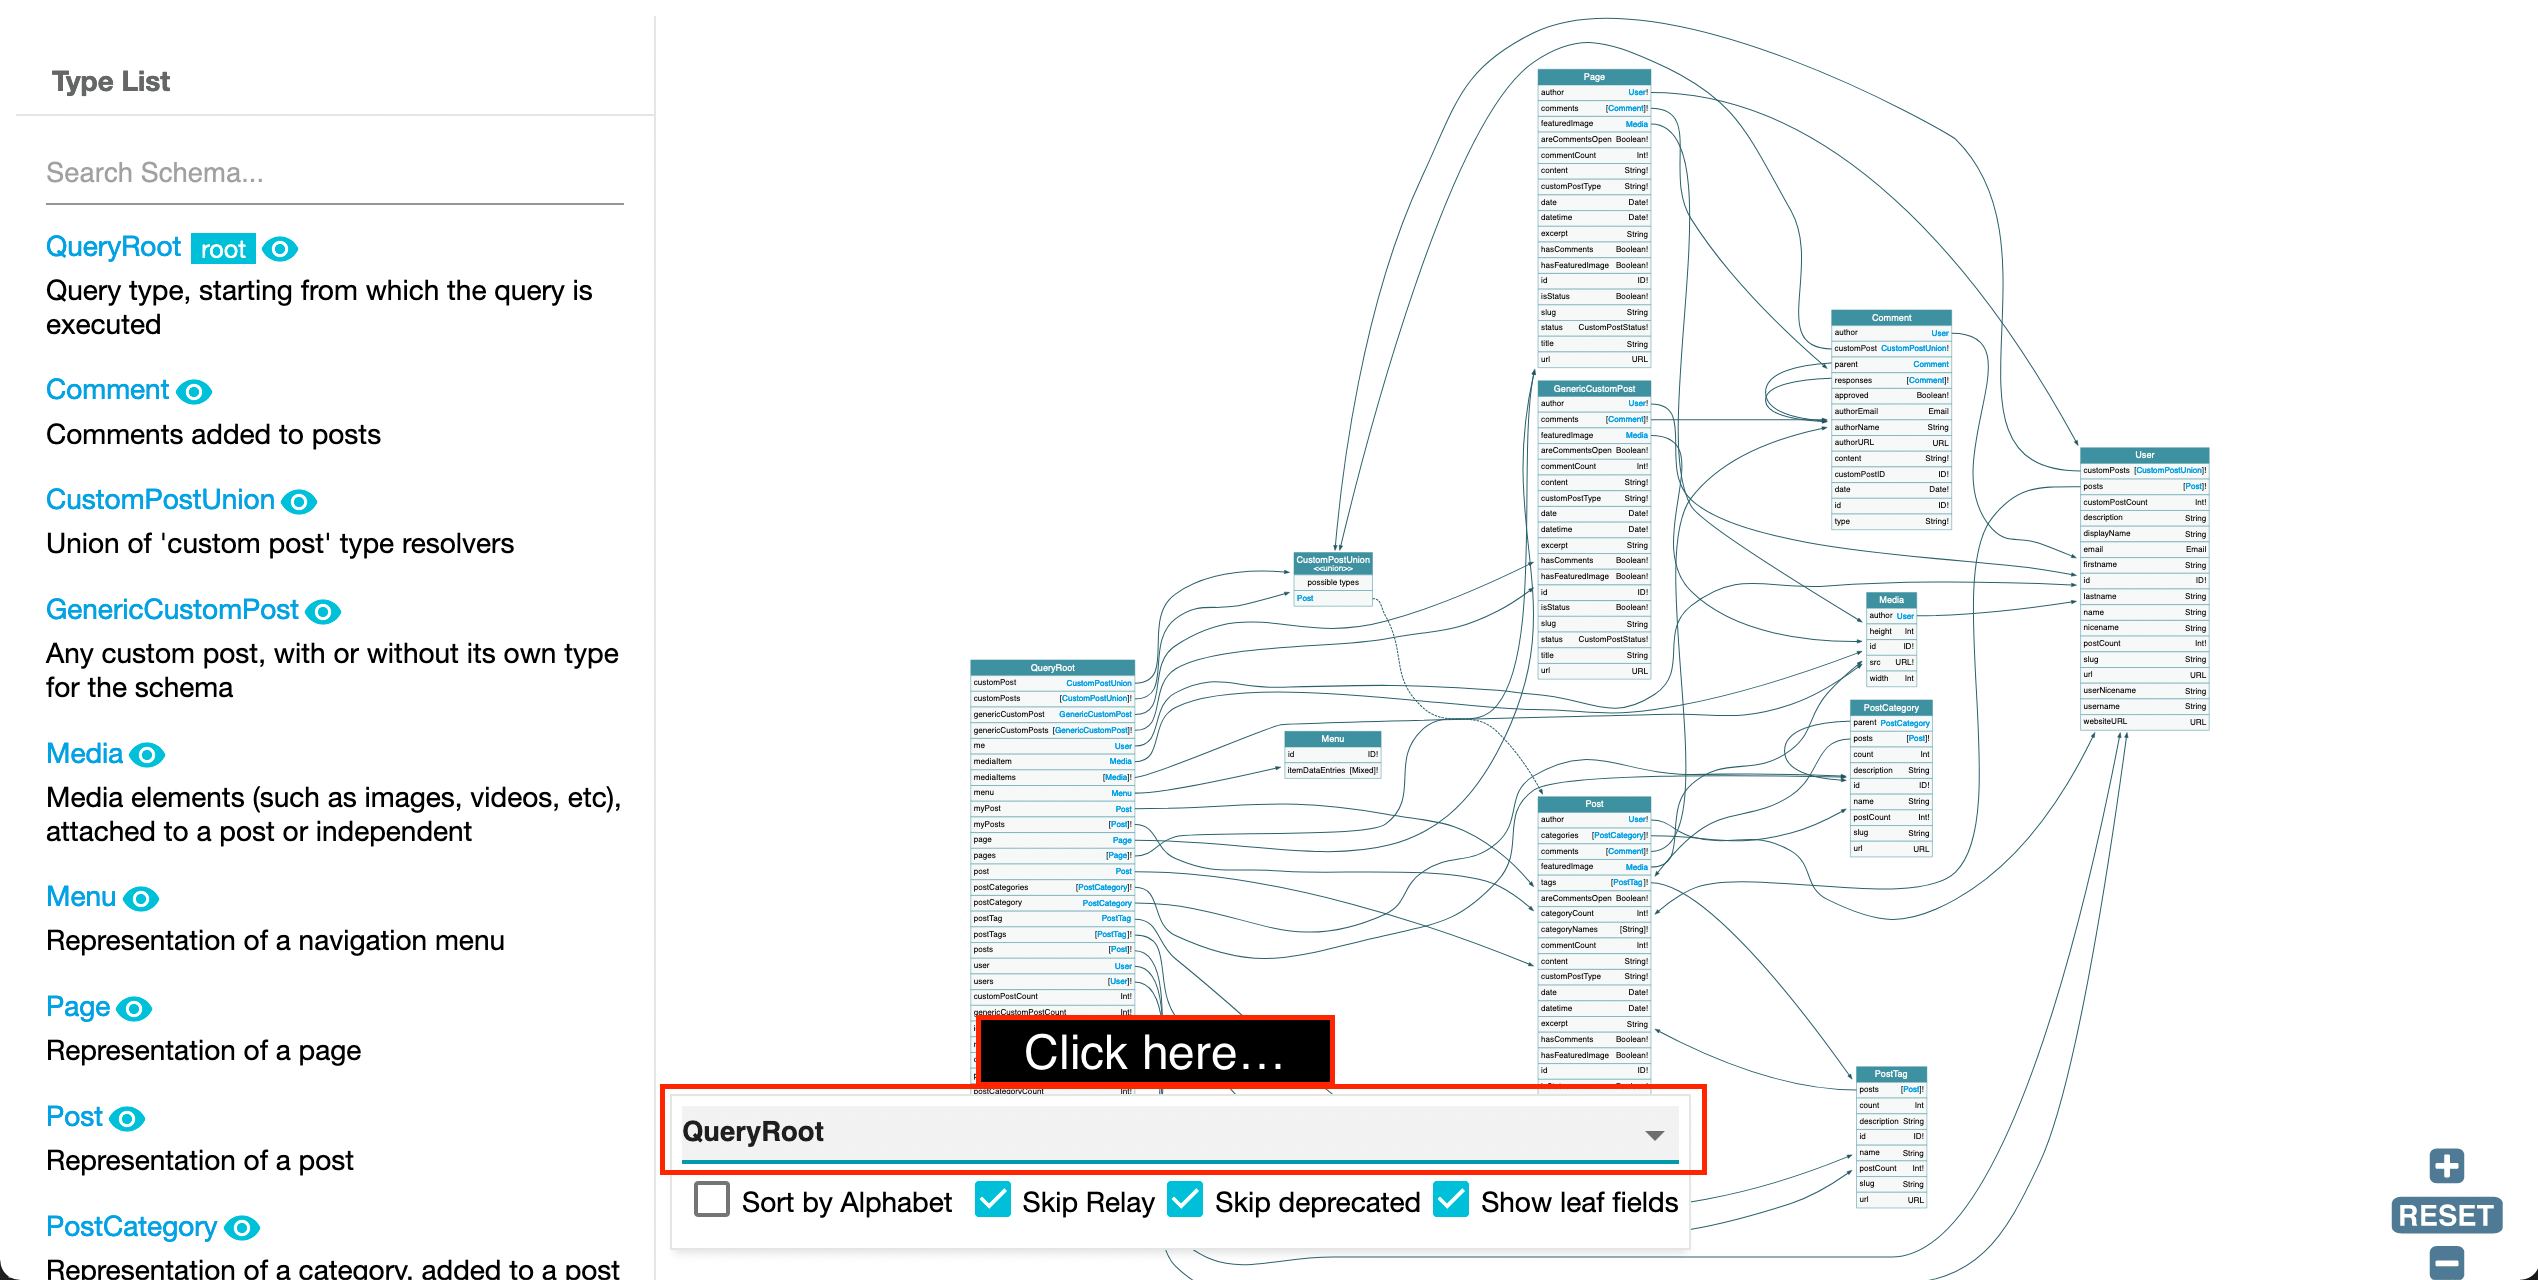
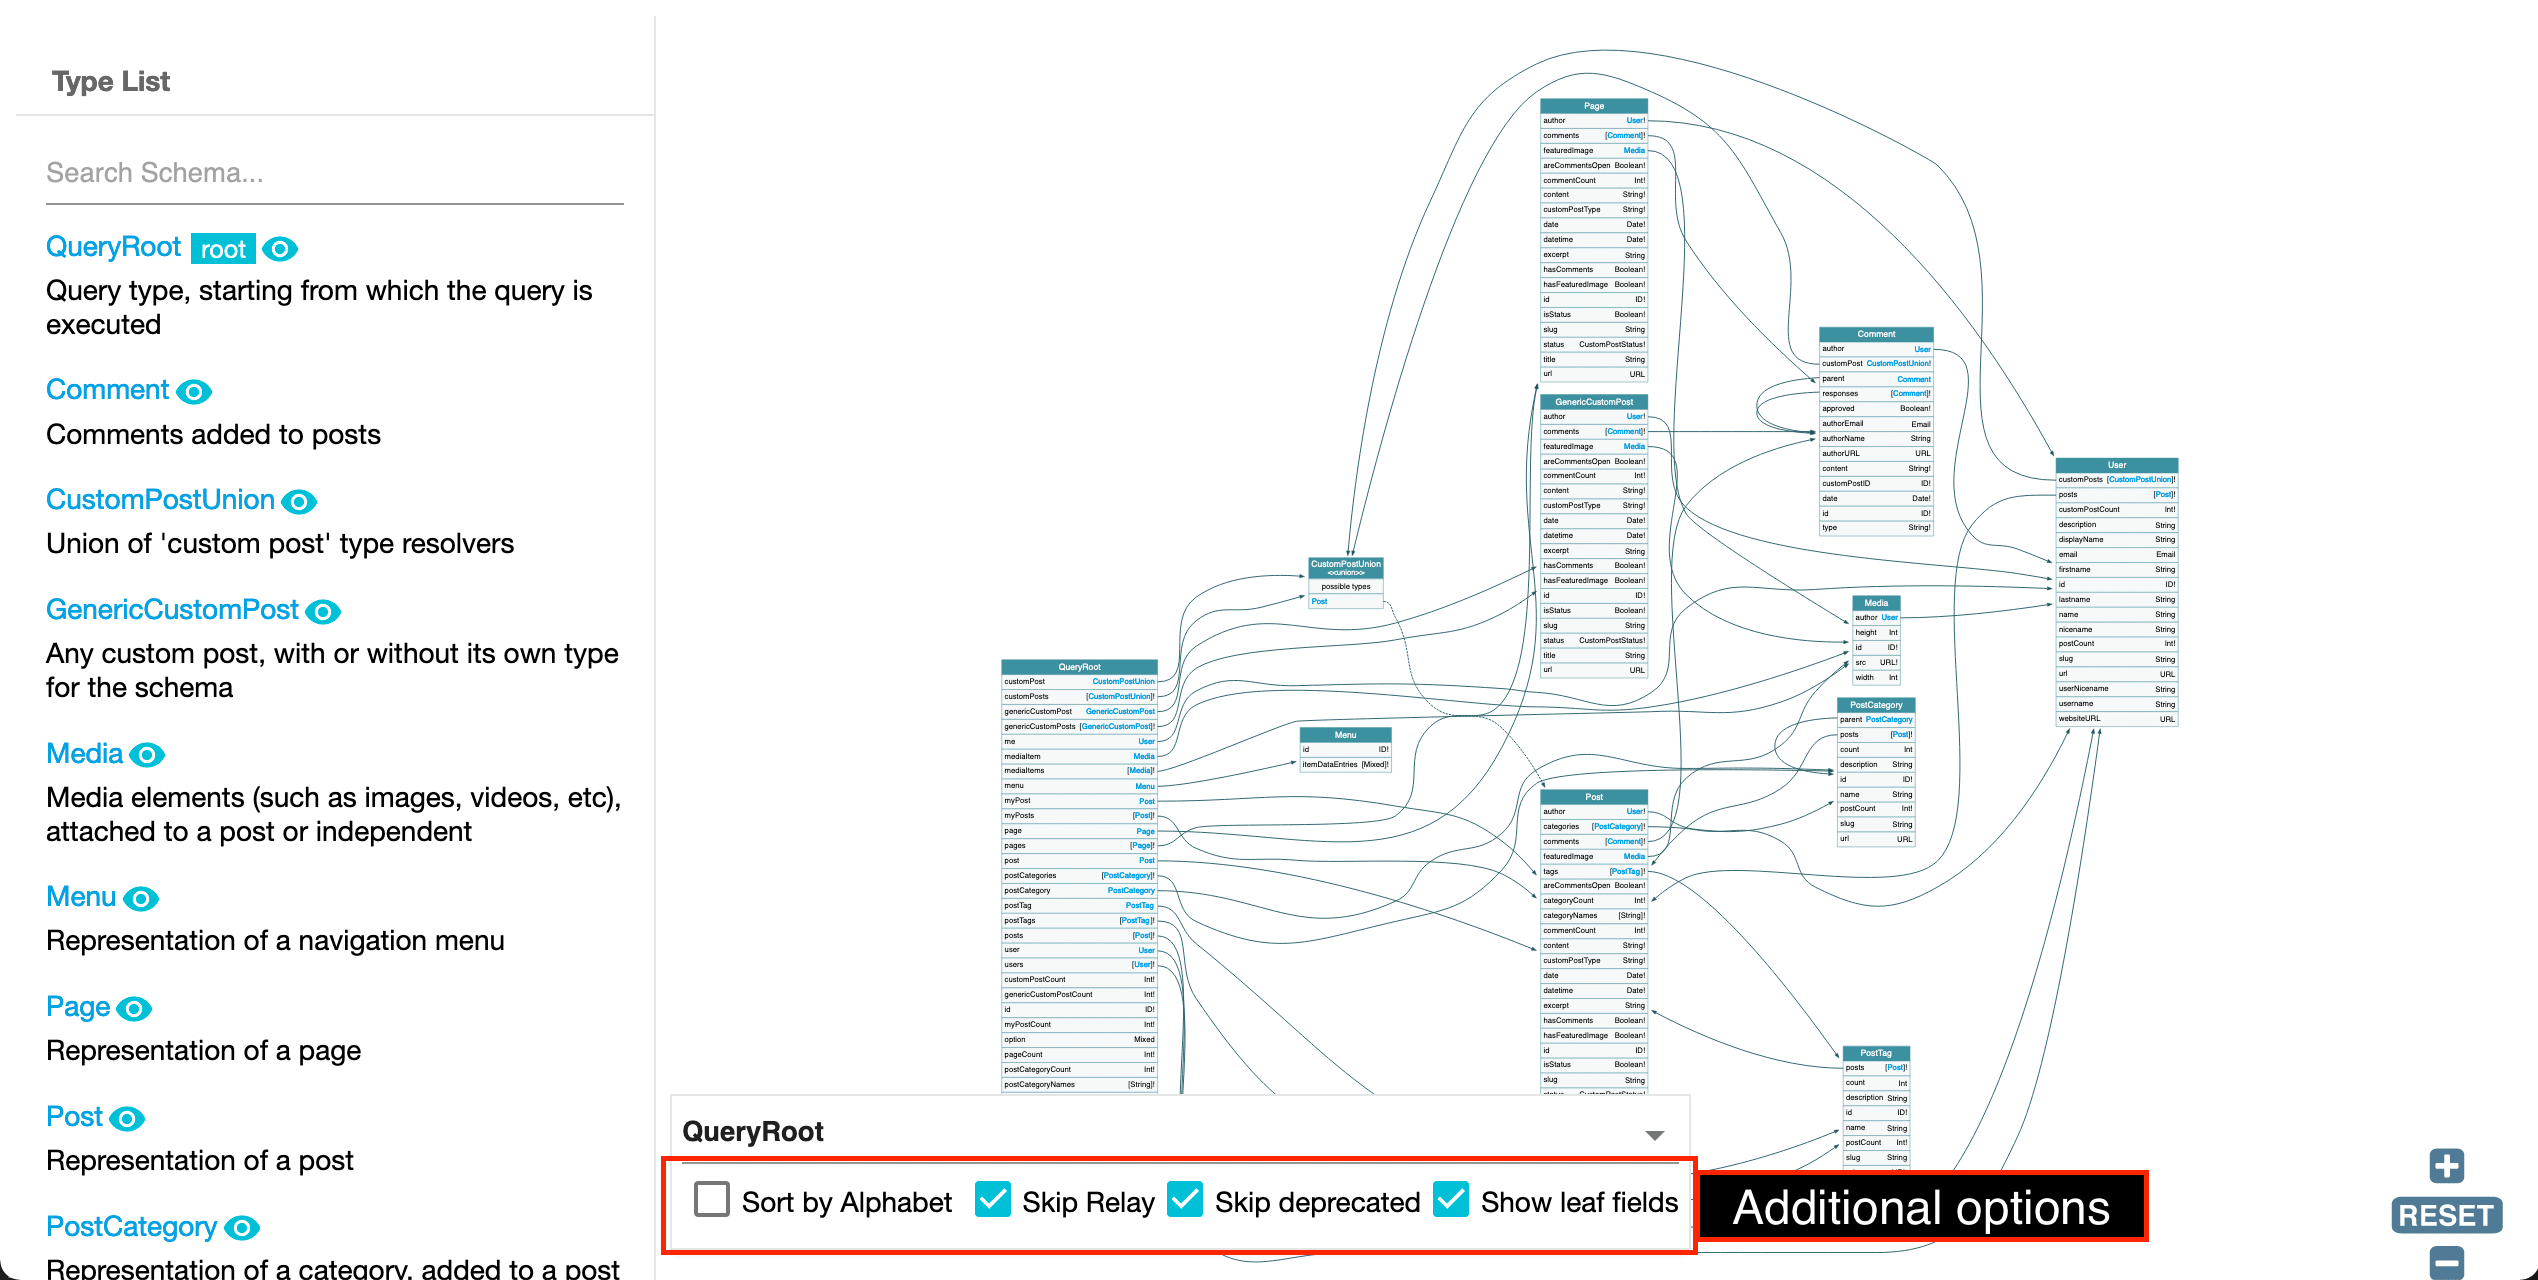
Voyager provides a birds-eye view of the GraphQL schema:
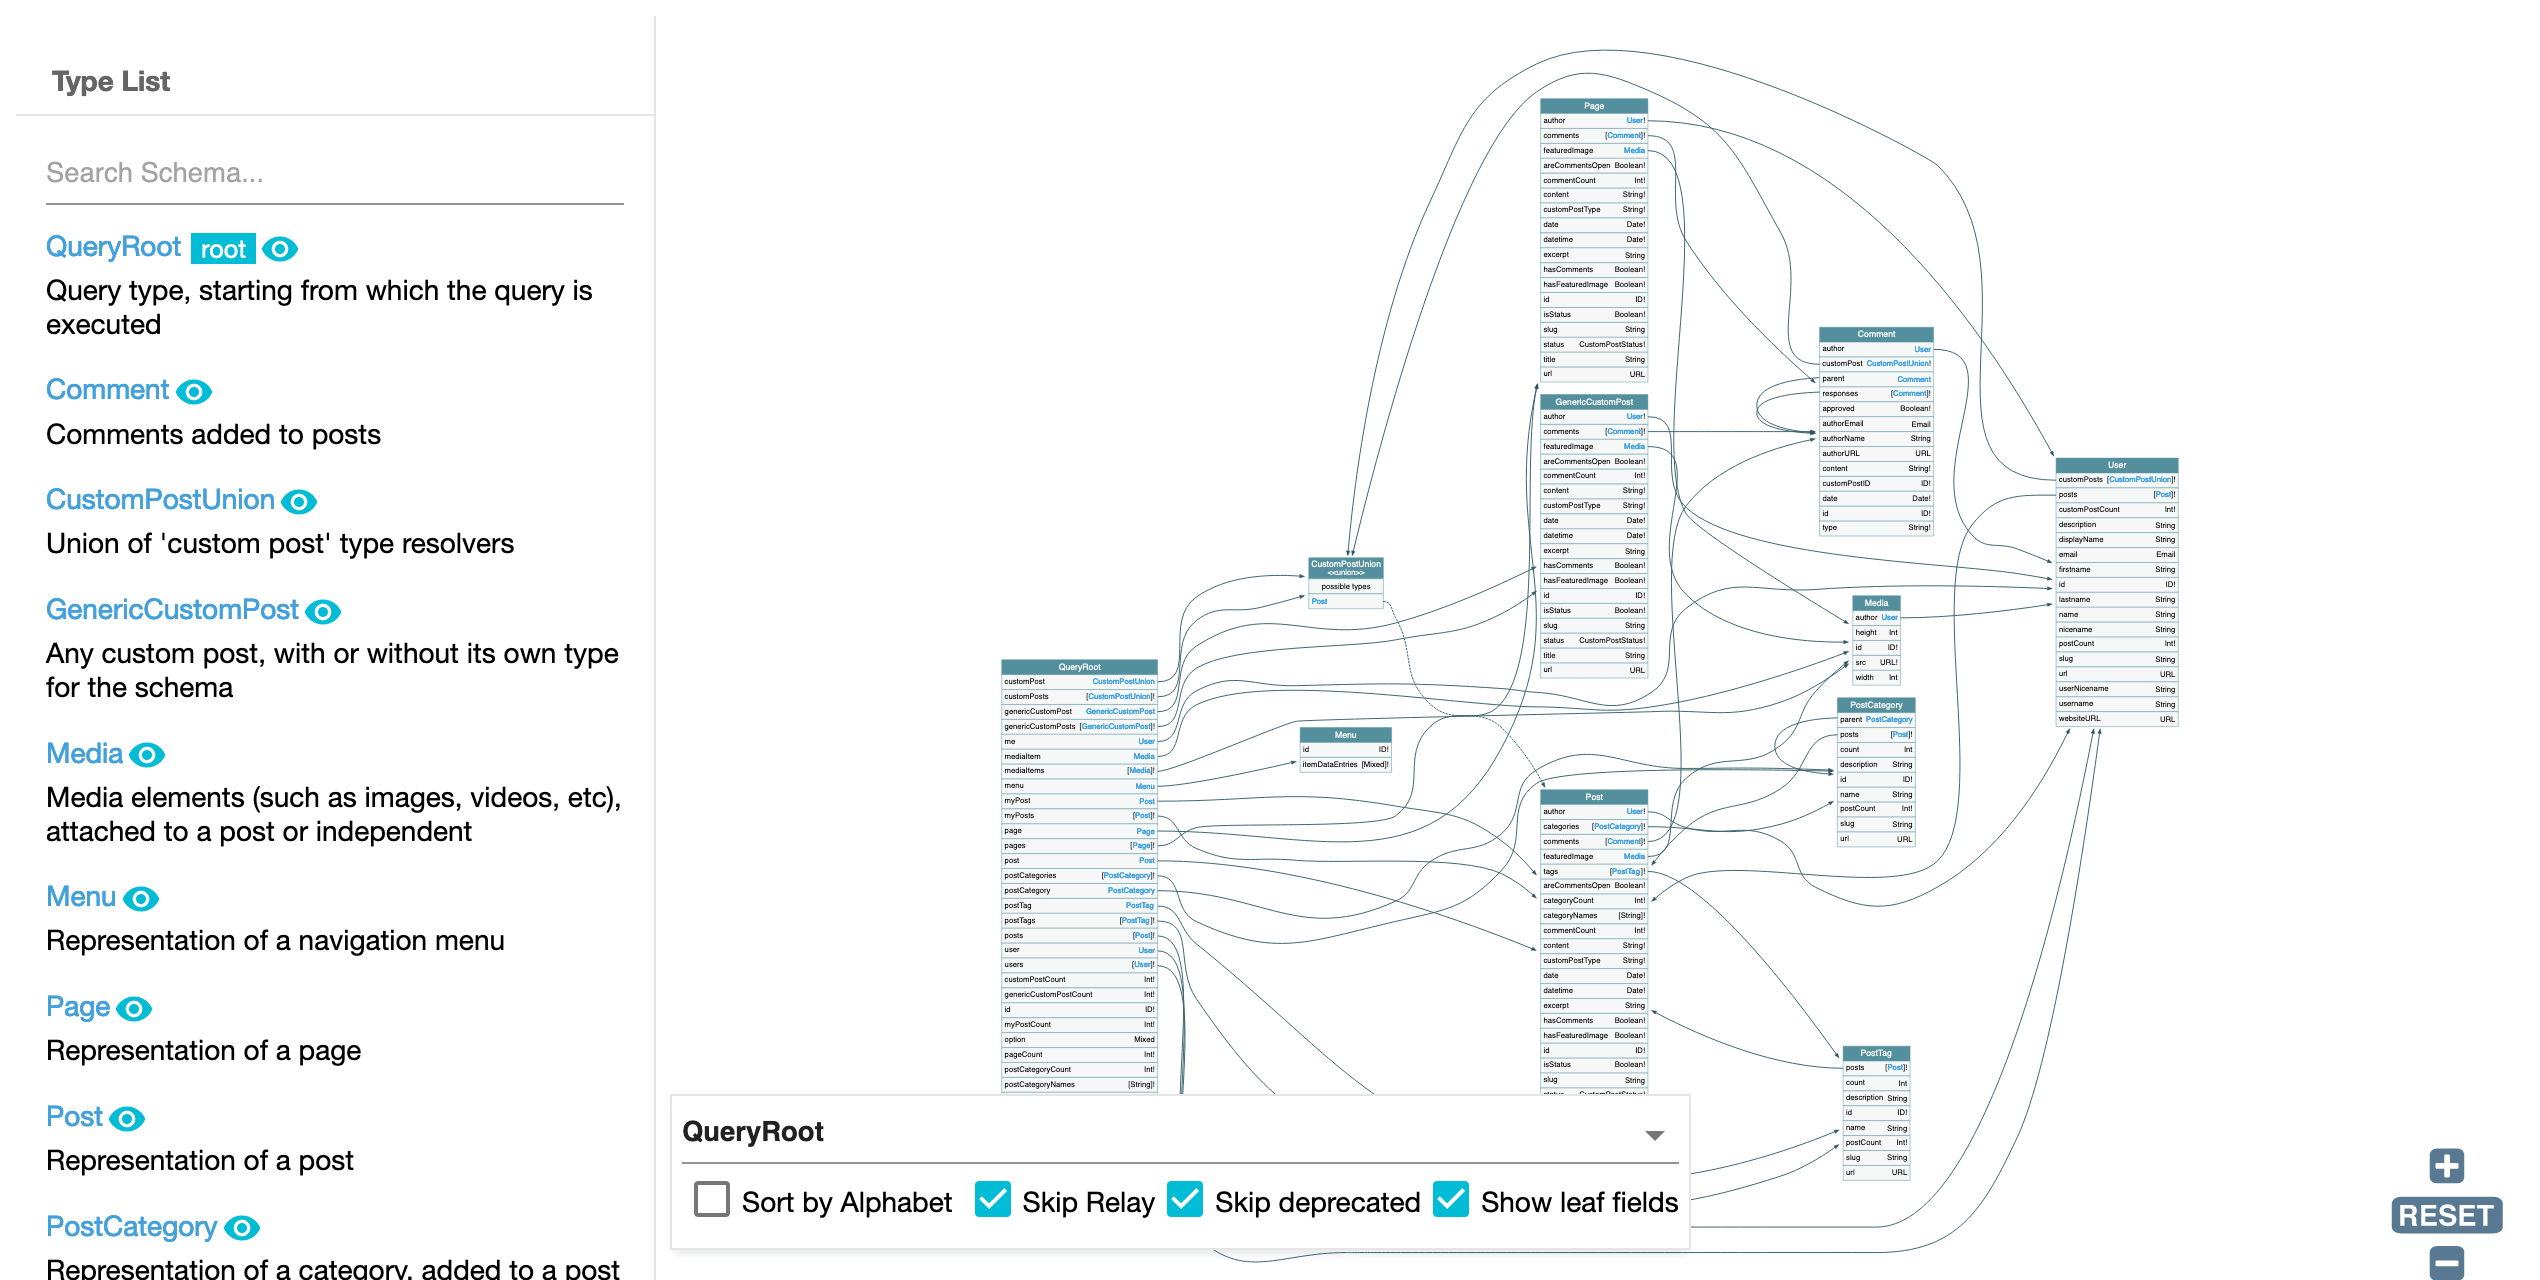
It makes it simple to understand how all elements in the schema relate to each other, using arrows to show the connections between types:
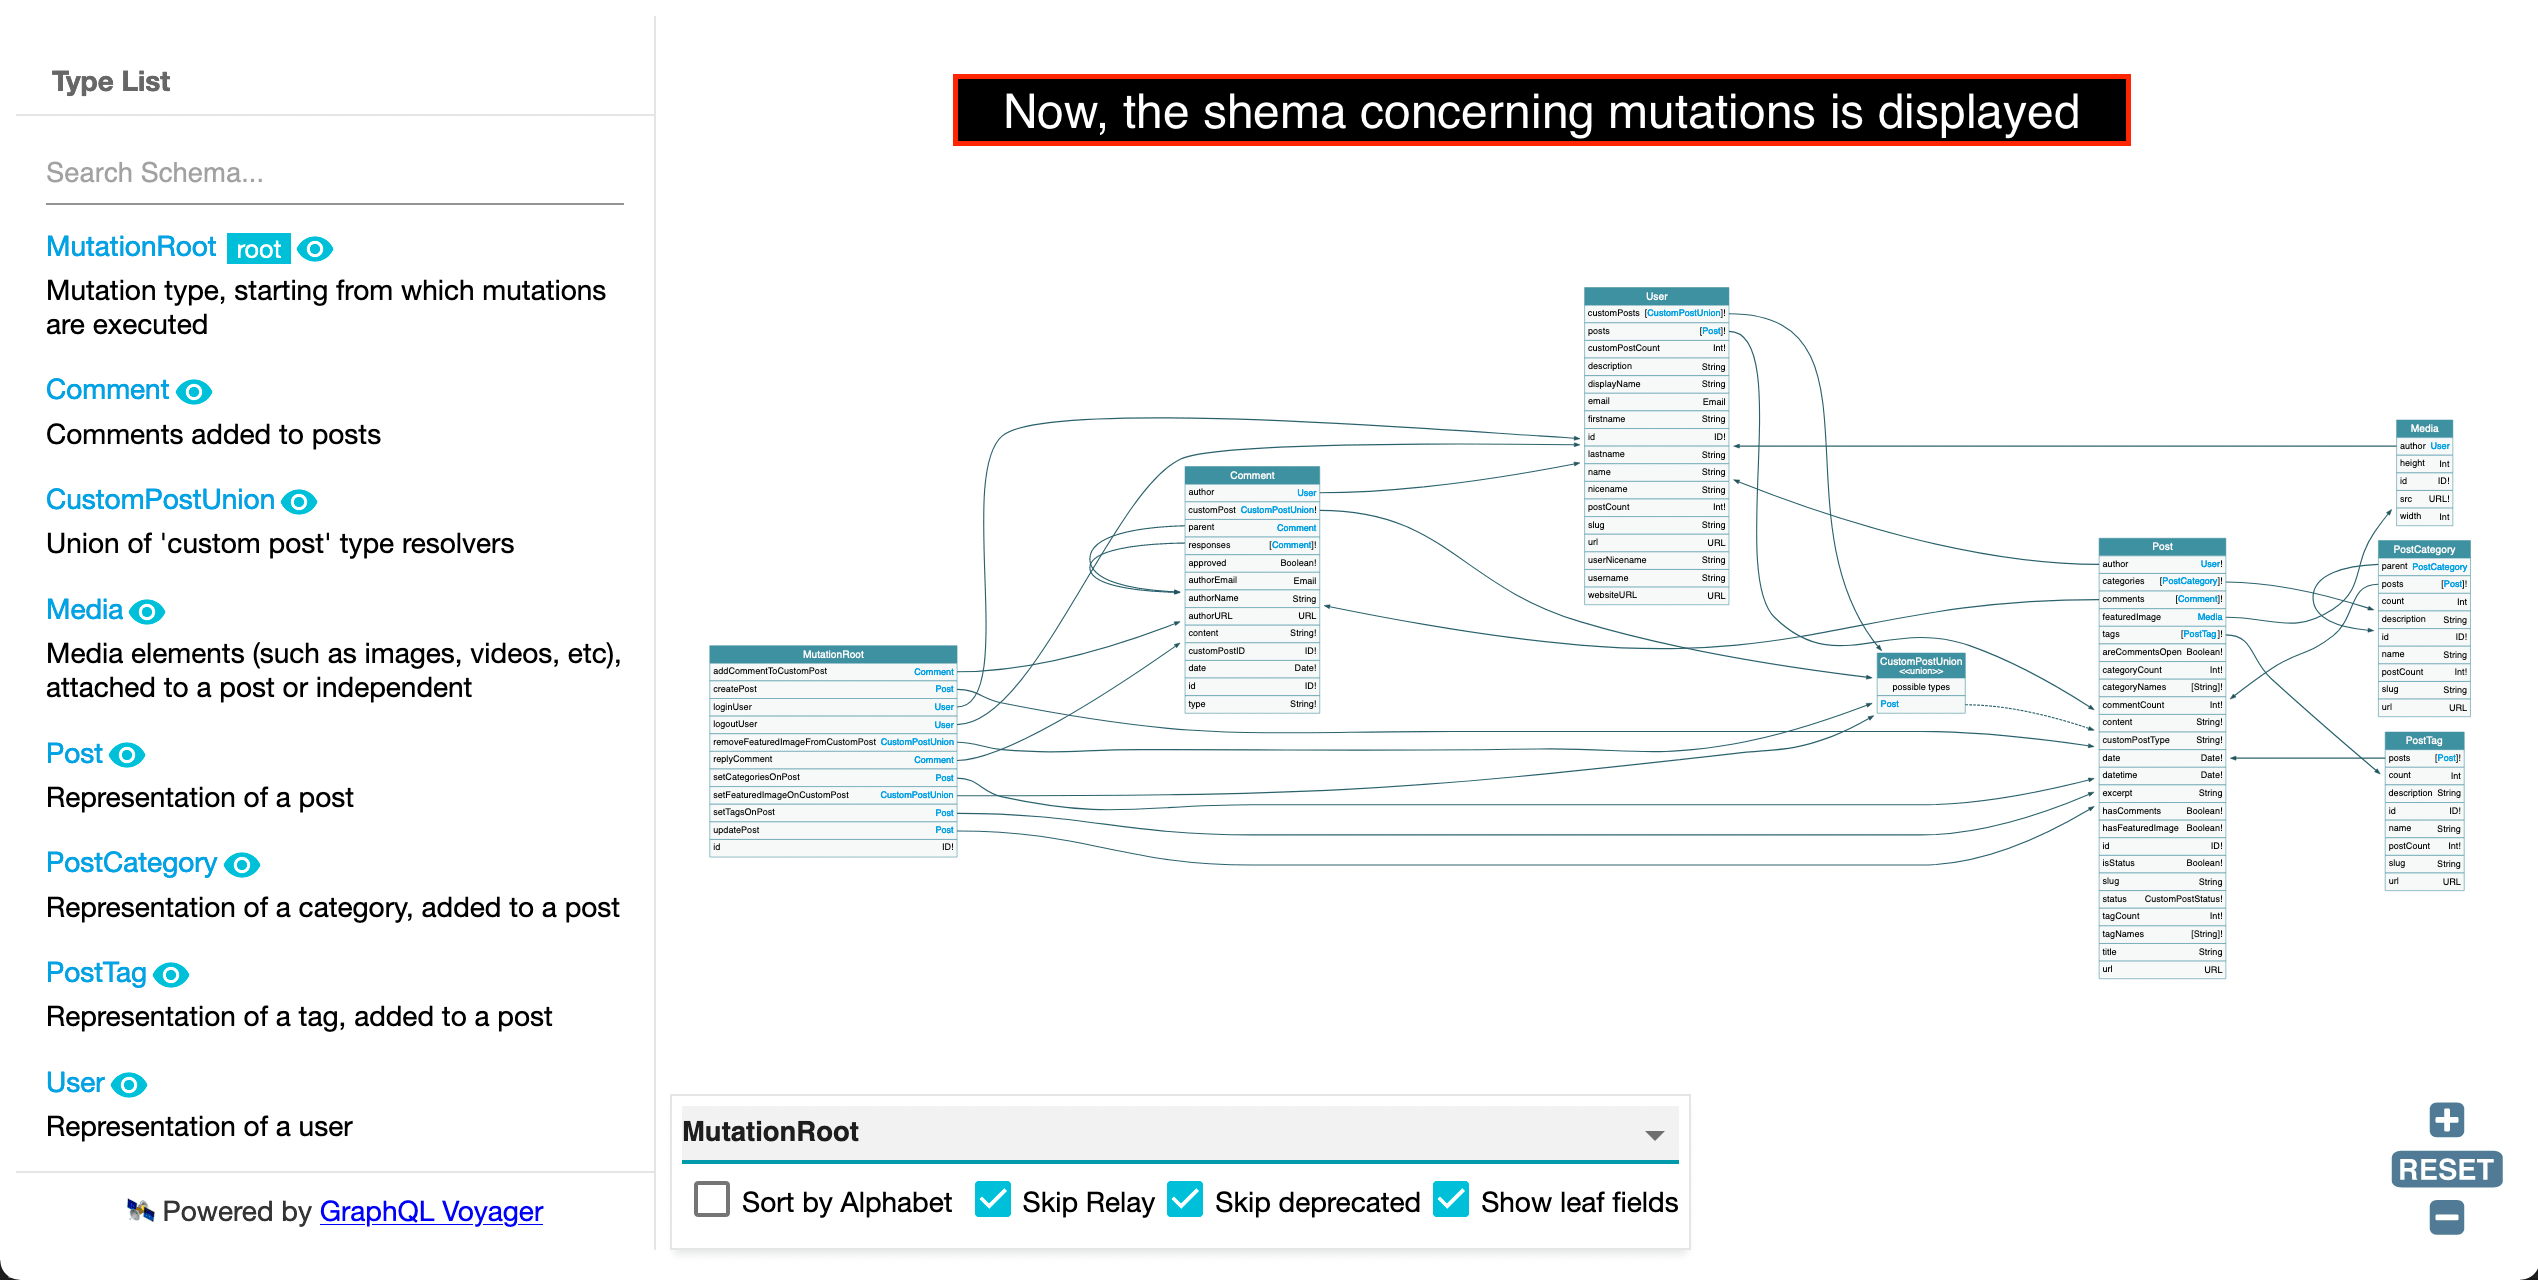
The schema has a starting point, which is a type from which all relationships are calculated. By default, this is the query root (in this case, handled via the QueryRoot type), which is indicated in the floating panel at the bottom. To visualize the schema around mutations, we can select the corresponding mutation root type (in this case, MutationRoot):

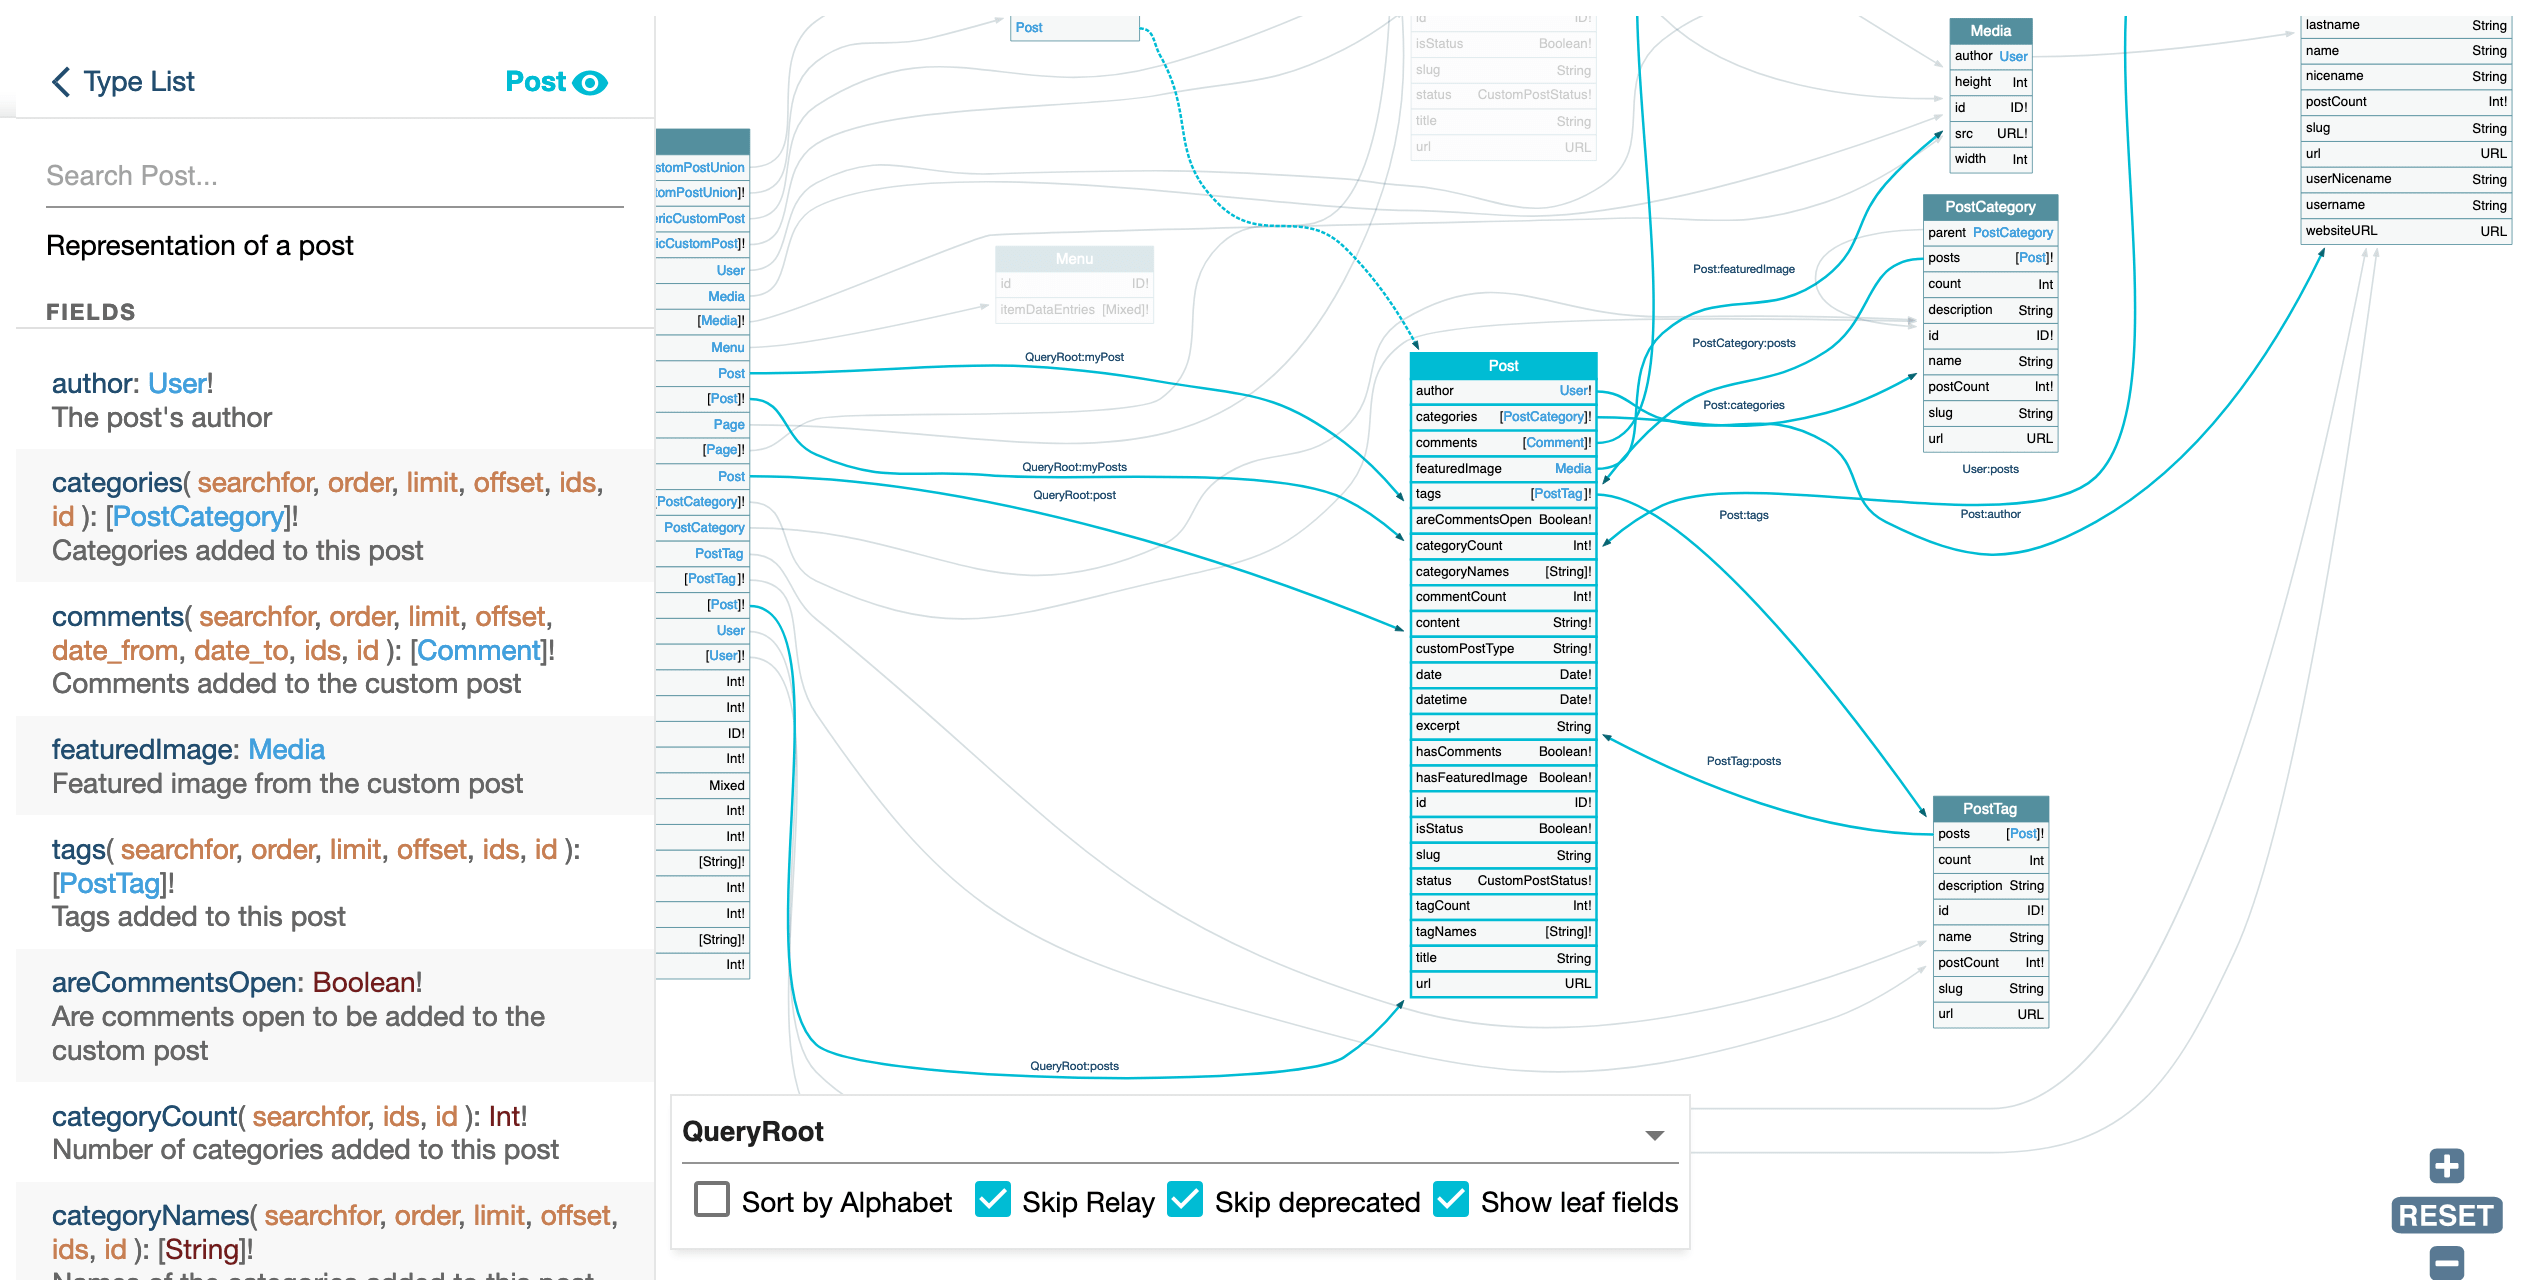
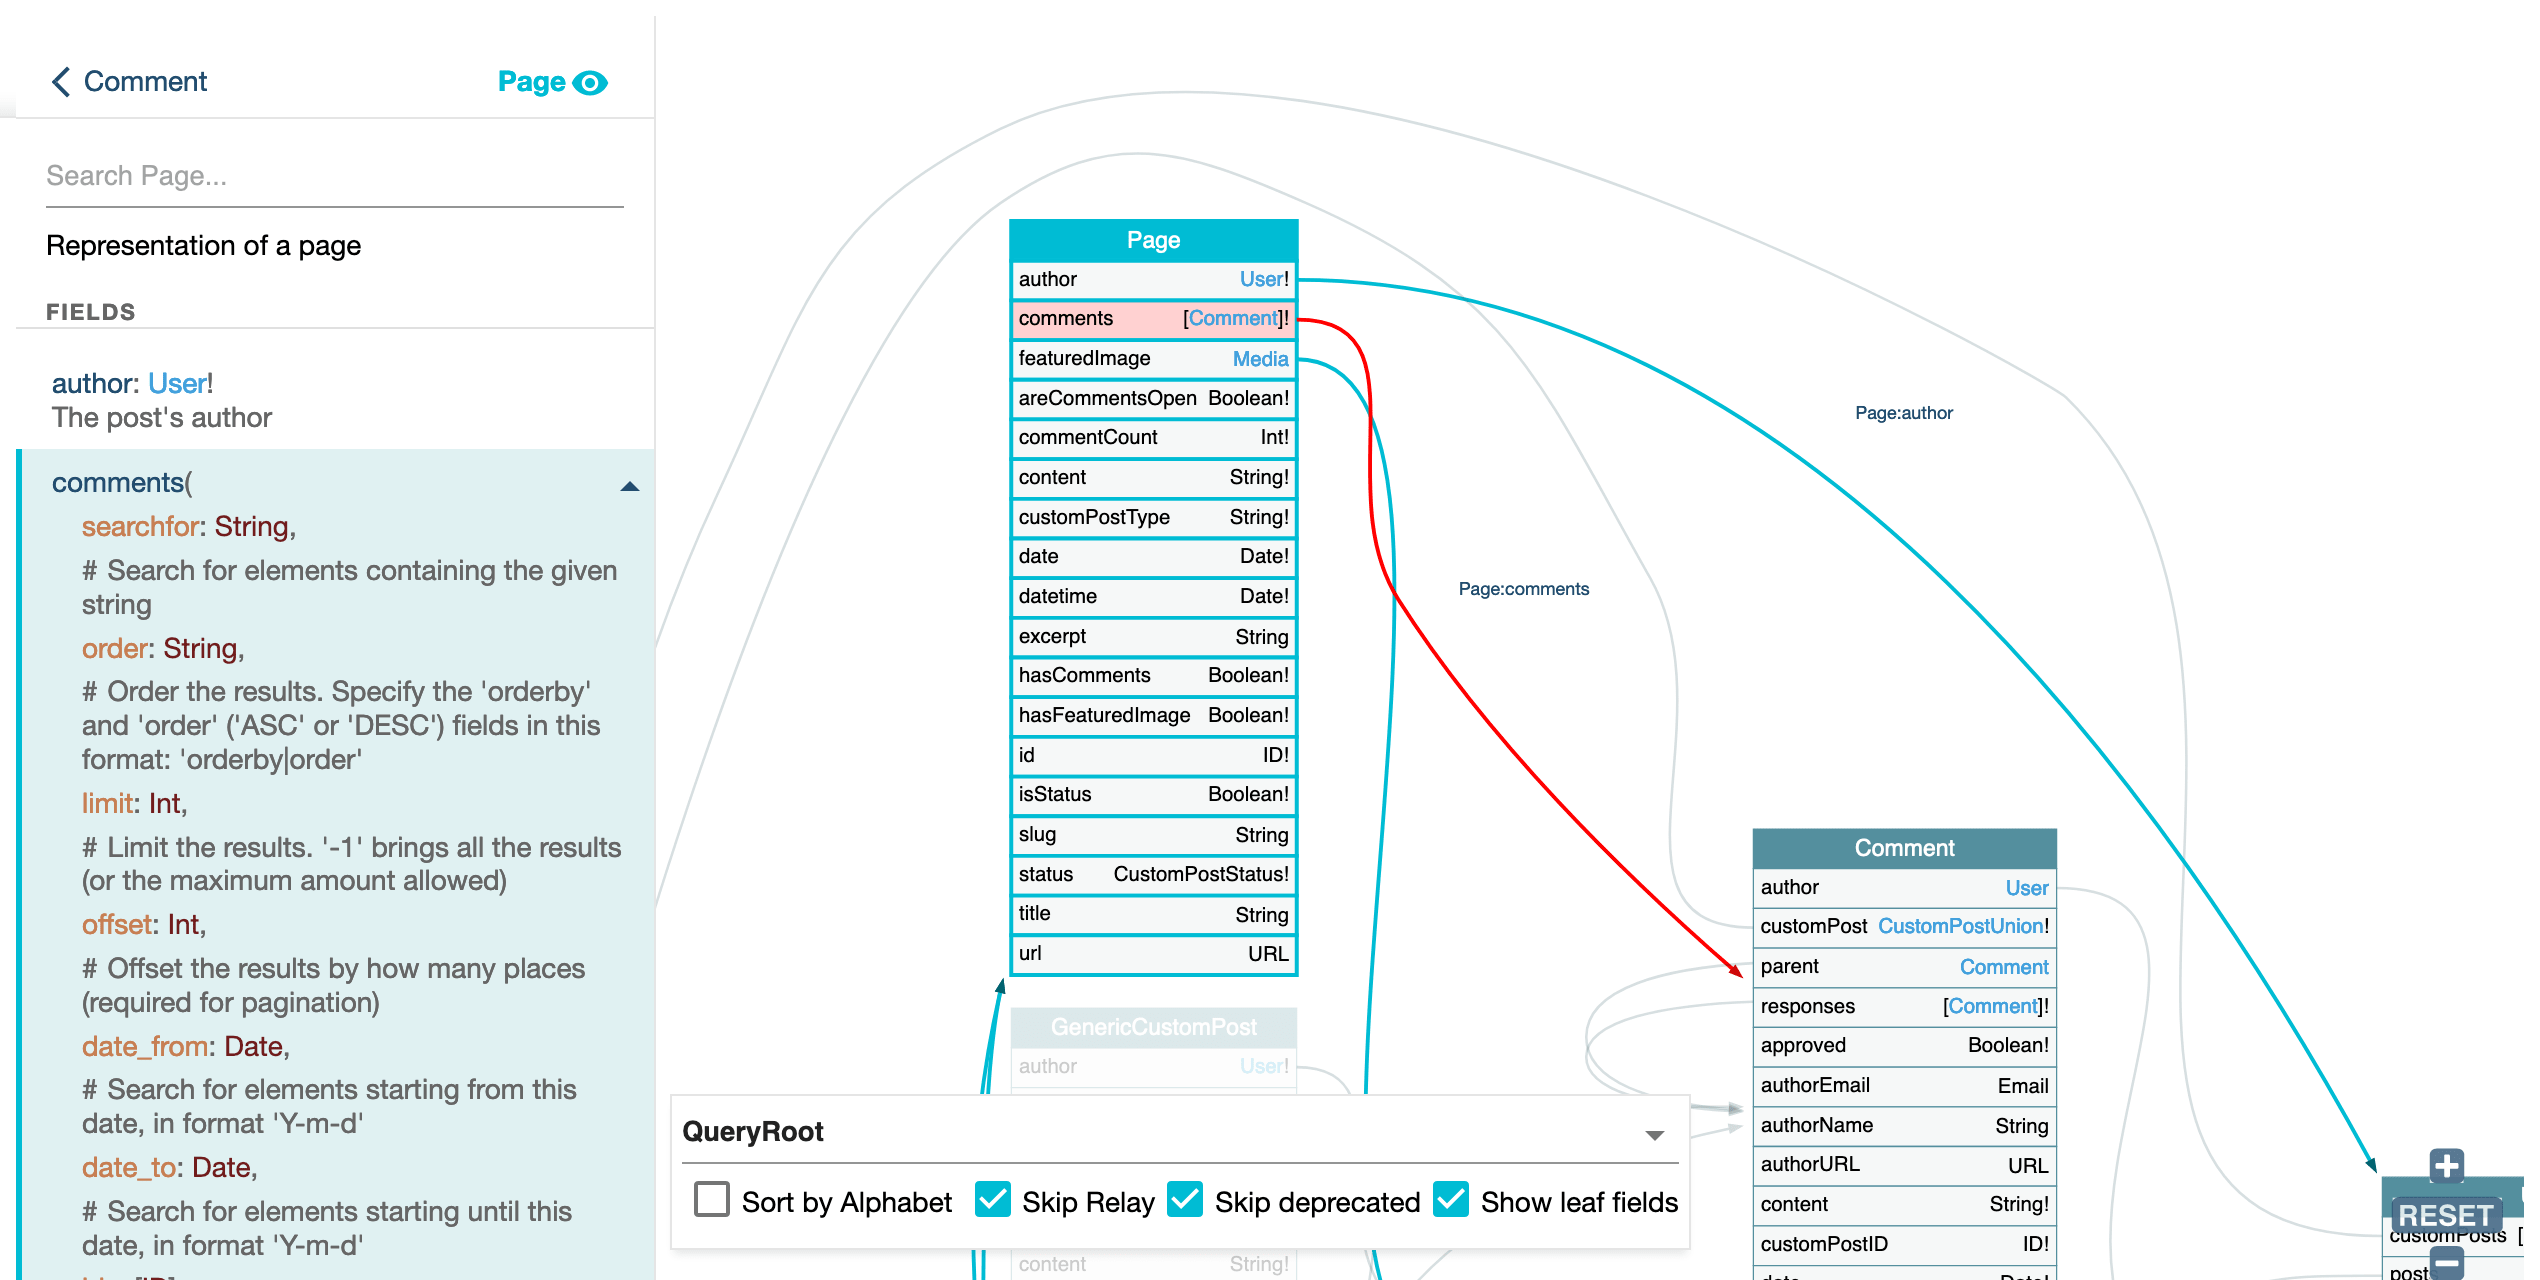
Clicking on a type on the schema will highlight its connections and display the metadata for its fields (the same outcome happens when clicking on the type's name on the left-side panel):
The search input on the left-side panel enables to filter the schema elements:
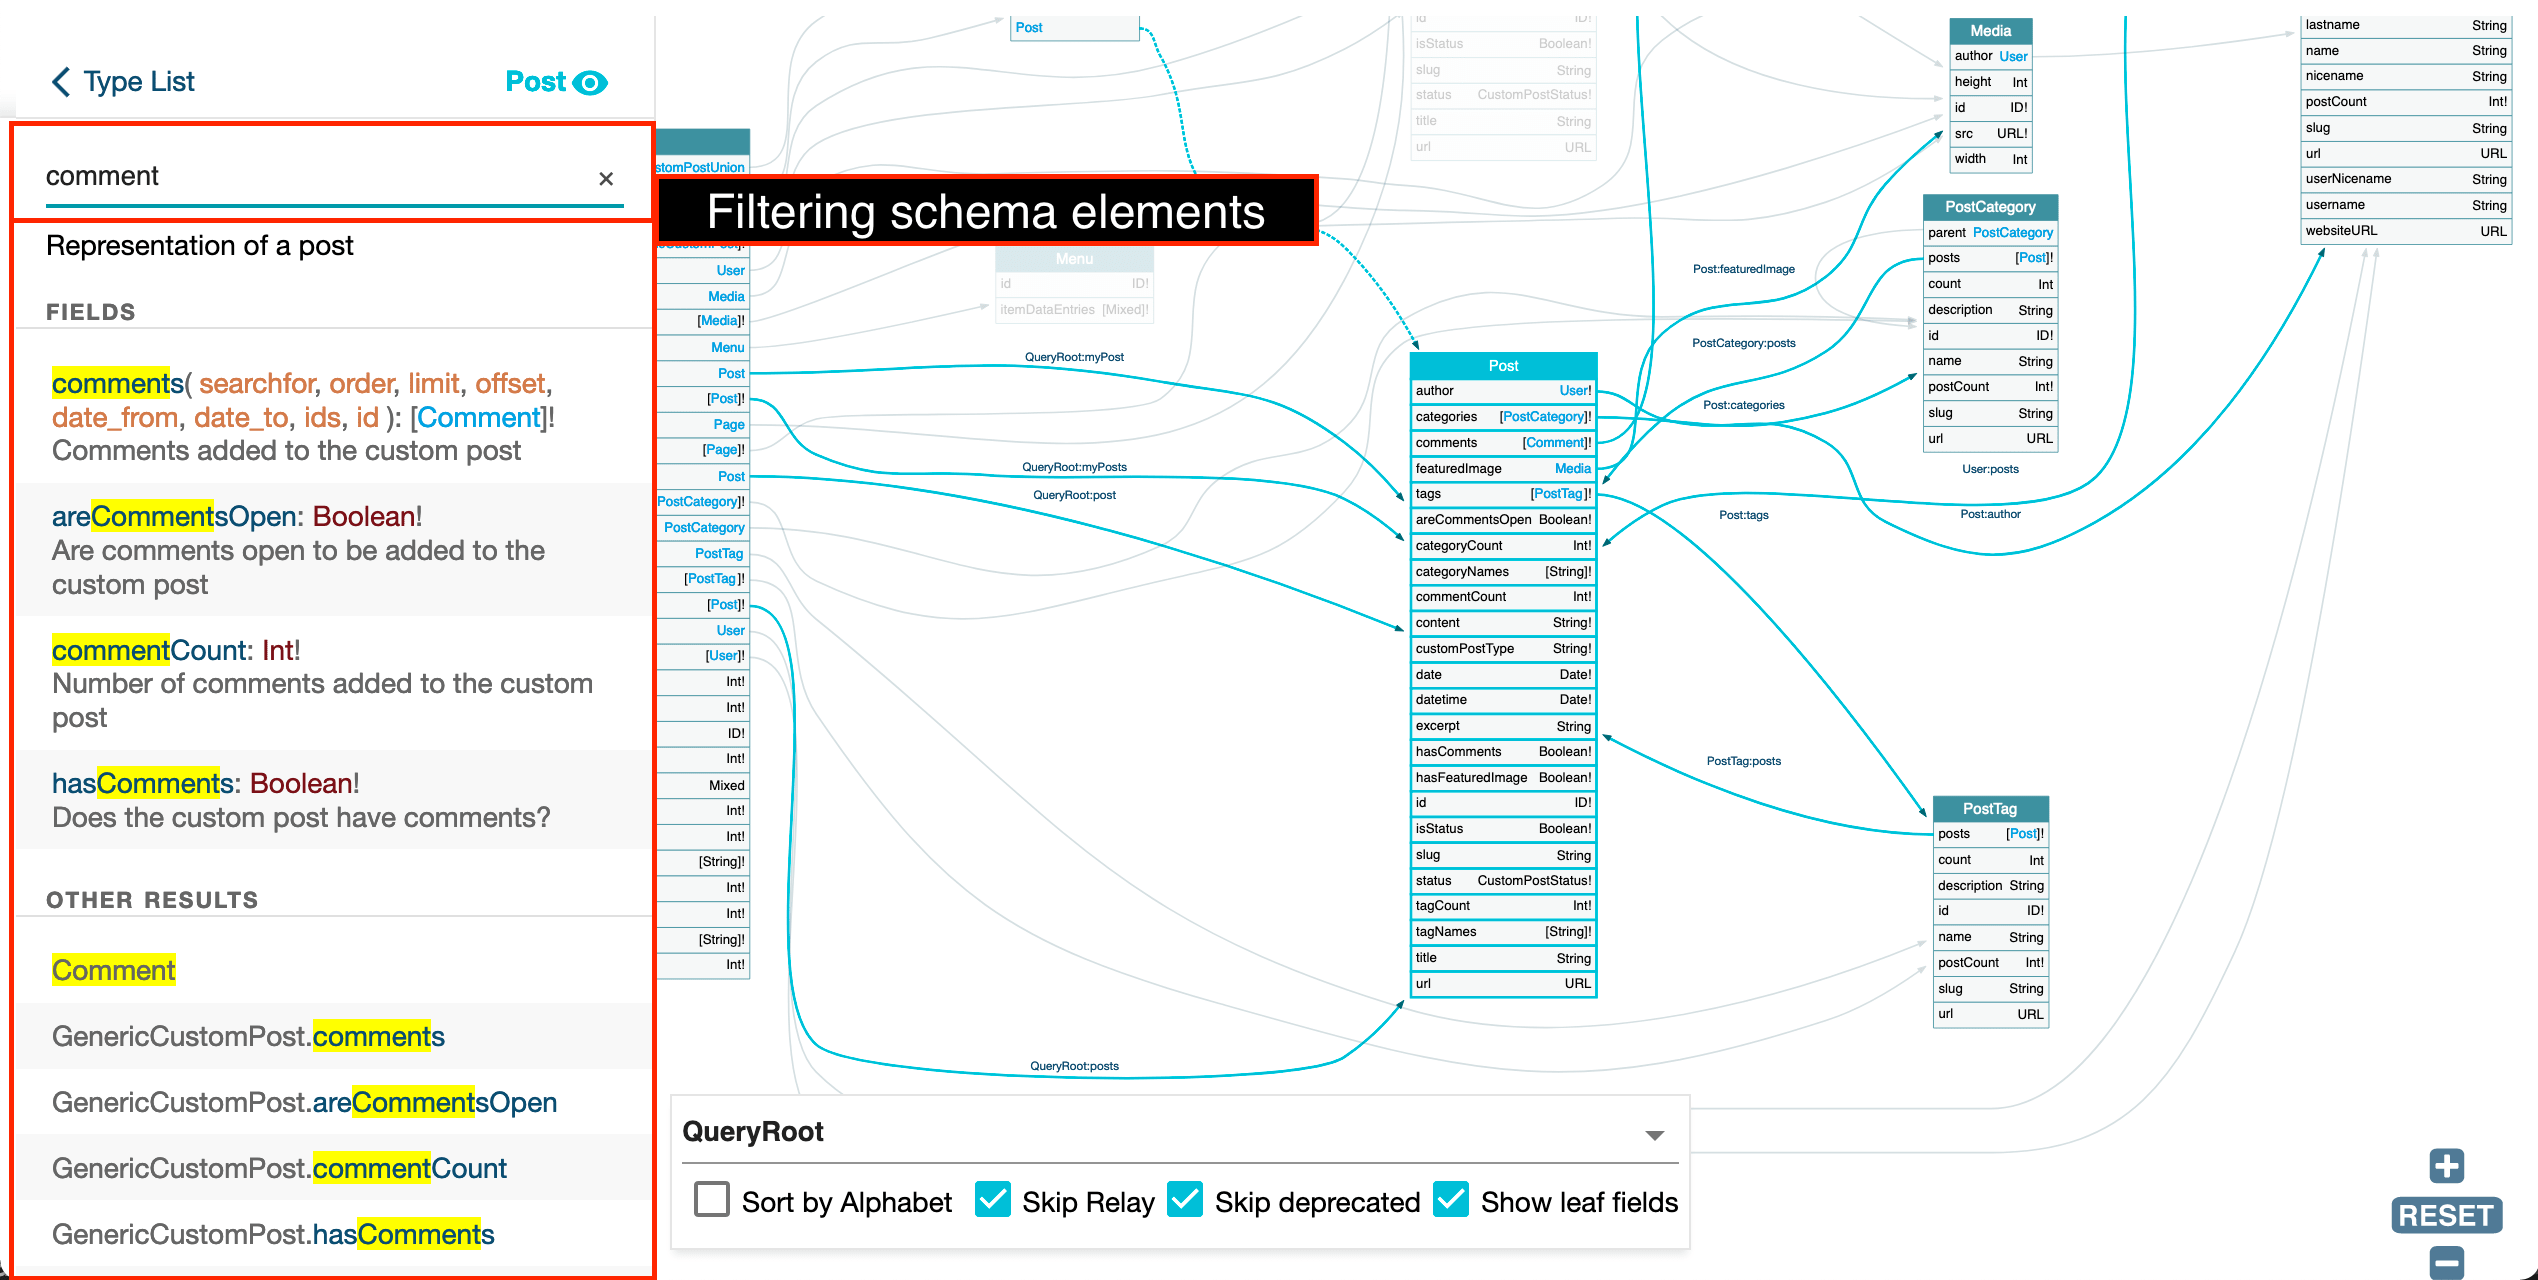
Clicking on a connection will highlight it, both in the schema and on the left-side panel:
We can use the mouse (and, to some extent, the buttons on the bottom-right of the screen) to navigate the graph, zooming in and out, moving in any direction, and focusing on elements:
On the floating panel on the bottom, we have a few additional options:
- "Sort by alphabet" alphabetically sorts all fields in each type
- "Skip Relay" removes Relay's wrapper classes
- "Skip deprecated" hides all deprecated fields
- "Show leaf fields" displays all fields which are not a connection
Wrapping up
The GraphiQL and GraphQL Voyager clients provide pretty useful features, enhancing GraphQL's development experience. These tools allow us to better understand the schema, improve the collaboration with team members, and integrate our APIs within the application in a shorter amount of time. Now that you've seen how to use them, I hope you're able to leverage them to improve your development workflow using GraphQL. I hope you find them useful!