Building a Weather Application Using Vue, StepZen, and Express

 Godwin Alexander
Editor's Note: We welcome Godwin Alexander to the StepZen blog to share his project to combine weather and location data in a new weather application. The GitHub repo for this project can be found here.
One of these reasons why GraphQL is a popular specification is that the client can query for just what is needed, and get an appropriate response with no extra data. StepZen takes this GraphQL experience to another level by allowing developers to connect any combination of data sources – including your APIs, and third-party APIs to produce a single endpoint.
In this tutorial, we build a weather application using StepZen, Vue, and Express. We’ll see how to combine multiple data sources, APIs in our case, to produce a single endpoint that can be queried by a client to get their weather data.
What you’ll need for this tutorial
- Basic knowledge of Vue
- Working Knowledge of JavaScript
- Node.js
What we'll cover
- Getting started with StepZen
- Building a GraphQL schema for REST API using StepZen
- Setting up a configuration file
- Connecting multiple APIs using StepZen @materializer
- Setting up an Express endpoint to make GraphQL query
- Setting up a Vue application
- Connecting to Express endpoint from the Vue frontend
Getting started with StepZen
-
Sign up to create a free StepZen account.
-
Install the StepZen CLI. (The CLI gives you access to commands required for running and managing your StepZen application.)
npm install -g stepzen
- Login to StepZen
stepzen login
You can get the credentials from your StepZen dashboard. We should be ready to start our project now.
- Creating a StepZen application
Run the following command to construct our StepZen application:
mkdir stepzen && cd stepzen && touch location.graphql weather.graphql index.graphql
Building a GraphQL schema for a REST API using StepZen
To access location data, we'll use IP-API, and to get weather data, we'll use the OpenWeather Weather API. The former does not require authentication, but the latter does, so sign up and obtain your credentials.
- Open the
location.graphqlfile and add the lines below.
    type Query {
      currentLocation: JSON
        @rest(
          endpoint: "http://ip-api.com/json/"
          headers: [{ name: "", value: "" }]
        )
    }
The @rest directive makes the call to REST APIs. We've also set the response type to JSON, which will be changed shortly.
- Add the lines below to the
index.graphqlfile.
    schema @sdl(files: ["location.graphql", "weather.graphql"]) {
      query: Query
    }
- Run
stepzen start --dashboard=localin your terminal to start your StepZen application.
Provide appropriate responses to the prompts. Unless there are any errors, your app should be running on the specified port. Open up the localhost link that is displayed in the terminal after running stepzen start --dashboard=local and you should see a GraphiQL browser in your browser.
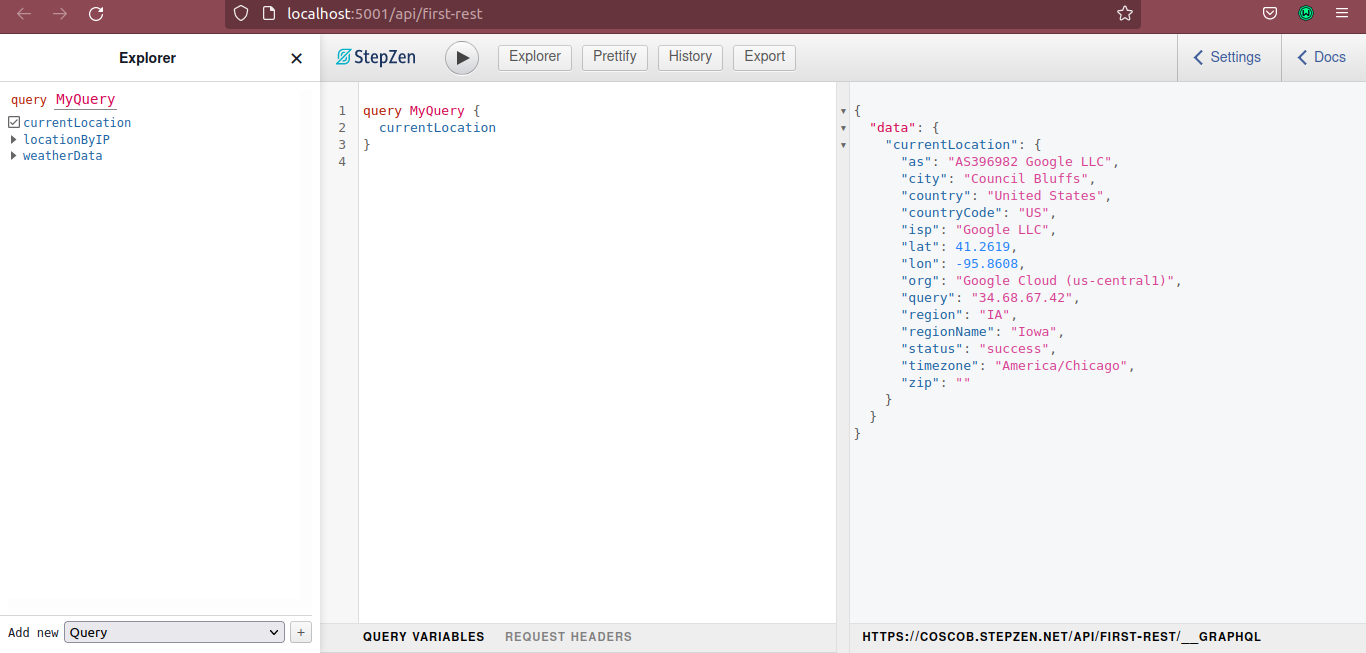
The default way to test your GraphQL endpoint is from the StepZen dashboard explorer. You can get a local GraphiQL IDE by running
stepzen startwith the--dashboard=localflag.
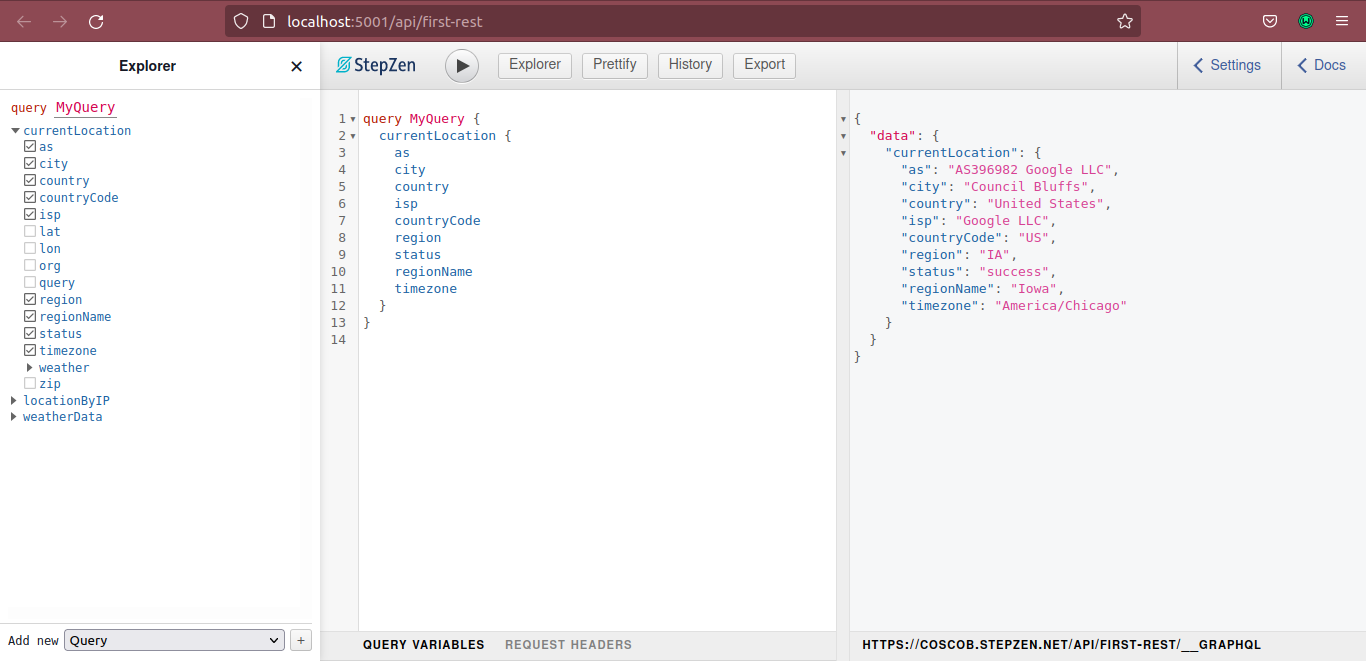
-
To convert the
JSONresponse toSDL(schema definition language), copy the JSON response into theJSON2SDL tool. -
Replace the content of the
location.graphqlfile with the following code.
    type LocationData {
      as: String
      city: String
      country: String
      countryCode: String
      isp: String
      lat: Float
      lon: Float
      org: String
      query: String
      region: String
      regionName: String
      status: String
      timezone: String
      zip: String
    }

    type Query {
      currentLocation: LocationData
        @rest(
          endpoint: "http://ip-api.com/json/"
          headers: [{ name: "", value: "" }]
        )
    }

    type Query {
      locationByIP(ip: String!): LocationData
        @rest(
          endpoint: "http://ip-api.com/json/$ip"
        )
    }
Passing our JSON response to JSON2SDL yields the LocationData type, which is returned by both queries. The second query, locationByIP, takes a string variable and uses it to make an API call.
Querying for specific data is now possible as follows:
- Add the following to the
weather.graphqlfile:
    type Clouds {
      all: Int
    }
    type Coord {
      lat: Float
      lon: Float
    }
    type Main {
      feels_like: Float
      humidity: Int
      pressure: Int
      temp: Float
      temp_max: Float
      temp_min: Float
    }
    type Sys {
      country: String
      id: Int
      sunrise: Int
      sunset: Int
      type: Int
    }
    type OneWeather {
      description: String
      icon: String
      id: Int
      main: String
    }
    type Wind {
      deg: Int
      speed: Float
    }
    type WeatherData {
      base: String
      clouds: Clouds
      cod: Int
      coord: Coord
      dt: Int
      id: Int
      main: Main
      name: String
      sys: Sys
      timezone: Int
      visibility: Int
      weather: [OneWeather]
      wind: Wind
    }

    type Query {
        weatherData(lat: Float!, lon: Float!): WeatherData
        @rest(
          endpoint: "https://api.openweathermap.org/data/2.5/weather?lat=$lat&lon=$lon&appid=$api_key",
          configuration: "owm_config"
        )
    }
Keep in mind that to get to the above code, we have to get the JSON response like we did with the location API, then we pass the response to json2sdl to get the SDL representation.
StepZen also supports importing a REST API as GraphQL using
stepzen import curl <YOUR_ENDPOINT>TheweatherDataquery accepts two variables:lat(latitude)andlon(longitude) (longitude). The@rest directivecontains some syntax that we haven't encountered before, so it will be our next topic of discussion.
Setting up a configuration file
If we recall correctly, the openWeather API makes use of API keys, in order not to get our API keys exposed we put them in a configuration file.
Create a config.yaml file, and add these lines of code to it:
    configurationset:
      - configuration:
          name: owm_config
          api_key: Your_open_weather_map_API_key
Replace Your_open_weather_map_API_key with your actual open weather map API key. We can use this configuration in our schema (.graphql) files as follows:
    type Query {
      weatherData(lat: Float!, lon: Float!): WeatherData
        @rest(
          endpoint: "https://api.openweathermap.org/data/2.5/weather?lat=$lat&lon=$lon&appid=$api_key",
          configuration: "owm_config"
        )
Connecting multiple APIs using StepZen @materializer
StepZen lets us connect several APIs for a single request. To connect both the location and weather APIs we use StepZen's @materializer directive.
Open up the location.graphql and add the following code to the LocationData type:
weather: WeatherData @materializer(query: "weatherData")
Now we can get both the location and weather data of the client, with a single API call.
The StepZen @materializer directive allows us to call the WeatherData query at the same time as any of the queries in location.graphql are called. First, the data for the client’s location is retrieved, including the lat and lon fields. The lat and lon fields are then used to retrieve the weather data for the client.
Setting up an Express endpoint to make the GraphQL query
To avoid exposing our API key, it's best to make StepZen calls on the server.
- Install
Expressby running the commands below:
    mkdir server
    touch app.js .env
    npm init -y
    npm install express cors axios dotenv nodemon
Replace the main and script of your package.json file with the following:
     "main": "app.js",
      "scripts": {
        "dev": "nodemon src/app.js"
      }
We’ve also installed
dotenvfor accessing environment variables, andcorsandaxios- for making API calls.
- Edit the
.envfile to contain the following:
    STEPZEN_AUTH=apikey YOUR_STEPZEN_API_KEY
    STEPZEN_ENDPOINT=YOUR_STEPZEN_URL
- Replace
YOUR_STEPZEN_API_KEYwith your actual API key that can be found in your StepZen dashboard. YOUR _STEPZEN_URLis thehttpsaddress you get when you runstepzen start.
- Open up the
app.jsfile and input the following code:
    const express = require('express')
    const cors = require('cors')
    const axios = require('axios')
    const port = 3200
    require('dotenv').config()
    const app = express()
    app.use(cors())
    app.use(express.json())
    app.use(express.urlencoded({ extended: true }))

    app.post('/', async(req, res, next) => {
        try {

            const response = await axios(
                process.env.STEPZEN_ENDPOINT,
                {
                method: 'POST',
                headers: {
                  'Authorization': `${process.env.STEPZEN_AUTH}`,
                },
                data: req.body
            })

            return res.status(200).json(response.data)
        } catch (error) {
            console.log('error', (error.response.data.errors))
        }
    })

    app.listen(port, () => {
        console.log(`App is running on *${port}`)
    })
- Run
npm run devto start your express app.
Setting up a Vue application
Vue is a JavaScript framework for building user interfaces.
- Run the following command to install
vue:
    mkdir client
    npm init vue@latest
- Provide appropriate responses to the prompts, then run the following commands:
    cd <your-project-name>
    npm install
    npm run dev
Your Vue app should be running on the specified port.
Connecting to an Express endpoint from the Vue frontend
To make API calls to the Express endpoint, we must install axios. We’ll also be using bootstrap icons.
- Install axios
npm install axios bootstrap-icons bootstrap-icons-vue
- Edit the content of
main.jsto become as follows:
    import { createApp } from 'vue'
    import { createPinia } from 'pinia'
    import { BootstrapIconsPlugin } from 'bootstrap-icons-vue';
    import App from './App.vue'
    import router from './router'
    const app = createApp(App)
    app.use(createPinia())
    app.use(BootstrapIconsPlugin)
    app.use(router)
    app.mount('#app')
Piniais a store library for Vue.createPinia- Creates a pinia (the root store) and pass it to the app.
- Open up your
HomeView.vuefile and update its content with:
<template>
<main>
<!-- <TheWelcome /> -->
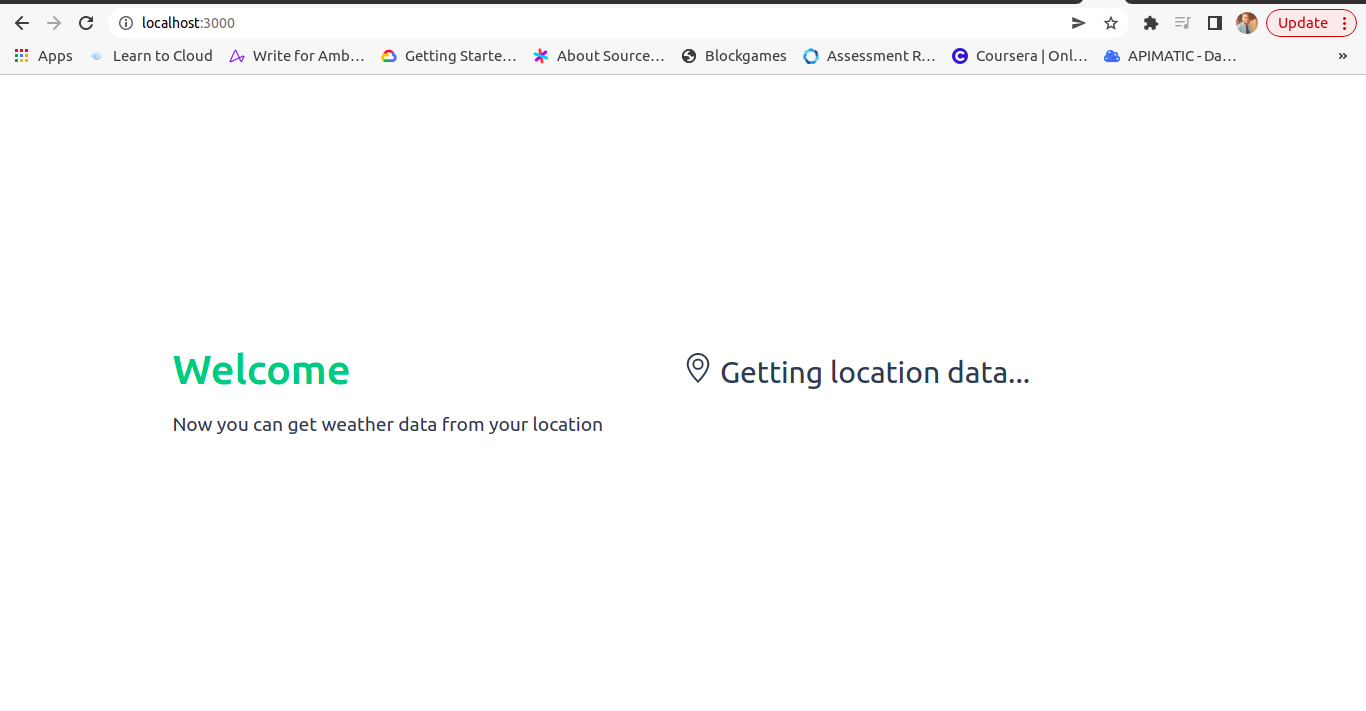
<div v-if="loading == true">
<h1><BIconGeoAlt/> Getting location data...</h1>
</div>
<div v-if="loading != true">
<div class="display">
<h2><BIconGeo /> Location Data</h2>
<div class="margined">
<p>Country: {{ weatherData.locationByIP.country }}</p>
<p>Region: {{ weatherData.locationByIP.regionName }}({{ weatherData.locationByIP.region }})</p>
<p>City: {{ weatherData.locationByIP.city }}</p>
</div>
</div>
<div class="display">
<h2 class=""><BIconThermometer /> Weather Data</h2>
<div class="margined">
<p>Main Temperature: {{ (parseFloat(weatherData.locationByIP.weather.main.temp) - 273.15).toFixed(2) }}<sup>o</sup>C</p>
<p>TimeZone: {{ weatherData.locationByIP.weather.timezone }}</p>
<p>Wind Degree: {{ weatherData.locationByIP.weather.wind.deg }}<sup>o</sup></p>
<p>Weather description: <BIconCloudHazeFill /> {{ weatherData.locationByIP.weather.weather[0].description }}</p>
<p>Main Weather: {{ weatherData.locationByIP.weather.weather[0].main }}</p>
</div>
</div>
</div>
</main>
</template>
<style scoped>
...
</style>
<script>
import TheWelcome from '@/components/TheWelcome.vue'
import axios from 'axios'
export default {
data() {
return {
weatherData: '',
loading: true
}
},
async created() {
const { data } = await axios.get('http://ip-api.com/json/')
const graphqlQuery = {
operationName: "MyQuery",
query: `query MyQuery {
locationByIP(ip: "${data.query}") {
lat
lon
country
countryCode
city
region
regionName
weather {
timezone
main {
feels_like
humidity
pressure
temp
temp_max
temp_min
}
wind {
deg
speed
}
weather {
icon
description
main
id
}
}
}
}`,
variables: {}
};
const res = await axios(
`http://localhost:3200/`,
{
method: 'POST',
data: graphqlQuery
})
this.weatherData = res.data.data
this.loading = false
}
}
</script>
- Fill up the
App.vuefile with the following:
    <script setup>
    import { RouterLink, RouterView } from 'vue-router'
    import HelloWorld from '@/components/HelloWorld.vue'
    </script>
    <template>
      <header>
        <div class="wrapper">
          <HelloWorld msg="Welcome" />
        </div>
      </header>
      <RouterView />
    </template>
    <style>
    @import '@/assets/base.css';
    #app {
      max-width: 1280px;
      margin: 0 auto;
      padding: 2rem;
      font-weight: normal;
    }
    ...
    </style>
- In
HelloWorld.vue, insert the following:
    <script setup>
    defineProps({
      msg: {
        type: String,
        required: true
      }
    })
    </script>
    <template>
      <div class="greetings">
        <h1 class="green">{{ msg }}</h1>
        <h3>
          Now you can get weather data from your location
        </h3>
      </div>
    </template>
    <style scoped>
    ...
    </style>
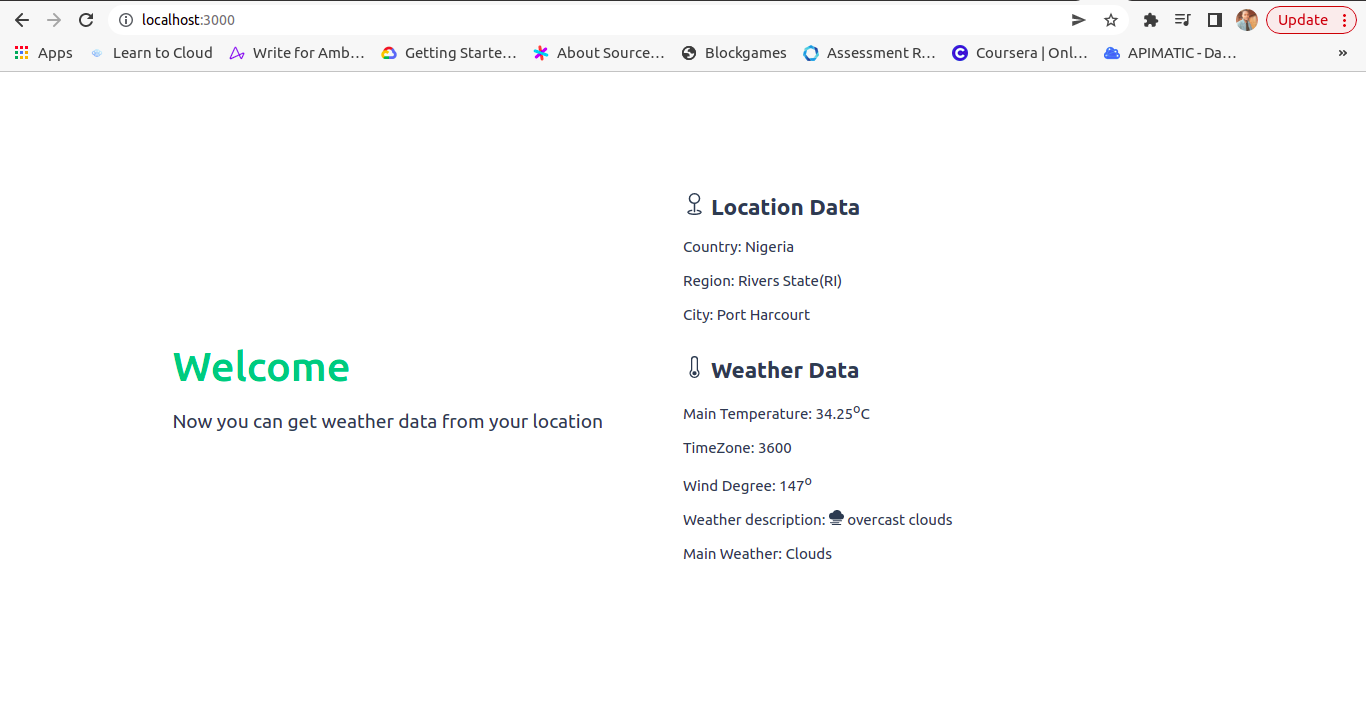
- Open up the browser and you can see the updated version of our application:
Summary
With StepZen, we’ve made a single API call to get both the user location and weather data. We were also able to query for the specific data we required.
The GitHub repository for this project can be found here, StepZen documentation here, and join the StepZen Community Discord for help with issues and general Q&A.